
 This video covers the first in a series of texturing for prosthetic sculpts, and in this one we’ll take a look at creating natural skin textures.
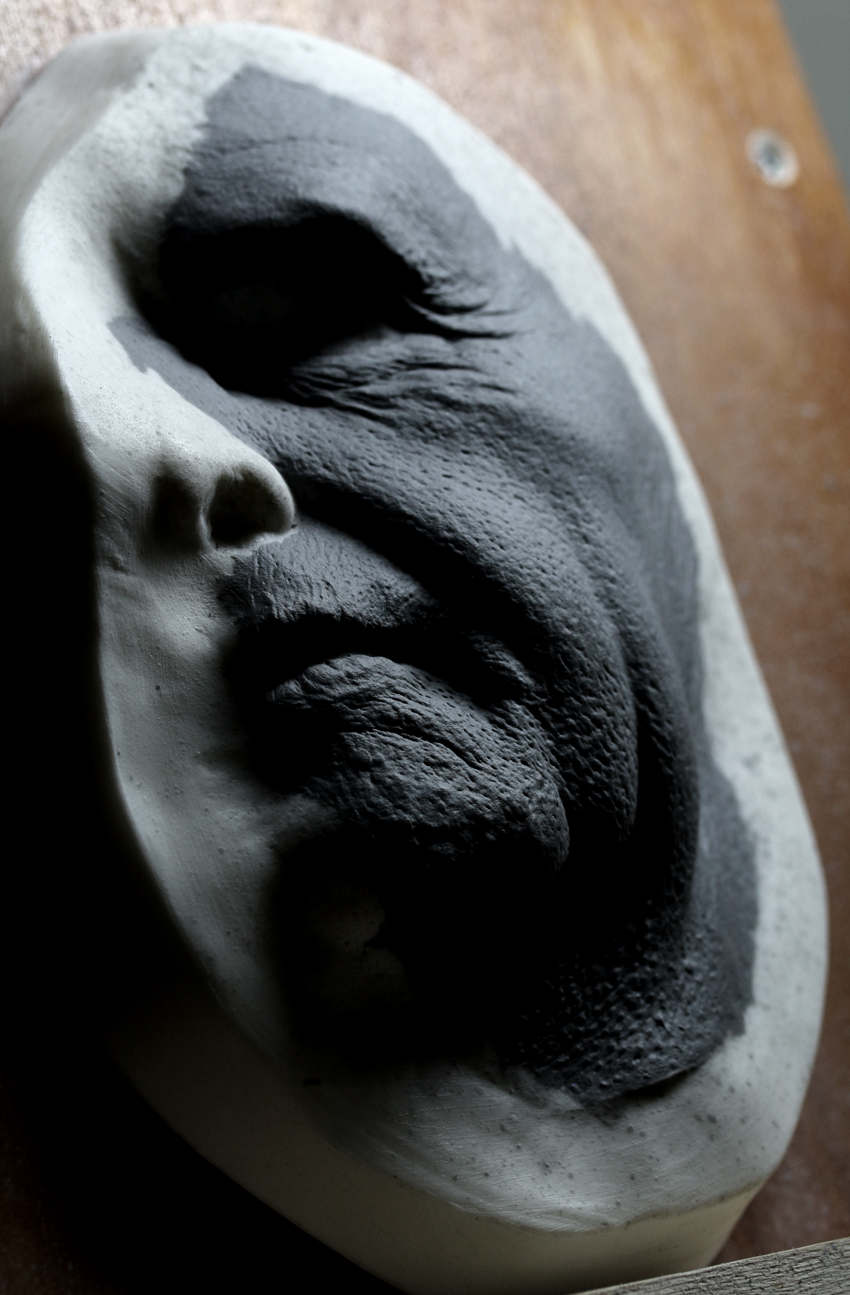
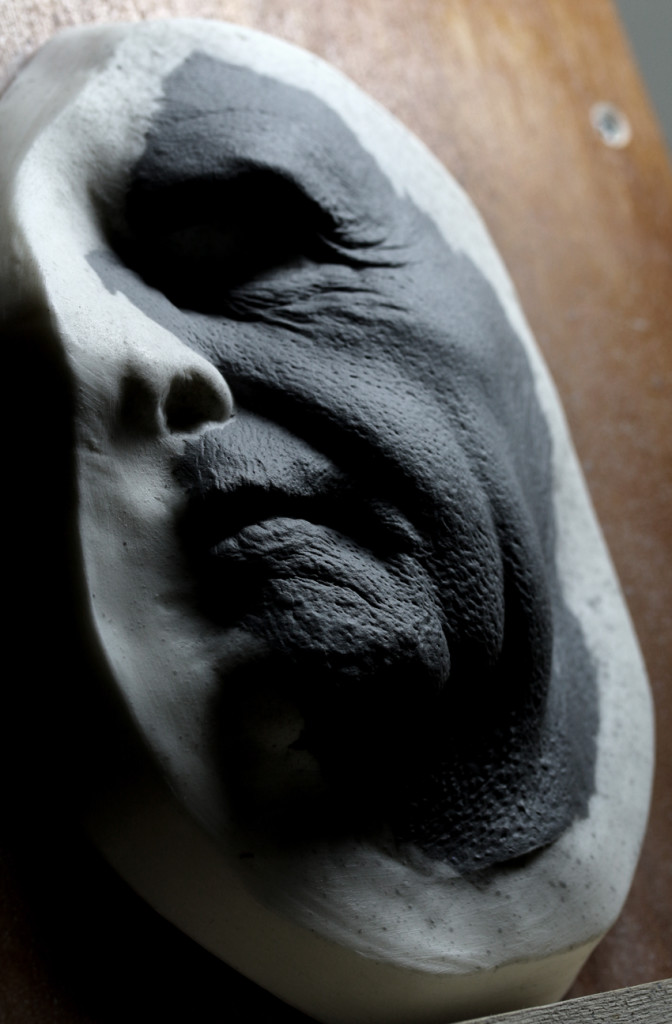
I have tried to cram in as many of the commonly needed skin textures in this sculpt which are pores, wrinkles and folds and raised goosebumps.
These textures could of course be amplified or reduced by using a heavier or lighter touch depending on the effect you need.
It’s worth pointing out that texturing needs to happen after the form is there. You can’t texture your way to a good form, if the shapes aren’t right then change them until they work.
Think of textures like a wallpaper. You need put it up onto good, flat walls. If the walls aren’t flat, straight and level then neither will your expensive lovely wallpaper.
As such I want to start of by quickly showing you how I block out the form onto the core. I am sculpting onto a urethane resin cast of part of a face (FC52 from Mouldlife in this case).
The lifecast was cleaned up, smoothed out and modified to get rid rid of as many undercuts as possible, such as the join between the lips, nostrils and the eyelids, which often have little overhangs due to the weight of the materials on the face during lifecasting. If you want to know more about how to make cores, check out my video on making them here.

You have to start with the right shapes before you begin adding texture. It’s like trying to wallpaper a wall which is still being built otherwise.
I start by adding small blobs of plastiline. I like rolling each one into a kind of sausage shape, and pressing this in place, plattening as I go. This gradually builds up into the rough shapes I want, and then I blend the blobs together with sculpting tools, usually a flat wooden tool and a twisted metal loop.
This makes those individual blobs blend out into a new shape, and you see it as a single, complete shape. The texture of the tool marks can be smoothed with a finer tool like a guitar string loop, however as you will see as the texture starts to go in, it really doesn’t need to be perfectly smooth before texturing begins. If you want to know how to make your own loop tools, check out my old tutorial on that here.
It’s worth just pointing out that texturing can look just plain wrong when you start, as your smooth blank surface starts having little dents or scoops put into it and it just can look like you are ruining a nice smooth surface. I know that feeling!
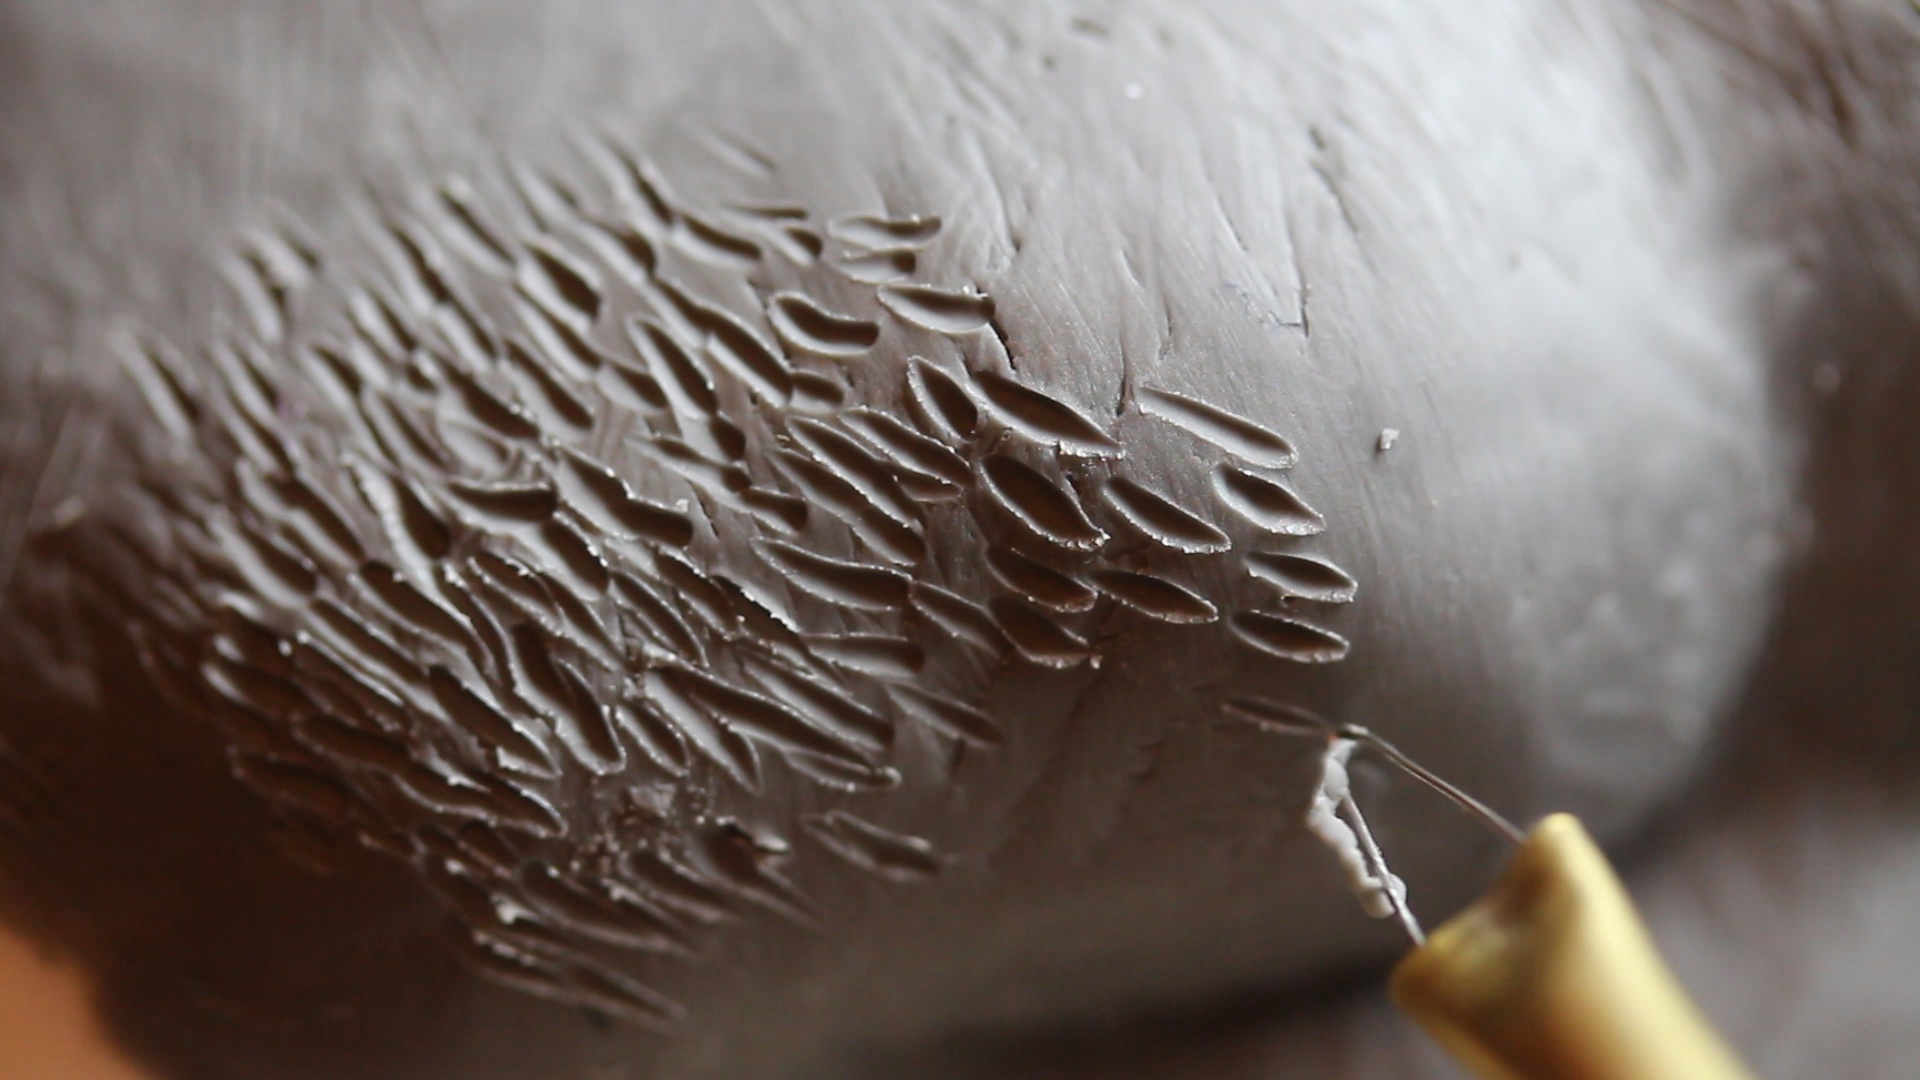 I call this the ‘blank canvas syndrome’, where it just looks like isolated dents in an otherwise perfect surface. Have faith and keep at it, because soon, there will be lots of little dents, and the more area you cover, the more they will look like they are supposed to be there!
Anyway, check out video to see how different kinds of pores, wrinkles, folds and goosebumps can be created on the surface with just a few simple bits of kit.
We also cover a method of creating ‘texture stamps’, where you harvest existing textures from objects (stone, leather, fruit skins etc.) which can also be used on appliance sculpts.
Remember, if you have any questions about makeup FX and want to see a blog post dedicated to your question, email us at stuartandtodd@gmail.com.
Thanks for watching
Stuart & Todd
geweldig , heel leerzaam
How to make finger print.?
Pingback: Sculpting Prosthetics: Skin Textures - PaintingTube
I realy love your work Sir .
Love the video. The tip about making slip from plasteline is great. Have you used it also for smoothing surfaces by painting it on? Also would love to see a video on how you’ve produced your loop tools and the gauge of wire you’re using for the surface textures.
Hello, thank you for the great video. I just wanna ask regarding your tools. Is that a copper tube? And did you make them or are they purchased? Thank you
Absolutely LOVE the goosebumps! Also, the blow dryer to warm up and soften the surface and making some texture molds will be fun!
Thank you very much for your information 🙂