
The first time I’d seen real innards moulded and used for an effect was in Alexander the Great (2004).
(Scroll down – this one has a podcast)
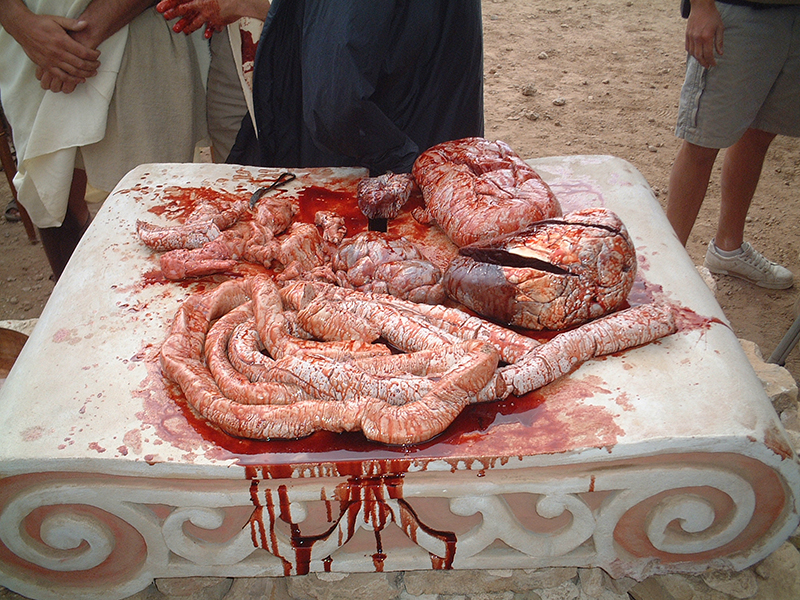
We needed to make some bull guts for a scene in which a seer would use the innards of a slayed beast to predict the outcome of a battle (as you do in the absence of solid intelligence of your enemy, drones and remote missile launch capabilities).
(Stuarts note: I had made a lot of guts for Saving Private Ryan and Shaun of the Dead, but these were not moulded from real guts!).
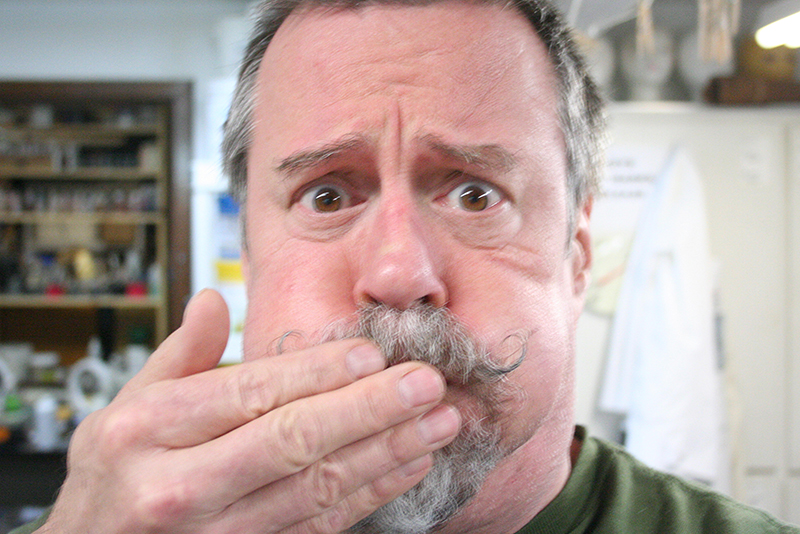
It was mentioned that they wanted to use real guts for the scene, as it was thought fake ones would look fake (Ahem! Challenge accepted!) Of course health and safety issues rang up, among just the eeeew! of it all. So we decided instead to make some. A brave soul went and fetched some freshly removed innards from an abattoir and before moulding, I decided to take some pics.
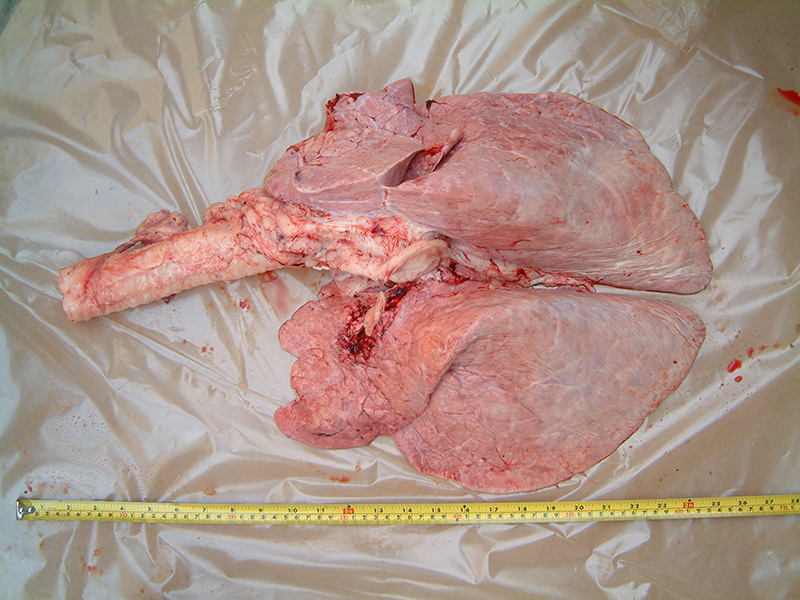
They were enormous – much bigger than I realised. We had lungs, a liver, a heart and a kidney. I was going to sculpt the intestines as I figured their lengthy, floppy and gelatinous nature would not be easy to mould. I used the real guts as reference to inform how these would look – there are always gloopy bits of non-descript tissue hanging off stuff and I had enough pictures of intestines to keep me going.
I have also done similar things using something called ‘fat-back’- from butchers which is basically a 12″ square of pig skin with half an inch of fat still attached (pork rinds, anyone?). It was handy to smash it, stab it, hit it with hammers, burn it and just generally abuse it to recreate the surface trauma that skin can receive.
It could then be moulded so we could study what the surface actually looked like. Also the idea occurred to me if you can, for example, burn the skin surface with a blowtorch and then mould the result, you would be able to observe the three dimensional surface only without the distraction of colour!
Often when you look at pictures of real wounds, they are smothered with bruising and blood which can make it difficult to discern what is shape and what is colour. Doing this, there can be no doubt as to what the surface topography was without the distraction of colour or blood, dirt and other elements.
It’s interesting to me, as you realise how much you embellishment you can add when sculpting wounds. It’s really easy to go over the top in the name of dramatic effect when in fact, the surface indications of real damage is often understated.
I don’t have images of these experiments, so Todd and I thought we should do something similar for your delectation. Moulding real things instead of sculpting is nothing new – but we figured as the final post of the ‘sculpting’ trilogy it would be fun to focus on harvesting real textures to create some gore.
I did a post last year on creating textures and moulding them to make cool new surfaces and textures based on the talk I did at IMATS London last year – see it here: http://www.learnmakeupeffects.com/london-imats-2013/
Only this time, we figured it would be interesting to focus on the effects of firearms.
Gunshot trauma varies with the myriad of variables possible, from type of gun, type of round, range, whether the round passed through wall, glass or ricochets before hitting the body….there are so many possible outcomes.
If you need to create the effects of a gunshot wound then reading up on the weapon and circumstance will help. For the most part however, there are many similarities. Obviously the skin is broken by the round passing through it, and penetrative trauma of some degree occurs.
The round may or may not exit the body, there may or may not be stippling of powder residue, the edges of the wound can be burnt, the skin may split….etc.
Well, by shooting up a load of large pieces of meat with skin intact, we study the effects up close and see how it looks from all angles, including the back to examine the effects first-hand without any human injury involved.
If you’ve already listened to our Podcast on this subject, now you can see the images that I… we… hope will help it all make more sense.
Also, check out the video of some of the shots, you get an idea of just how much power is emitted and just how quickly:
Let me start off by saying, “I F#*KING LOVE SCIENCE!” And I’ll tell you why after a brief preamble. Stuart and I have been talking recently (we talk quite a lot, actually, when we’re not both up to our eyeballs in one thing or another) about textures. Not skin textures, which we do actually talk about, but tissue textures. Veins, muscle, tendons, bone, fascia, fat… you know, cool stuff.
Not a lot of people know that my career path started out originally down a surgical medicine track, so I still have somewhat of a vested interest in the sciency side of makeup effects, and tissue is a big subject to cover. If you’re going to be creating tissue and tissue damage, etc. as part of a makeup, you want to get it right, right?
There are four groups of tissue in the human body:
- Epithelial
- Nervous
- Connective, and
- Muscle
There are two kinds of epithelial tissue (epithelial tissue protects your body from moisture loss, bacteria, or bacterial infection, and internal injury):
- One kind covers or lines almost all of your internal and external body surfaces, such as the outermost layer of your skin and other organs, and the internal surface lining of your digestive tract, and your lymph system.
- The other kind secretes hormones or other stuff like stomach acid, sweat, saliva, and milk.
Nervous tissue forms your nervous system (duh), which orchestrates all movements and activities of your body. Parts you may be familiar with are your brain, your spinal cord, and the nerves that branch off of those two important parts. Nervous tissue is made up of two kinds of nerve cells:
- Neurons, which are the basic structural component of your nervous system, and
- Neuroglia, also called glial cells, which provide support, such as insulating or anchoring neurons to blood vessels.
Connective tissue is the glue that provides structure and support to your body, and there are two kinds of connective tissue:
- Fibrous connective tissue is found tendons, ligaments, cartilage and bone, and is the more rigid of the two types.
- Loose connective tissue also holds structures together, but is more flexible, and holds the outer layer of your skin to the underlying muscle tissue. This stuff is also in fat, lymph glands and your red bone marrow. Yum!
The fourth group of tissue is muscle. It differs from the other tissue types in that it contracts; muscle tissue is available in three styles: Cardiac, Smooth, and Skeletal. Those muscle tissues are made up of fibers that contain many myofibrils, which are the actual parts of the fibers that do the contracting.
- Cardiac muscle is obviously found in the heart.
- Smooth muscle lines the walls of blood vessels and certain organs, such as your digestive (stomach, intestines) and your urogenital (naughty bits) tracts.
- Skeletal muscle is attached to bones (by fibrous connective tissue) and allows movements of your body by bending at joints (which are cushioned and protected by fibrous connective tissue!)
All that being said, what Stu and I want to do is show you this stuff for real so you will have good reference material to work from, as well as to show you ways to create your tissue sculpts by actually using REAL TISSUE!
I am now considered to be a very strange fellow at several butcher shops around the city where I live. Go with your strengths, I say…
Note : I think this looks like Alien Labia. Just sayin’…..
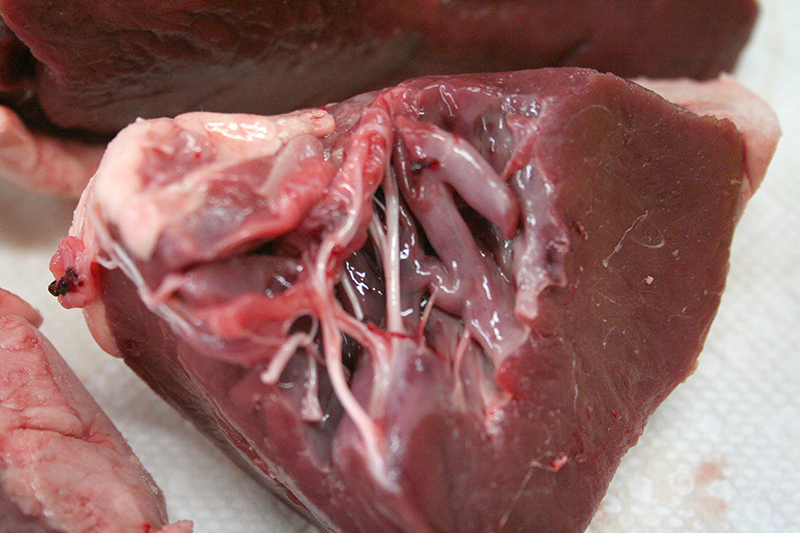
The first stage of the Real Tissue Project was to hit up my local grocer for some meat I would never willingly put in my mouth. Such as beef heart….
 …a big ‘ol hunk of beef bone with some muscle, veins and fat attached (for making soup)…
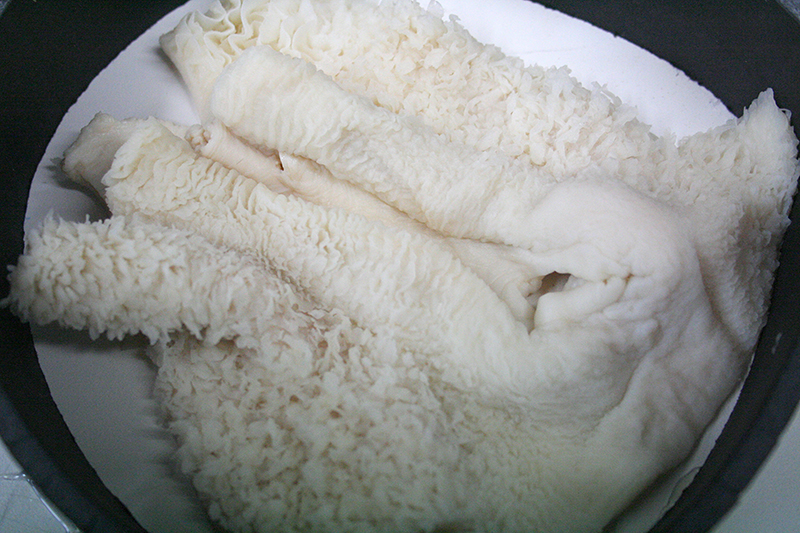
 …and a heaping portion of beef honeycomb tripe.
(*Bloikk*)
If you don’t know what tripe is, it is made from one of the three chambers of a cow’s stomach: the rumen (blanket/flat/smooth tripe), the reticulum (honeycomb and pocket tripe), and the omasum (book/bible/leaf tripe). If you do know what tripe is and actually eat it, you need help (JK).
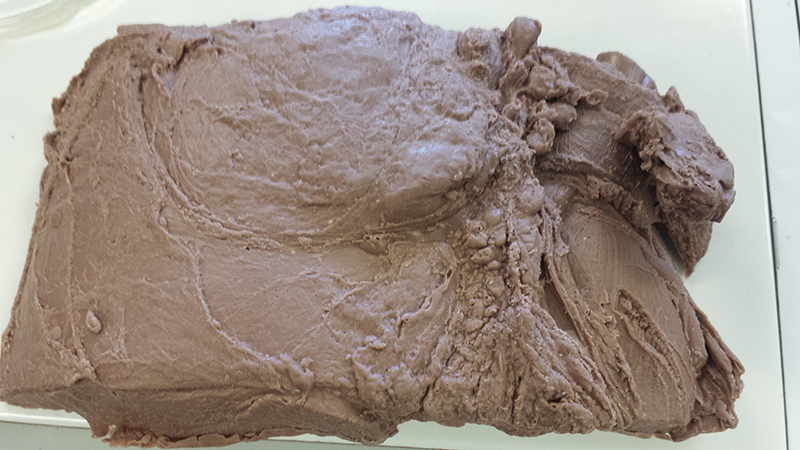
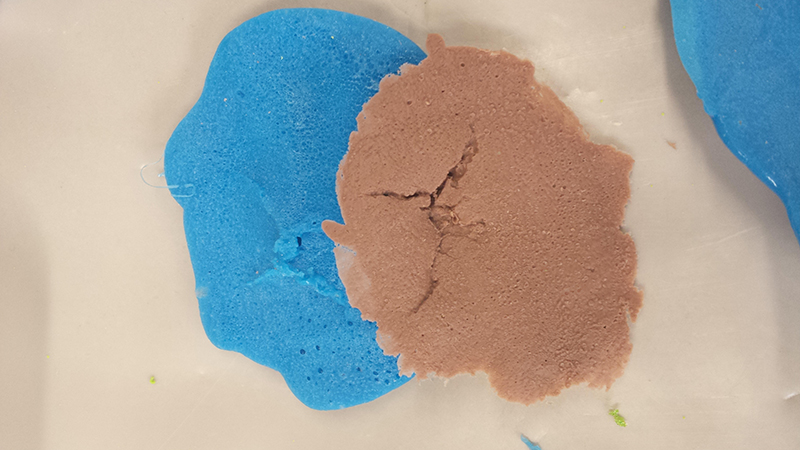
Stu and I decided that it wouldn’t be enough to just show you good, high resolution photos of these various tissues. No. We need to mold it so we can do clay pours and incorporate the actual textures into a wound sculpture.
Now the obvious comment would be, “Why not use the images as reference and just sculpt the tissue?” The obvious answer is, “Well, you can.” But Stu and I figured there’s nothing wrong with having authenticity on our side, and what’s more authentic than clay tissue molded from real tissue? Answer: Using the real tissue.
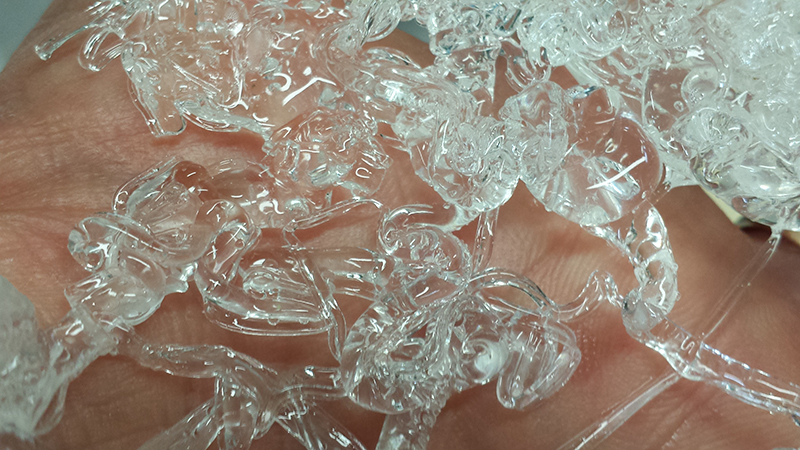
Here are some of the fake guts that Stuart was talking about at the top of the blog. Real ones would have gotten pretty ripe as the day went on…
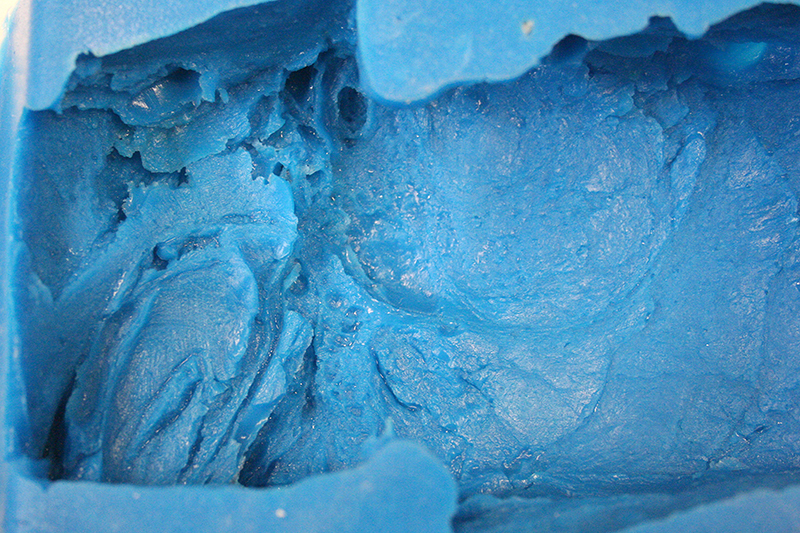
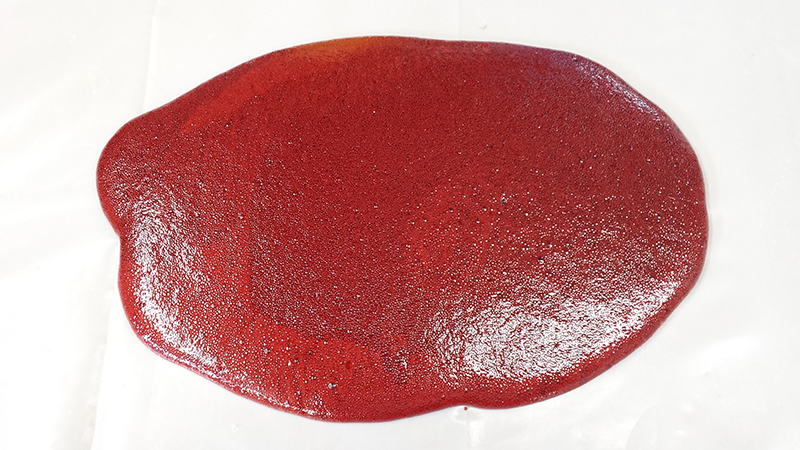
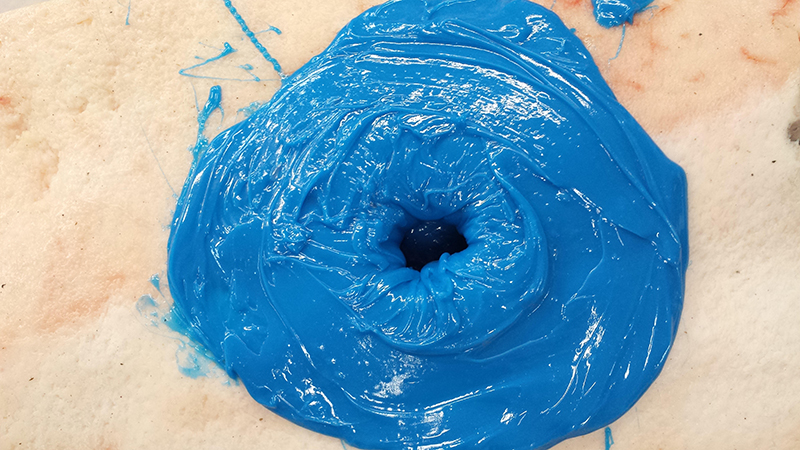
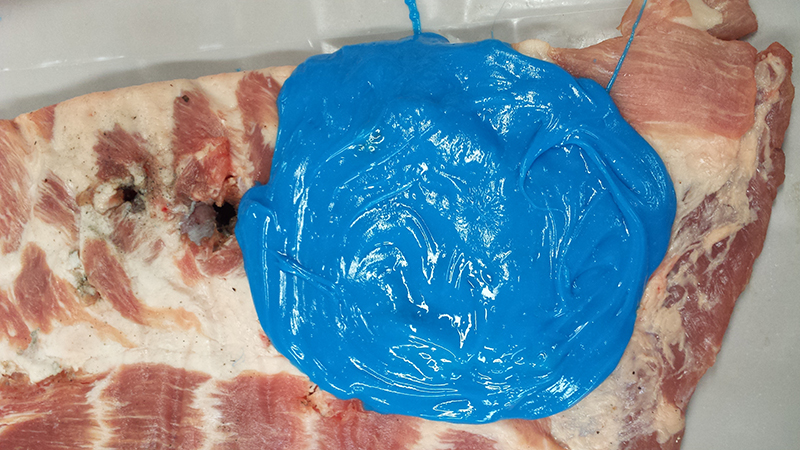
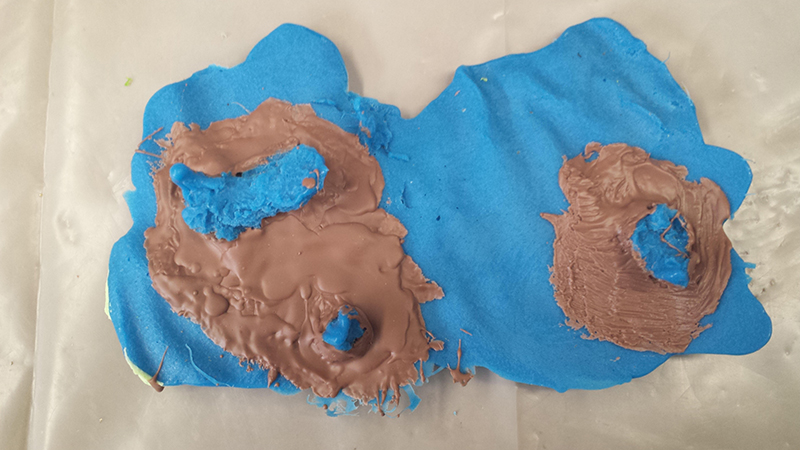
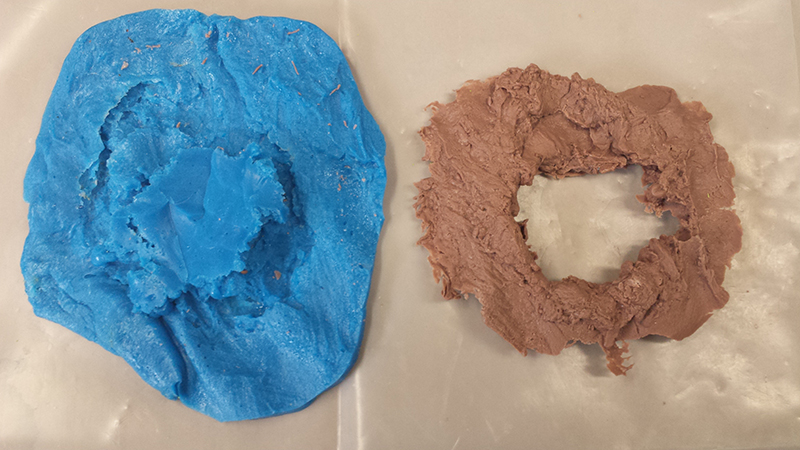
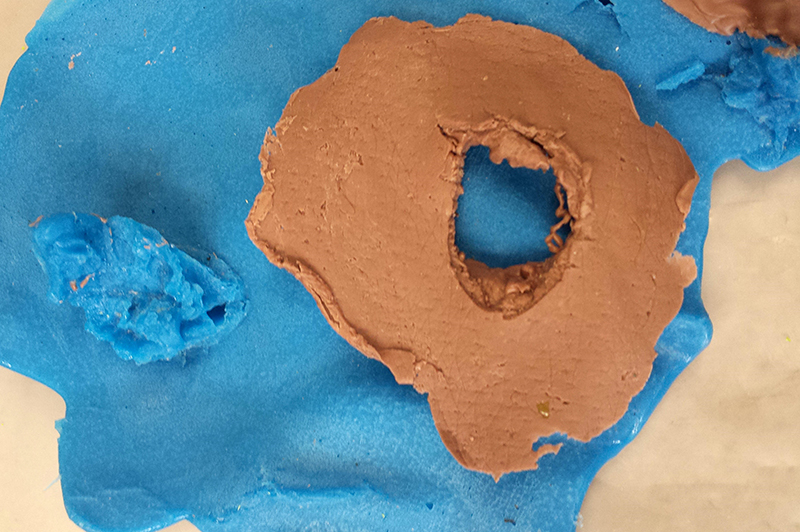
However, for our purposes, clay pours using Monster Clay into silicone molds made from real tissue is what I did, and I’m pretty pleased with the results:
 However, there are a couple of other methods that can yield pretty good results too. One is pouring hot melt vinyl into cold water (this vinyl is clear so not really as visible) – I confess my results were less than remarkable as you can see here…
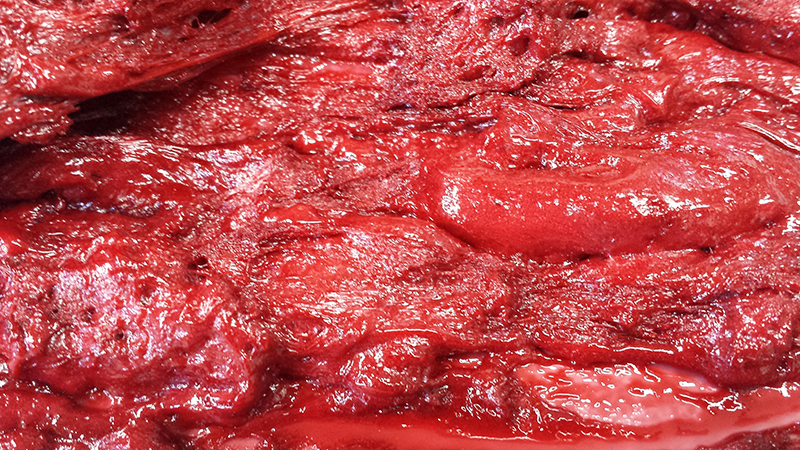
but I did have good results with soft polyfoam; this is Smooth-On Flex Foam 6 that I tinted to look like innerds. As the foam began to expand, I took a craft stick and just began swirling it around and when the foam began to set up, it began to take on a very random tissue-y look that I think will make an outstanding mold to work with.
So anyway, our task became acquiring portions of meat that we could abuse that would react similarly to human tissue damage that would/could occur in combat… without spending a lot of money. All in the name of science. The first lesson learned was that this was not going to be cheap if we wanted to do it right, and what’s the point if you’re not going to do it right?
In the name of science… and makeup effects… we got our hands on two slabs of pork belly (bacon) with the skin still attached (about 18” x 24” x 3”), and a slab of fatback (fatback is a cut of meat that consists of the layer of adipose tissue or subcutaneous fat under the skin of the back) and a slab of ribs about the same size. We all cried a little knowing we weren’t going to be able to cook any of it later…
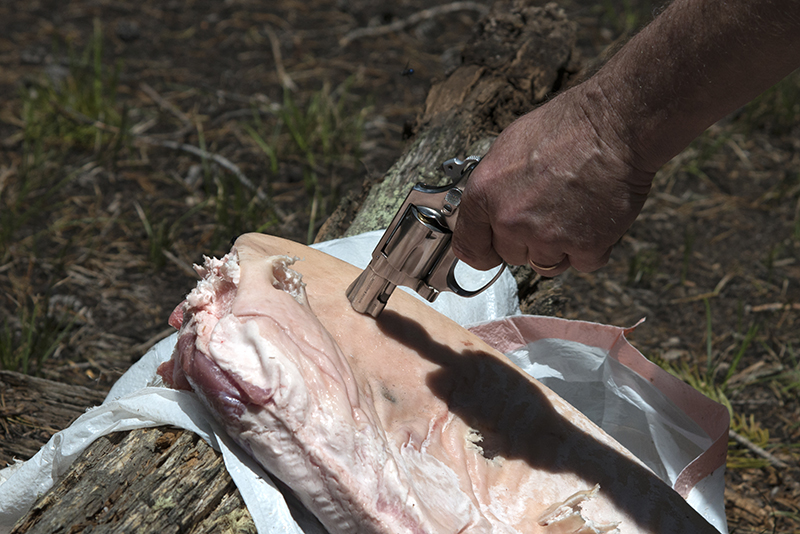
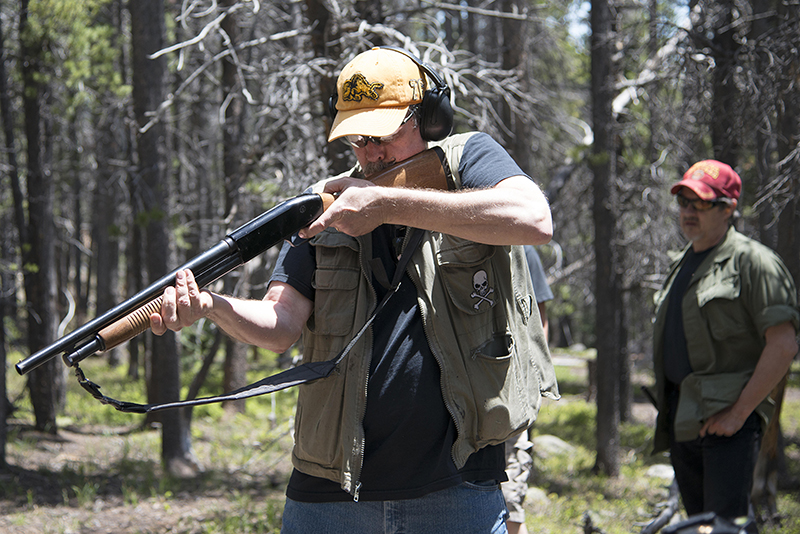
This project was going to be conducted under strict rules of engagement, seeing as we were going to be firing live rounds into the meat from varying distances and with different caliber weapons by combat veterans of Iraq and Afghanistan.
We would be firing .38 hollow point and full metal jacket, 5.56mm, .223, 9mm, and a 12 gauge shotgun (with 00 buckshot and a rifled slug), and a 20 gauge.
The second lesson learned was THIS WAS FUN!
First up was a Vietnam era Colt AR15 firing a .223 full metal jacket round. Yowza!
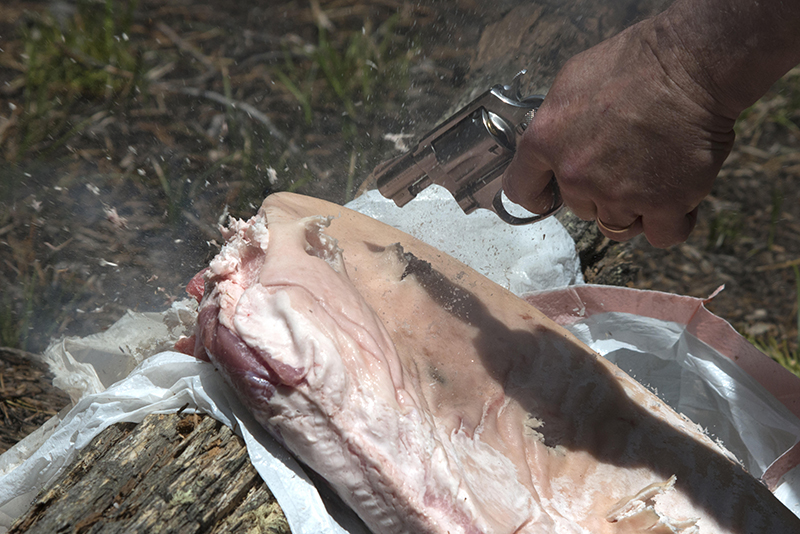
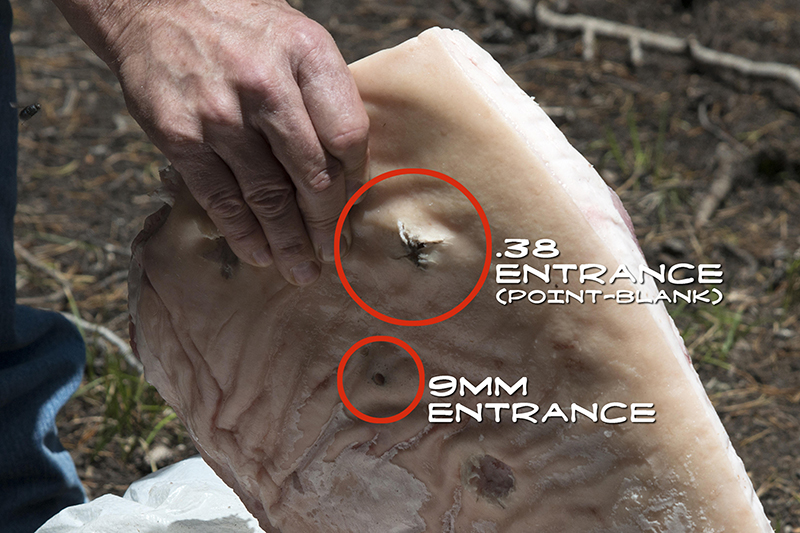
We fired rounds from a 9mm Glock with similar results, but a slightly larger entrance hole; what we wanted to see was a skin-contact point-blank shot from a .38 hollow point to show how the skin tends to split like a blunt force trauma avulsion. It did. Erk.
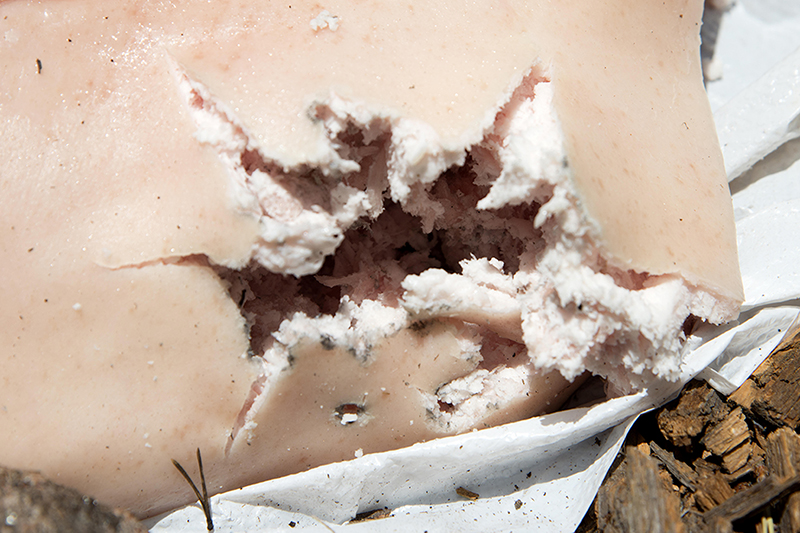
This went on for a while with the various calibers and pieces of pork. Here’s what a 12 gauge shotgun with 00 buckshot and a rifled slug will do from about 15 feet.
I missed a little…
Here’s the same 12 gauge with standard buckshot from the same distance.
That is a large hole. This is a 20 gauge sawed-off from 15 feet. Don’t ask me where it came from…
It makes a lot of noise, too. It was raining bacon. Literally. Mmm… bacon…
Next up, getting the forensic evidence back to the shop for molding. We took care to try and preserve the original shapes of the wounds, but we were transporting from a considerable distance, and even though we had a huge cooler filled with dry ice, there was going to be some disturbance of the evidence. I think we managed to save most of the original integrity of our mayhem.
We had a lot of gaping holes to choose from, and wound up molding quite a few entrances and exits.

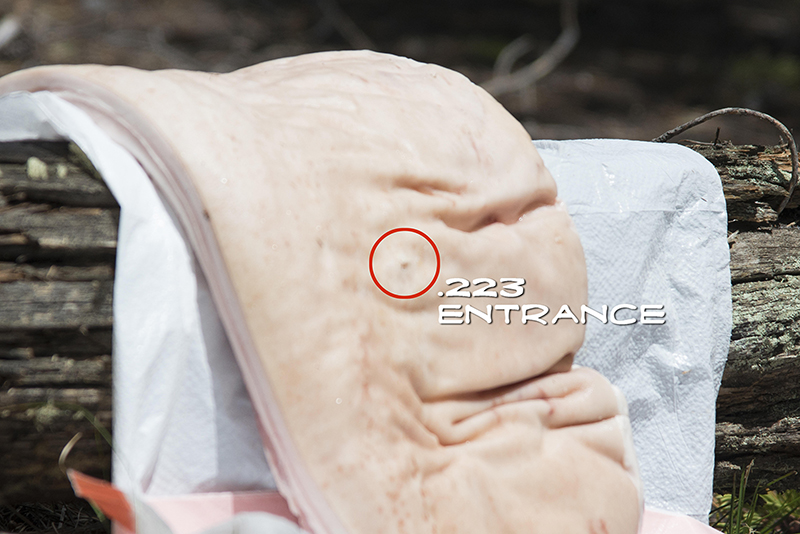
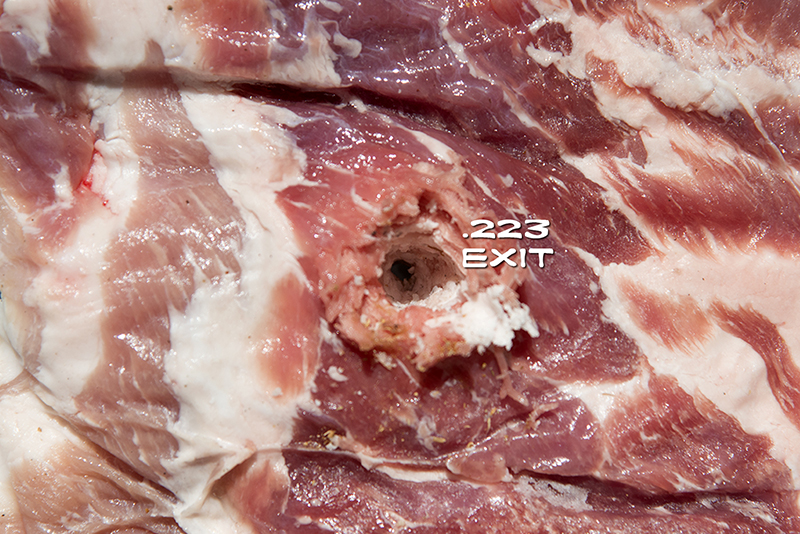
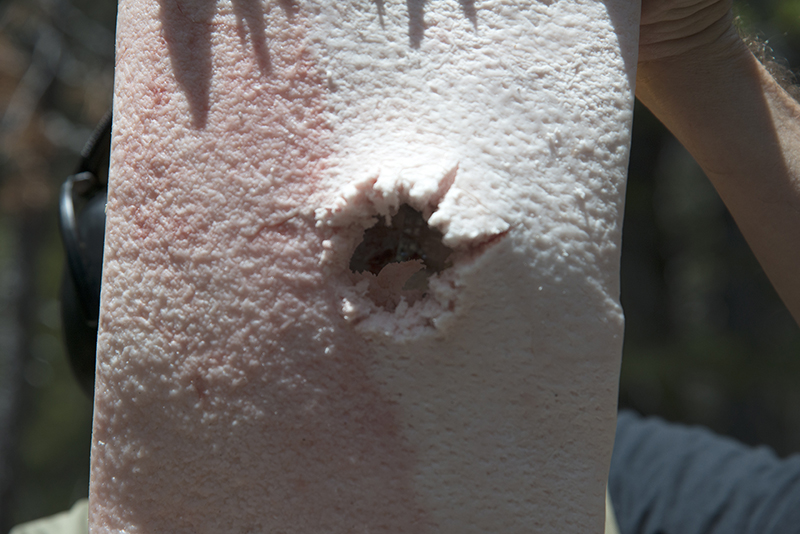
I’m pretty sure this is a .223 entrance hole.
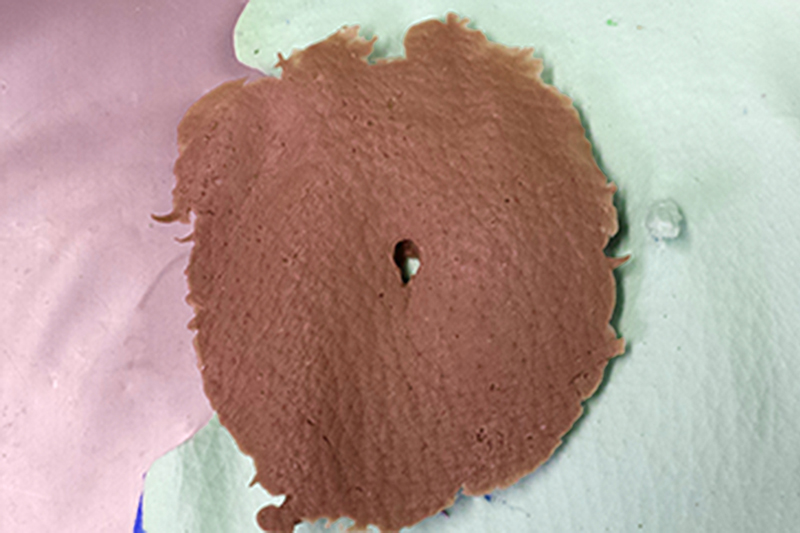
Yup.
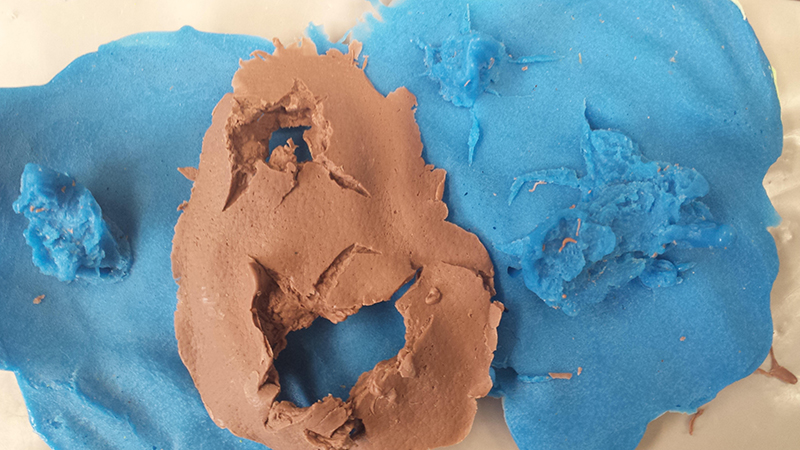
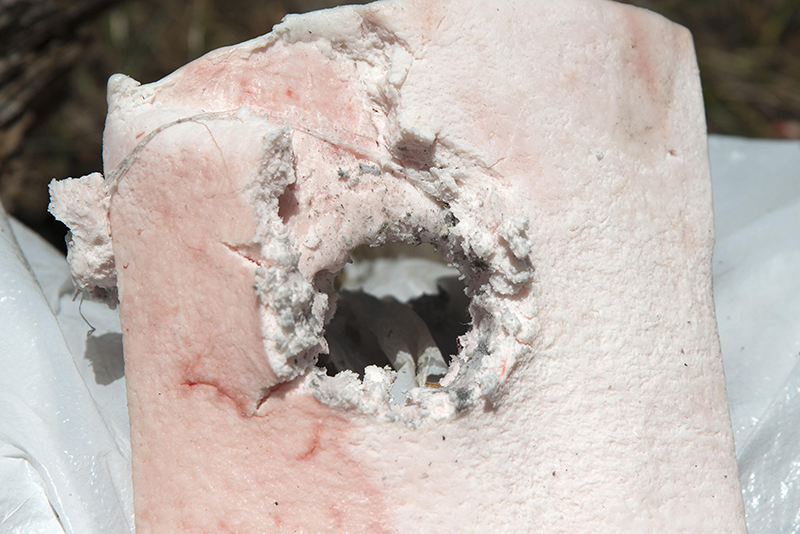
These are a couple shotgun entrance wounds; a 12 gauge (bottom) and a 20 gauge (top).
This is the point-blank .38 entrance.
Thanks to my stellar record keeping, I have no idea what these guys are… but they’re nasty, and very cool! Pretty certain this is one of the shotguns.
I believe this one below is the 20 gauge.
I hope you get the idea.
We now have way more molds and photos than Stu and I can possibly show you here, but we hope you can see the value of actually having molds of a real gunshot wound that can then be cast and modified to suit your particular prosthetic needs. In these wounds are all four types of tissue – Epithelial, Nervous, Connective, and Muscle. And now you have a much better grasp (we hope) on what various firearms can do to it.
PLEASE do not attempt this on your own without proper training and/or supervision! Perhaps Stu and I can incorporate these molds into our offerings to you if you are interested. Until next time!
—
We’re Stuart and Todd, a couple of FX guys.
We love to hear your comments and suggestions – if you like what we did then please share. Retweet the Meat, so to speak.
Email us direct on stuartandtodd@gmail.com
A great idea that I hadn’t thought of- and I’m a hunter! Can’t wait to give this a try, thanks for the awesome post!
I do so hope some of these molds make their way to flat molds for sale at my favorite local supplier… BITY 🙂
I think I ought to have finished my fish pie before I read this. Ah well..