
The last post finished with the silicone poured up. Happily the first one out was okay. A few air bubbles but nothing so bad.
Incidentally, the silicone I used here was Pro gel silicone. I hadn’t used this before, but did an application job for Kristyan Mallet which used appliances made from it just before Christmas.
That was hardly a coincidence, as Kristyan is part of a new materials company called PS Composites, so naturally he used his own material. I decided that I would give it a try on my next project, as it worked great on the shoot we did.
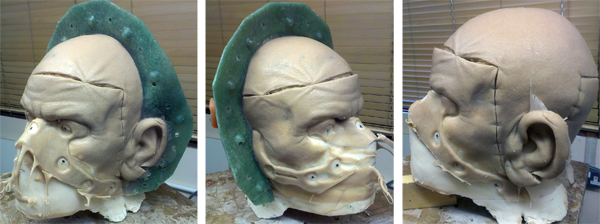
The front half of the mould removed, you can see the silicone filled the mould nicely.
The release I used for the mould was a couple of coats of washing-up liquid and water (about 1:1 ratio), allowing each to dry by leaving the moulds in front of a desk fan. This worked really well, but if it was a little sticky, it’s nice to immerse the whole mould in water. This would reactivate the washing up detergent, making it slip out more easily. This is then easily cleaned up with just water. Love it!
The silicone is nice – needs less deadener (I didn’t use any, and it was plenty soft) but most importantly it is thinner, kind of like cream in consistency. It fills up in the mould quickly because it is more fluid, and had less air bubbles as a result.
Silicone once out of the mould, but before removal from the core.
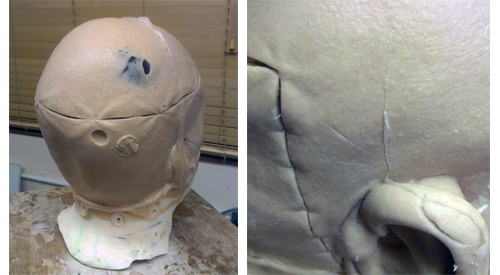
Once the mould was off, a quick assessment is made to see if there is any damage, air bubbles and the seam is okay. The seam was fab, so no great work in filling that. There was a big air pocket on the back, a touch down where the brown Lycra touched the mould surface (as it was thinner in the sculpt at that point).
There was also the nub where the injection point was. All these three things were on the back, two of them would be under hair, and all of it is easily fixed. I clean the whole head up with acetone to make sure the surface is ready to accept new silicone. Without this step, it may be that any silicone added could peel away later as residual release from the mould could still be on here.
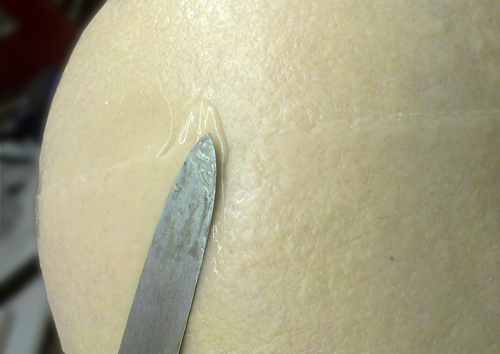
Thickening a little of the silicone with a silicone ‘thixotropic’ meant I could make a paste of the same silicone to fill any bubbles and seams.
I kept a little of the silicone back after they were poured for just this purpose.
By adding some silicone thickener (or ‘thixo’) I can create a thickened paster version of the same colour silicone to fill the holes.
I used a flat bladed spatula to fill the seam after snipping the excess away with little curved nail scissors. By slightly snipping too much away. you can fill the tiny trough left, and create a smooth finish. Once the seam is filled, another pass over the top stippled on to put some texture back can really help hide the join.
Once the filled areas have set it is time for paint. I must acknowledge Waldo Mason as the main source of my silicone painting knowledge, as he has been incredibly generous with his time explaining things to me in the past.
I used flowable silicone compound from RS as a base, mixed with naphtha. I found this in the form of car panel wipe, a solvent considerably less expensive than buying cigarette lighter fluid. That can then be tinted with oil paints to create washes of colour airbrushed or painted on, building up layers gradually.
First pass was a red, then blue, a little blood red and bruising in places, followed by a matte layer of the silicone mixed with Cab-O-Sil. Obviously, when using solvents and especially when using an airbrush, make sure that you work smart and wear a suitable respirator!
Leaving the paint to dry for an hour or so, I pick apart a cheap wig to attach to the head. I bought a really cheap wig from a party store which essentially was wefts (lengths) of artificial hair stitched onto a fabric cap shape. By snipping the wefts away from the cap, I can attach lengths onto the head where I want them, using the silicone compound as the glue.
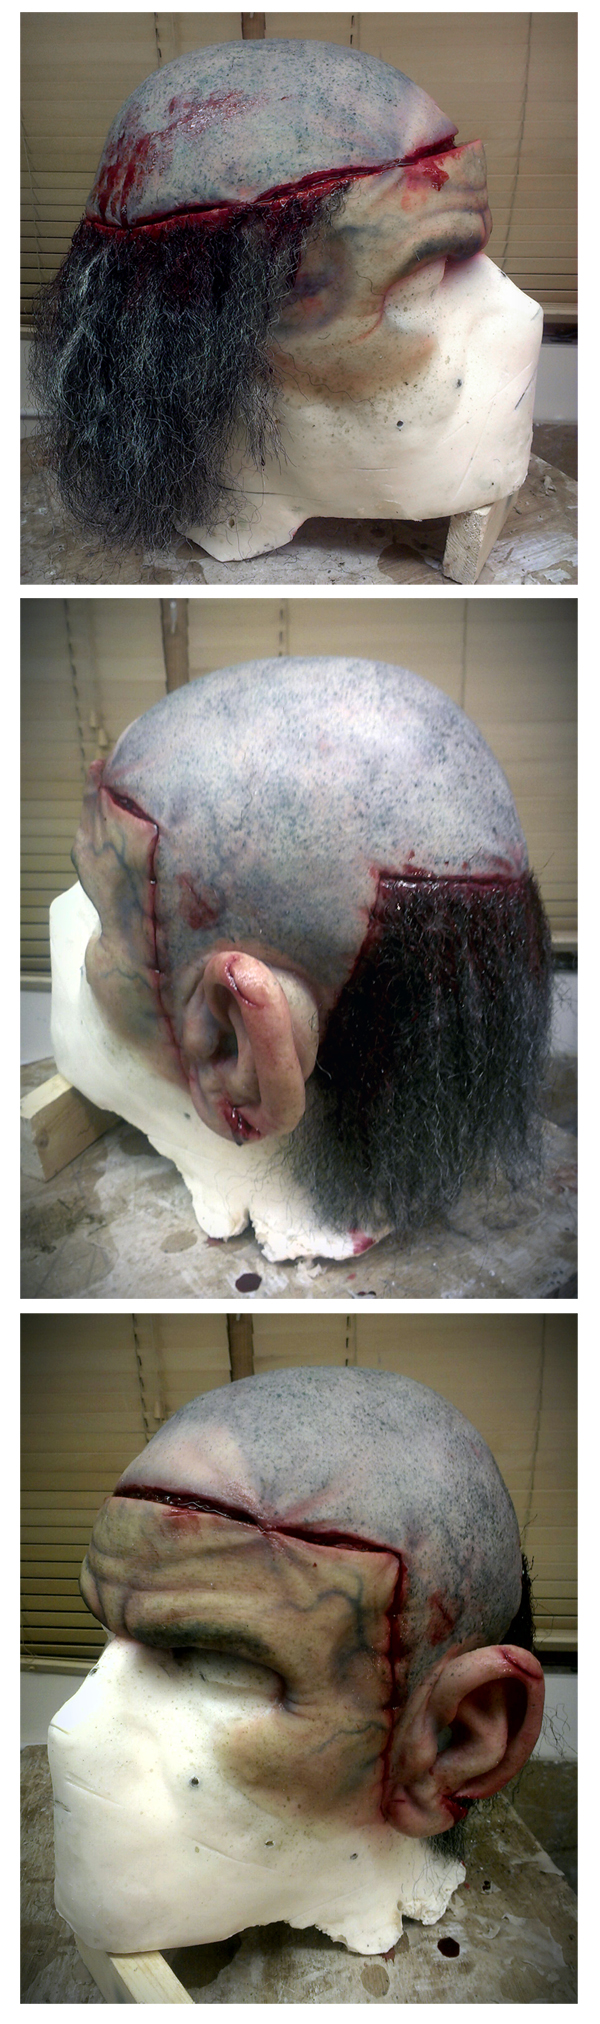
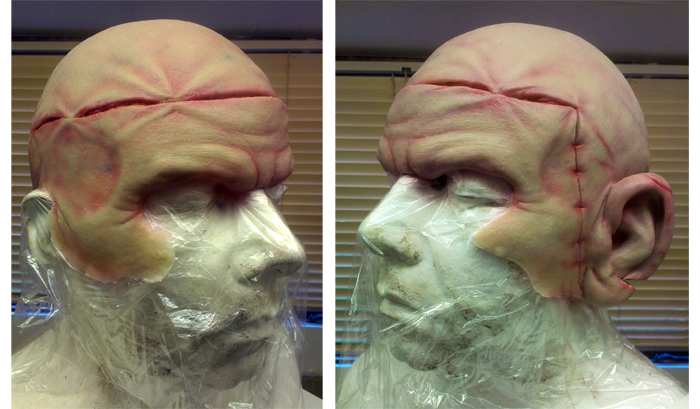
I build up several layers of hair, each overlapping the last and pin them in place allowing them to set up. I really don’t ‘do’ hair as you can see, but it was fun having a go. I had the hair finish suddenly where the different skin was (as the head is supposed to made up of two different men). The other skin of the head was made to look shaved, as well as having a distinctly different skin tone.
To create the shaved head look, I mixed a little blue/green and black silicone paint and stippled it on with a sponge. This left a pleasing ‘5 o’clock shadow effect.
Once all the painting was tweaked, and the hair trimmed to shape, the head is nearly ready to use.
I paint some eyebrows on to help give him that mean, glowering look without having any real hairs get in the way.
One finishing touch was to have some blood coloured silicone smeared and dripping down the hair – partly to keep it in place and partly as it looks utterly disgusting to have those wounds weeping down. The silicone dries shiny, so it looks nice a wet even though it is quite dry to the touch.
I made two heads, one as a spare or to allow alternating nights giving more time to repair and touch up any damage done from performance to performance.
There were little wound appliances which can be applied over the cheek edges fresh on each night. I designed the makeup so that these were the only real edges to see.
I should get some pics from the set soon, and will get some decent pics of this thing on for next time! Any comments or questions are always welcome – please drop me a line below!
-Stuart