
 What Is Master Moulding &
Why Would I Do It?
After you’ve taken a lifecast of a performer, you have a solid copy of their face.
This is presumably an accurate copy which has recorded the surface of their anatomy as true as is possible. Are we to then leap straight to the joyous distraction of making your modifications – making the nose bigger, changing the chin, adding a wound or a scar, or completely remodelling their face to change them entirely?
Woah! Hang on to those horses, sparky!
It is worth taking a moment to recall this original cast you took of the performer is a precious object – it is the only one you have and presumably it was gained at great cost. Drop it and we’ve had it!
Each lifecast is a performance of sorts, and to have successfully arranged the appointment, secured the performer for the date, taken reference images and then successfully gone through the entire process without any howling errors, you’ve spent time and money on materials, workshop space and staff, and for your troubles you now have a plaster head staring back at you.
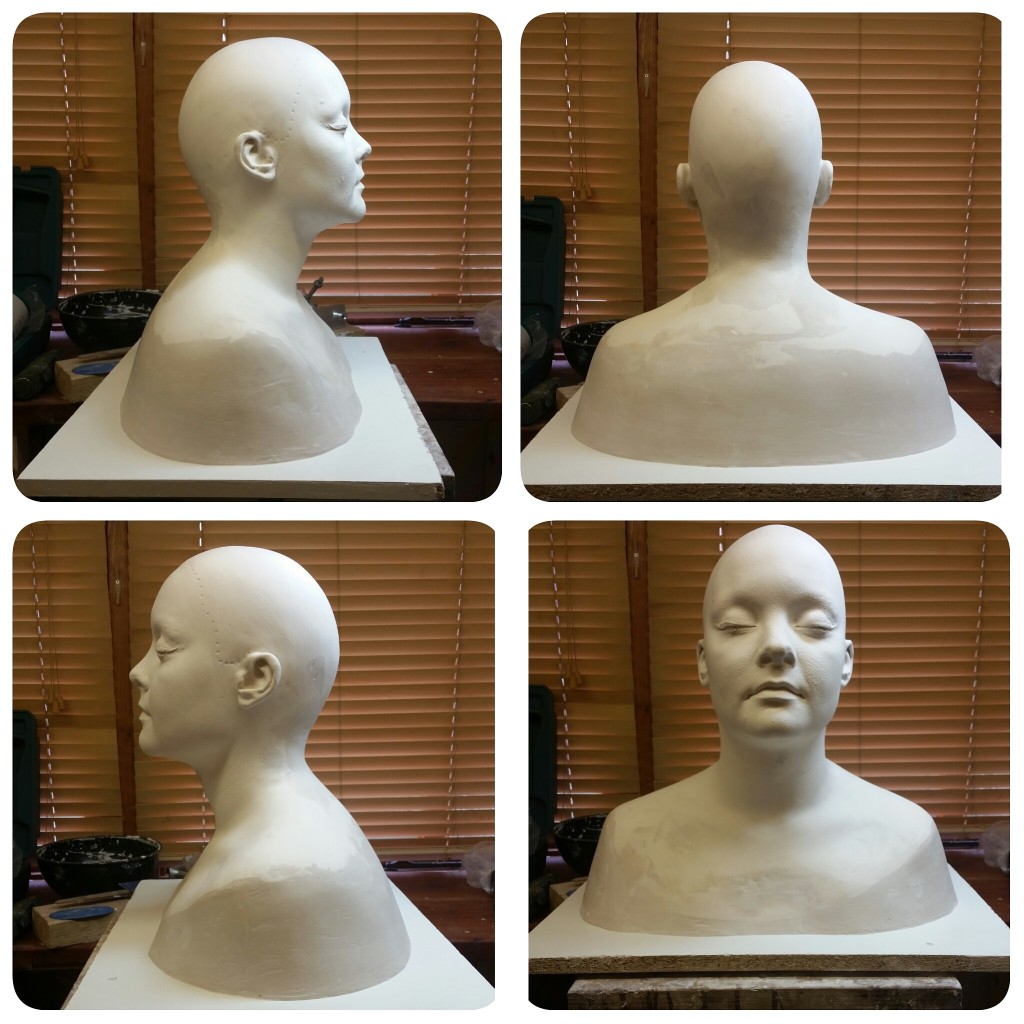
The solid plaster head cast out from the alginate or silicone was ideally a soft one to allow for the shaving down of unwanted artefacts collected during the casting process (such as air bubbles in the eyebrows, shapes of wrapped hair under the bald cap or seam lines) all of which will need fixing carefully so that the head is as clean, smooth and perfect as budget allows.
At the time of lifecasting a head you are primarily concerned with the performers comfort, maintaining clear breathing and usually focussing on the face – the part where errors would be most noticeable. Wishing to do all this as swiftly as possible, you will inevitably collect some air bubbles or have a less than perfect area somewhere on the head.
With careful shaving with a succession of tools from coarse to fine, where once was bumpy back of head caused by bald cap wrinkles now sits a smoothed shape, accurate to the performers real dimensions – as measured by the tailors tape employed at the time of casting. To have the head sit square and level, you may need to chock up the shoulders and carefully replace areas with plaster or clay to extend right down to the flat and smooth board on which it sits.
So having achieved such success, you’re not going to unleash sculpting tools and possible damage on this unique and precious snowflake, are you? I mean…the sculpting tools you use will certainly score the surface permanently. The powdery finish of soft plaster may cause wax based plastiline clay to simply fall off. What if you drop this head, or need to sculpt three different noses on the same character?
Nope – just like an original negative from a roll of film, you don’t work directly on this precious master original. Now you have this perfect head shape, it is time to make a master mould (usually in silicone) to allow copies to be made.
Now we can produce multiple versions in a harder plaster for sculpts to be floated/separated off at a later date or make lightweight versions for attaching finished appliances to for painting or shipping (air freight is rather expensive, you know!). Three people can sculpt different appliances on the same nose simultaneously. A copy can be sent to the performer as a gift, and we could even test makeups by applying to a copy of the head without the cost of booking the performer to thrash out paint schemes and best approach.
Oh, the possibilities!
Master moulding is an often essential process, and one of those ‘hidden’ processes which doesn’t get the attention it deserves. Much of the actual work in making these things is not a spectator sport. It rarely tickles the fancy of the behind-the-scenes film crews who are looking for a visually striking event to shoot.
However, just like the unseen hand-washing of a surgeon, the laborious preflight checks of a commercial air-pilot or a scuba diver learning their depth charts…those seemingly boring and uninteresting-to-a-witness activities are the backbone of said endeavour.
It’s an expensive thing to request a performer return to your workshop because you’ve ballsed something up, so it’s generally considered good form to avoid doing so. To this end, here is a step by step look at the process of preparing to make a master mould.
Check your reference images.
The human face is anything but symmetrical, and this may be more apparent in some faces than others. It may be one eye is obviously higher than the other, or than they are set so one is slightly more forward. It is for these reasons that it’s a good idea to take reference images from front, three quarters and side a well as from the rear and above. You want to be sure that if one ear is an inch higher than the other on the cast, it may just be so in real life…
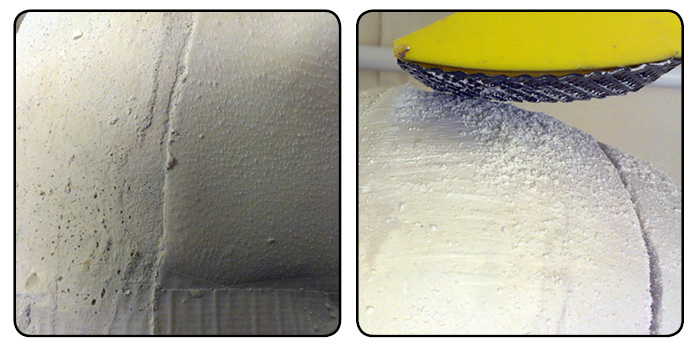
Shave down any air bubbles, bumps and seams carefully.
The trick is to shave down only the artefacts such as bubbles etc. without actually damaging the surrounding texture or form of the cast. Chipping the worst of the plaster excess carefully away and then using abrasive tools such as rifflers or files to smooth out the plaster is the best way. Even abrasive papers such as ‘wet or dry paper’ can be used to finish off tool marks (I like 80, 120 and 180 grit).
Very large areas to be removed may need to be chipped away using a hammer and chisel, again take great care to avoid damaging the forms you wish to retain.
Fill any unwanted dips, holes or recesses.
There may be some obvious small air bubbles in the plaster which need filling, and many others may only appear once the surface is shaved or sanded down lightly. If carving away thick chunks of plaster, such as when removing a bulge from a ponytail of hair under the baldcap, it is possible you can go through the thickness of a hollow plaster.
Should this happen, repairs can be made by first patching from inside with scrim (a wide weaved fabric, also known as ‘jute’ or ‘burlap’) and plaster, allowing it to set, blocking the hole and preventing the next mix from falling through. More plaster can then be mixed to fill this hole.
Whenever repairing plaster with more plaster, it is advisable to soak the plaster head in water for a few minutes first. Dried plaster is highly absorbent and will readily steal the moisture from the fresh plaster added to it. Wetting the plaster just beforehand will reduce this effect and make repairs easier to do.
For small holes, a watery mix of plaster can be wiped into the surface using a damp sponge and wiped over with a plastic kidney or scraper (sometimnes known as a ‘busk’). As the plaster begins to set, continue wiping it down with the plastic kidney or scraper, and you should end up with a smooth surface.
Don’t try to repair every single hole in a single batch if you are not experienced in repairing plaster – accept that you’ll need to do it in a few hits allowing each to set before adding another.
Prepare a board large enough.
The ‘footprint’ of the cast is the shape it occupies as the plaster sits on a bench. A large cast of a head and shoulders will have a big footprint, but the board it sits on needs to be at least approx. 50mm/2″ larger than cast to allow for the mould which will be built on top of all this. Think of it as choosing to wear stretch-pants at an all-you-can-eat-buffet. Account now for the extra space you will need later!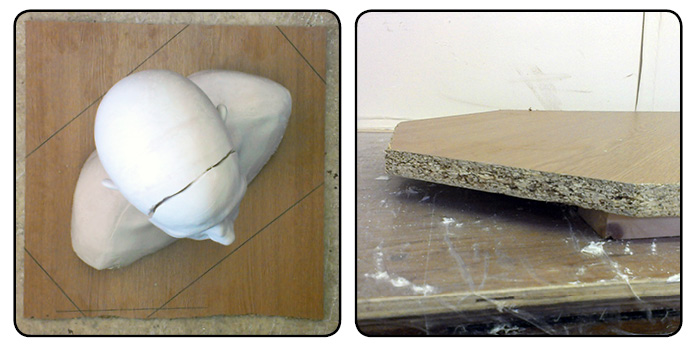
The board must ideally be non-absorbent, either melamine faced furniture board or plywood which has been sealed and waxed to stop anything from sticking to it. Another tip is to fix a couple of wooden strips underneath the baseboard so when the whole mould is finished and much heavier, you can easily get your fingers underneath to lift it.
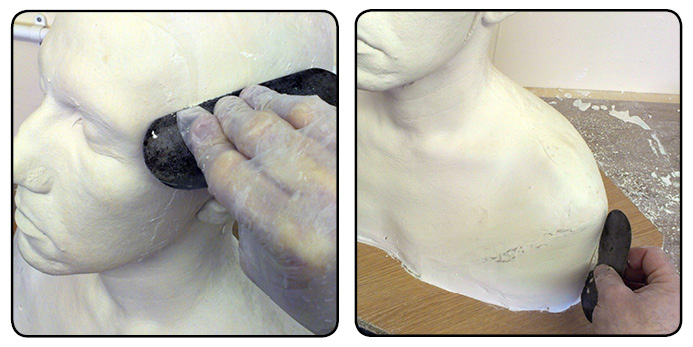
Level and square up the head and shoulders so they sit straight.
It is important to make sure the head and shoulders are sitting straight and level so the head appears natural. Usually a head and shoulders cast will extend further around the front and sides than the back, and the resulting cast will naturally sit at a peculiar angle. To counter this, the head can be held upright on blocks, wedged to sit at the corrected position which you would judge by sight. 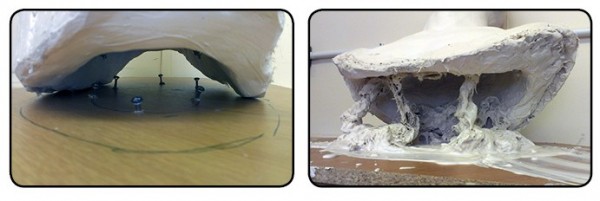
Then, plaster and scrim can be used to fix the head in that position. By placing screws into the base board and the underside of the plaster cast with a short amount sticking out proud, you will have strong mechanical means of joining the two together. Once this initial plaster and scrim has set, the wooden blocks and wedges can be removed and the plaster can be dressed and smoothed out as before.
Have the plaster smoothed from the edge of the cast and straight down to the flat board. This will remove as many undercuts as possible and provide a smooth, easy-to-release-from surface.
Seal/release the surface.
The plaster, having been smoothed and repaired is now ready to mould. We certainly don’t want anything else sticking to it so the best thing to do is to apply a thin layer of release such as wax to help things. Being slightly absorbent, the plaster may simply soak up liquid wax release.
If this is the case, a thin sealer may be applied first, such as a layer of shellac varnish (aka ‘button polish’) or clear car lacquer spray. Then, once this has dried the release can be applied. The key word is to apply a THIN layer, so as to avoid filling in the details that the original cast has captured.
Okay, so now your plaster head is pitch-perfect and ready, you can make a mould of it, which will be the subject of the next blog post!
As ever, comments below, on Facebook or emailed help make the blog better! stuartandtodd@gmail.com

Thank you Stuart, your tutorials are easy to understand, informative and always a welcomed “surprise” in my email inbox (I actually catch myself smiling when I see it). I’m eagerly waiting for part two of master moulding and it is killing me. I feel the pain of the kids from the 1950’s waiting for the second part to the cliff hanger of their favorite cowboy hero. Did I miss it some how?
Yeah, I’m so bad as I have so many plans and ideas and not enough time to do them all, it’s frustrating for me too! Thanks for keeping up with the blog!
-Stuart
Thank you Stuart! Very informative indeed. Just starting to make my own sculpting tools with your instructions. Perfect!
Cool – you see the video I did at BITY? https://www.youtube.com/watch?v=eBgvC1cIt-E
Great and very informative. I enjoyed this topic. Makes me want to just mold everyday.