
In this episode, Neill Morrill joins me in the workshop as we hit up Todd in Colorado and chat about our collaborated efforts on the makeup we did for The Prosthetics Event 2019.
Neil is originally from the UK but moved to Toronto in the early 2000’s and has worked on a number of high profile shows over the years such as 300, The Strain, Suicide Squad, Hereditary, It, Shazam! and the What We Do In The Shadows series.
Stream or download below, we are also on Spotify, iTunes, Soundcloud…wherever you get podcasts!
Subscribe where you get your podcasts to make sure you don’t miss the latest episodes!
It was an absolute joy working with Neil on our homage to Rick Bakers‘ ‘Reverend Brown‘ makeup on Arsenio Hall from 1988 classic Coming To America. Neil had the idea when chatting to our makeup sponsor Sian Richards when bouncing ideas around. The upcoming sequel recently finished shooting, and so Neil picked that as a good contender as a challenge for us to do – separated as we are by 3, 500 miles of Atlantic ocean.
British Rapper and DJ Normski agreed to be our victim, and so we set about hatching the plan. Obviously distance like that adds tricky elements to a physical process such as sculpting and moulding pieces, so we worked out a share of labour which was as follows. Video was shot and I will edit together the whole thing as a complete tutorial in more detail, so this is an abridged verion:
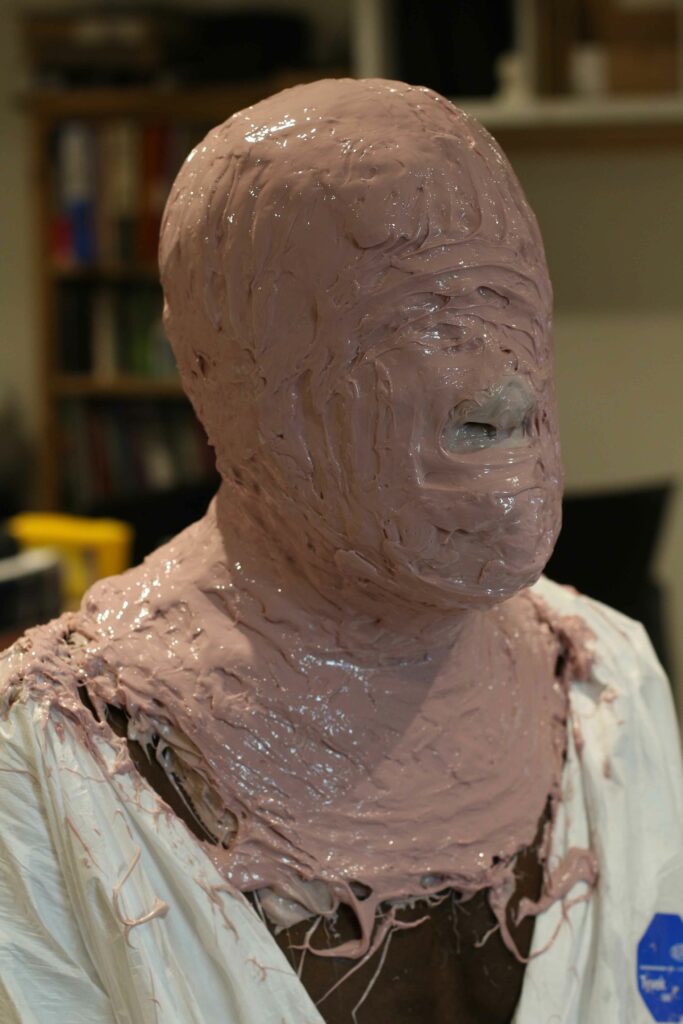
Step 1. Stuart lifecasts Normski at his studio using silicone to make a durable mould of his full head. Weight is a consideration as this silicone and plaster bandage will be shipped to Neil in Toronto.
Step 2. A plaster is cast out and kept in the studio as a backup and to be master moulded there.
Step 3. The silicone and plaster bandaged lifecast mould is carefully packed and shipped to Toronto. (A prayer is said to both the Gods of Lifecast Safety and Safe Shipping).
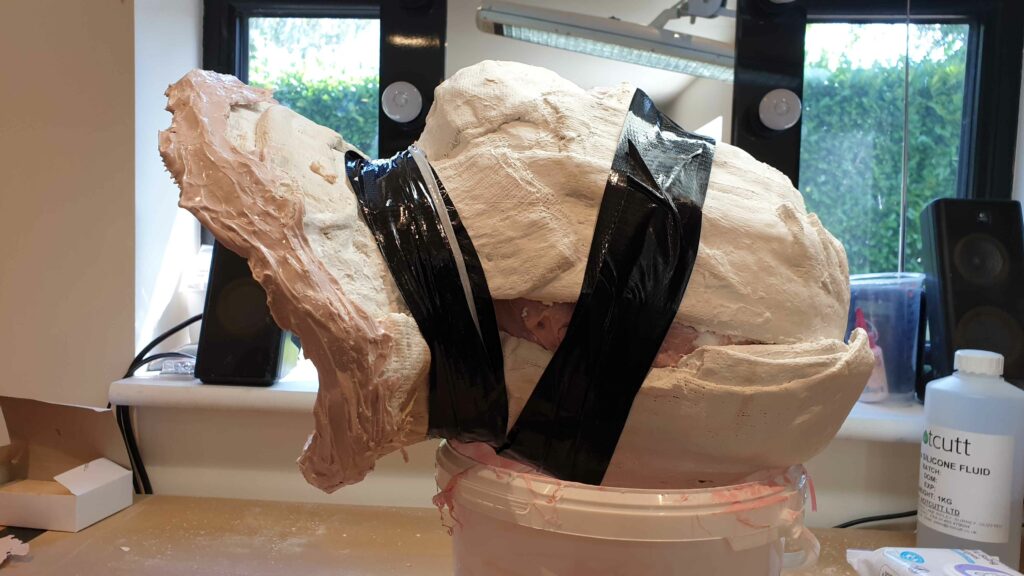
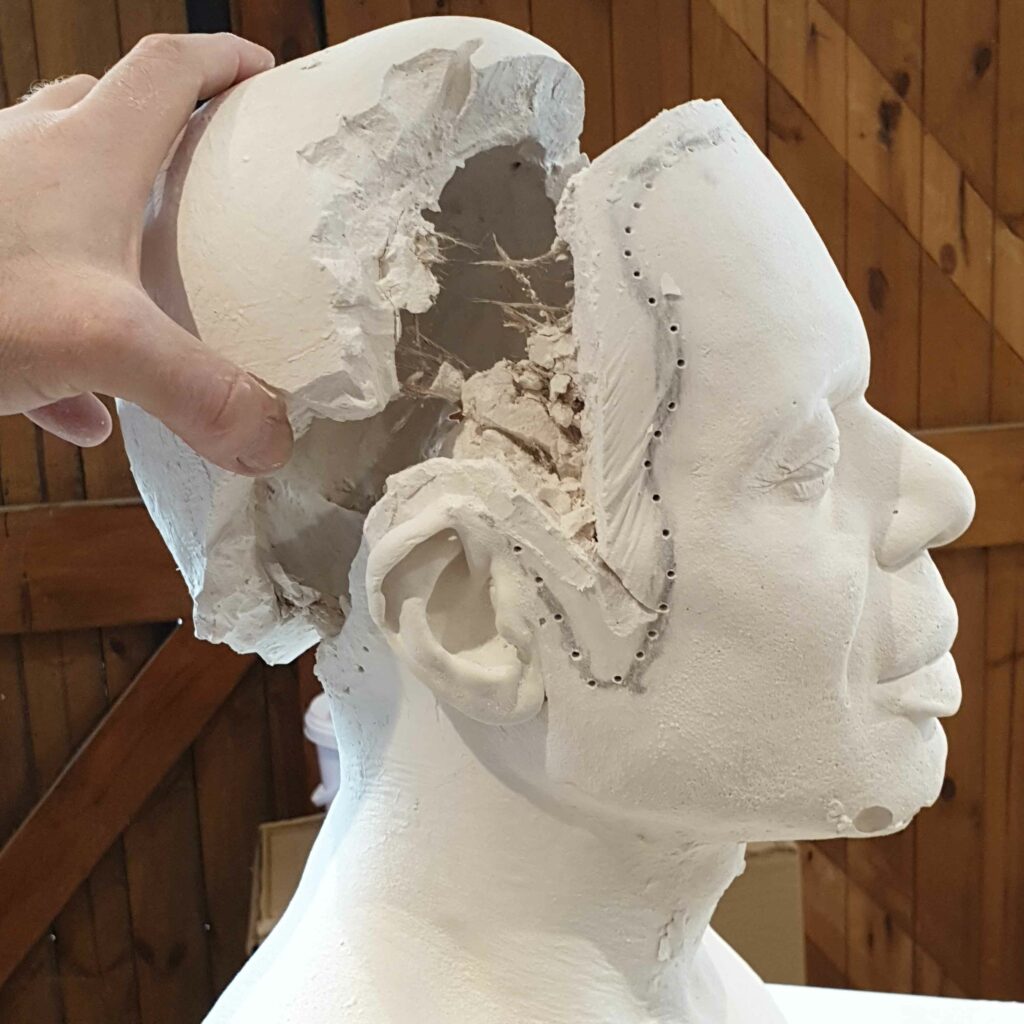
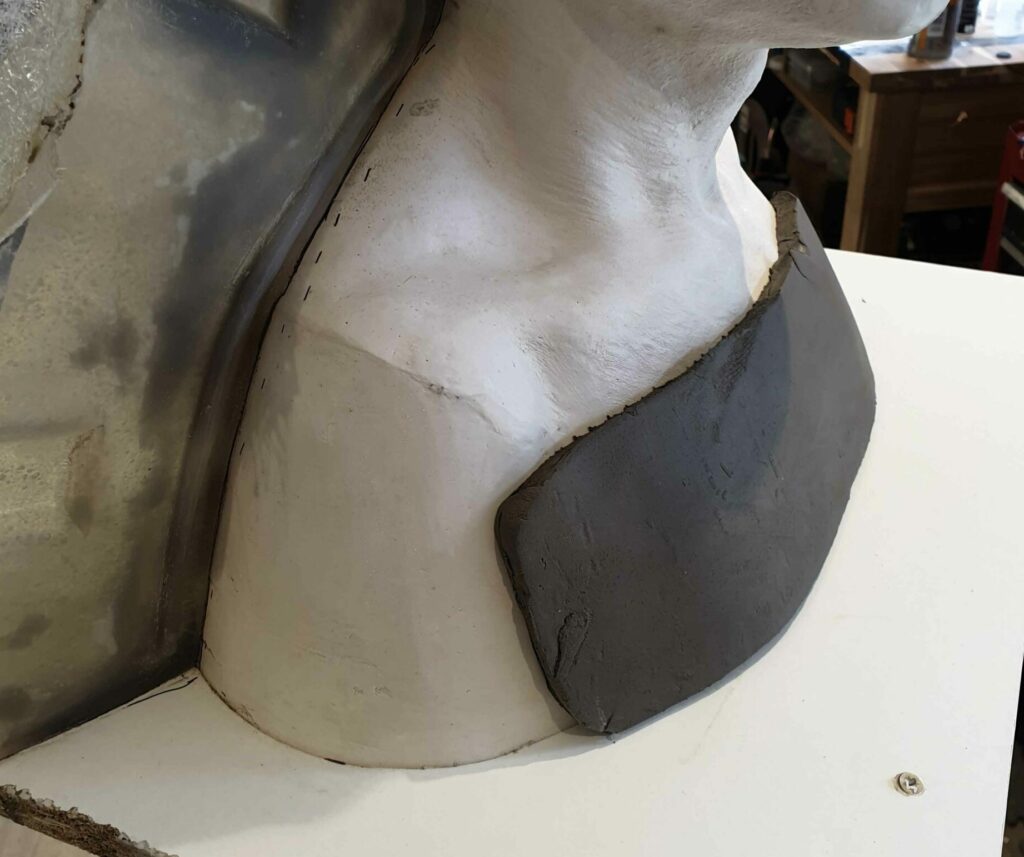
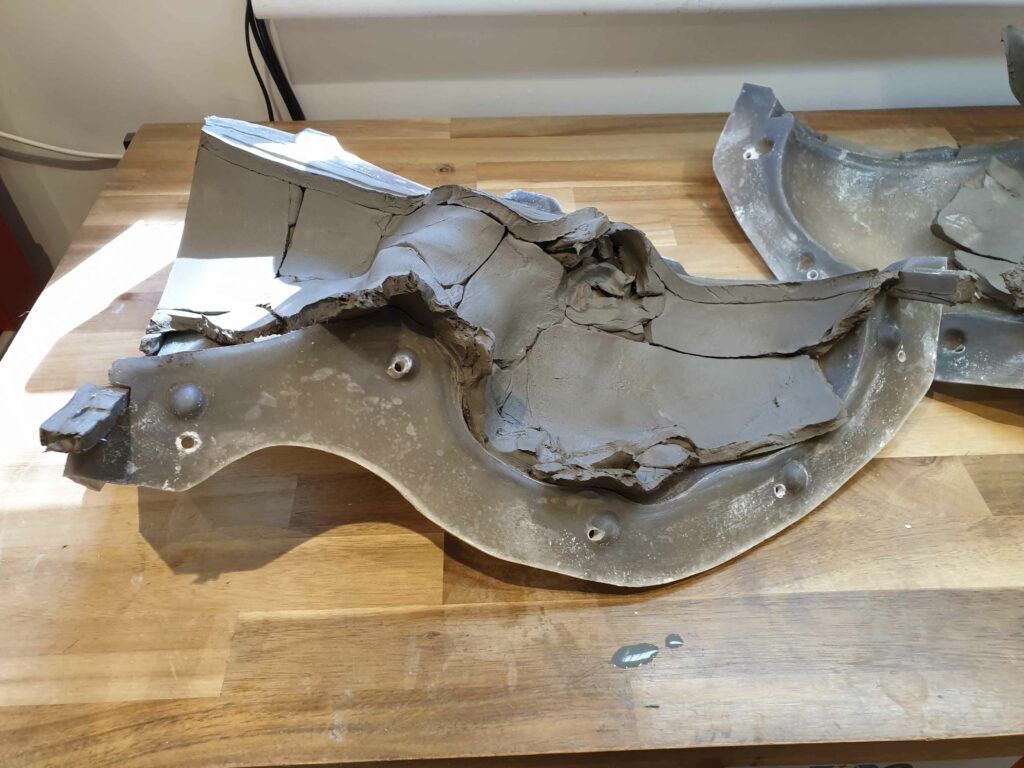
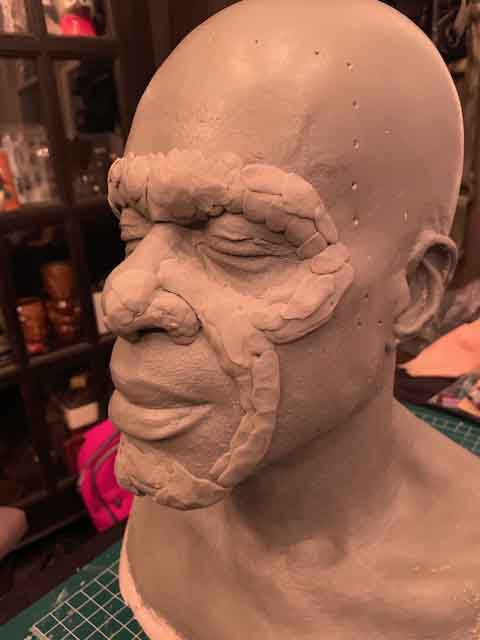
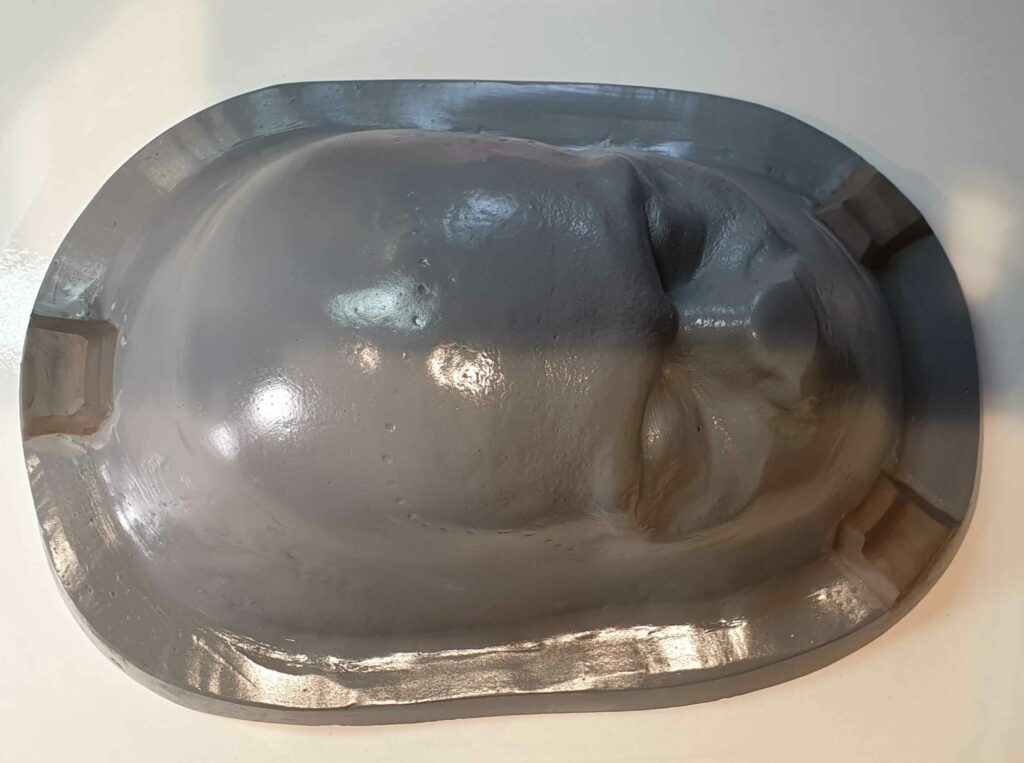
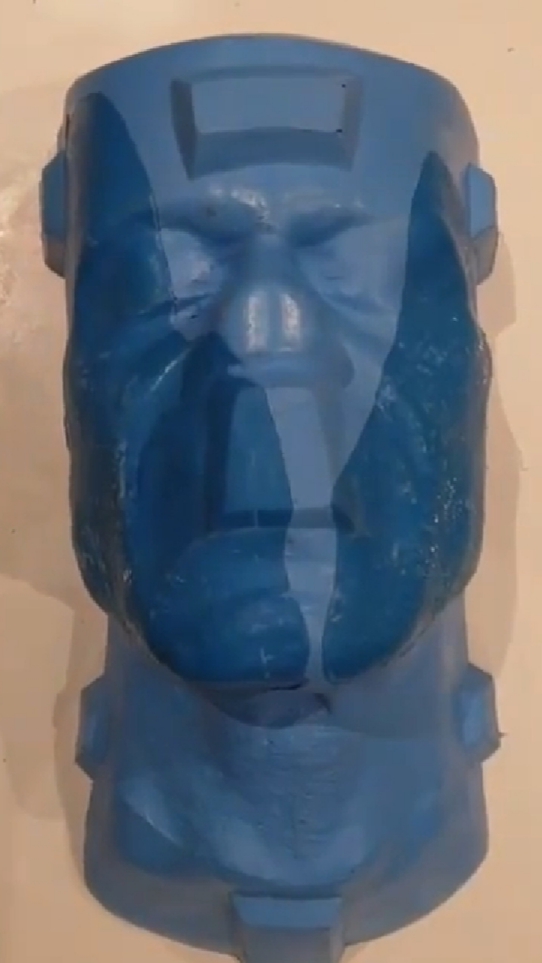
Step 4. As the precious cargo is making it’s way West, Stuart begins to clean up the plaster ready to remould. The man issue is Stuart’s lazy hair management – the afro beneath the baldcap was not flattened down. This means a volume of plaster as seen in the picture above has resulted in a solid mass which is larger than Normskis actual head measurement.
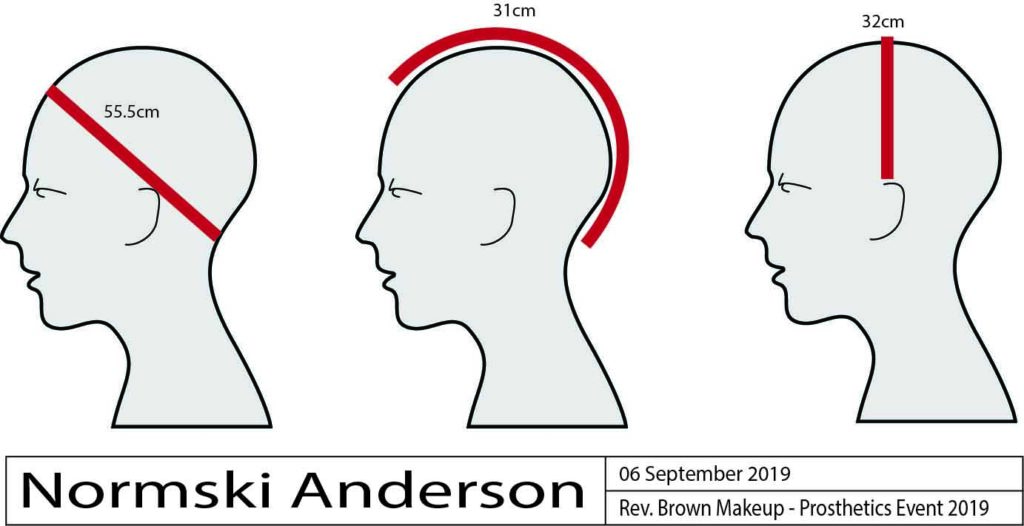
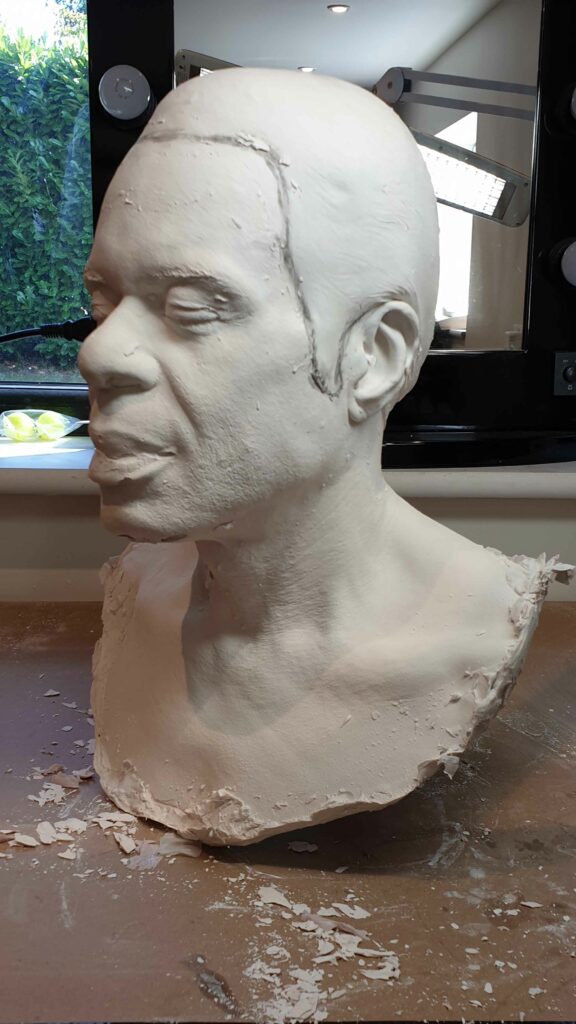
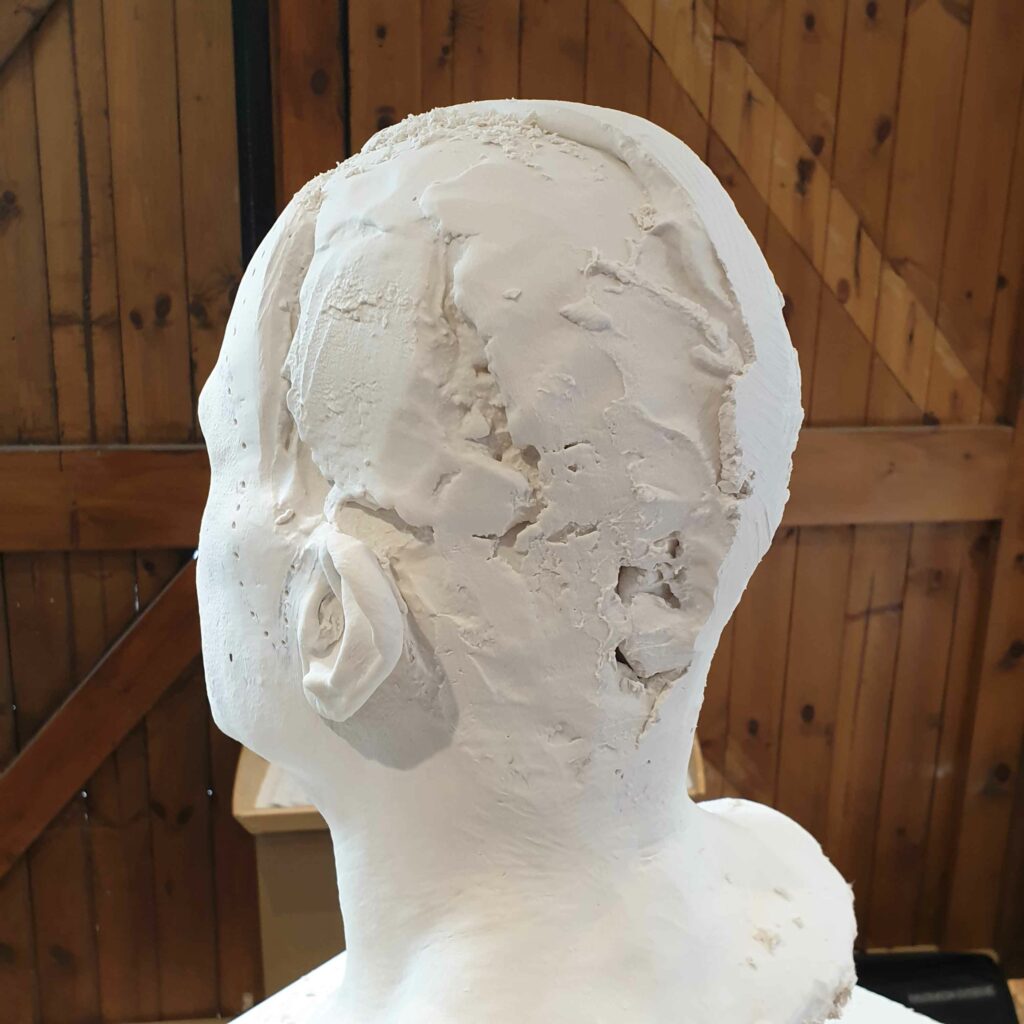
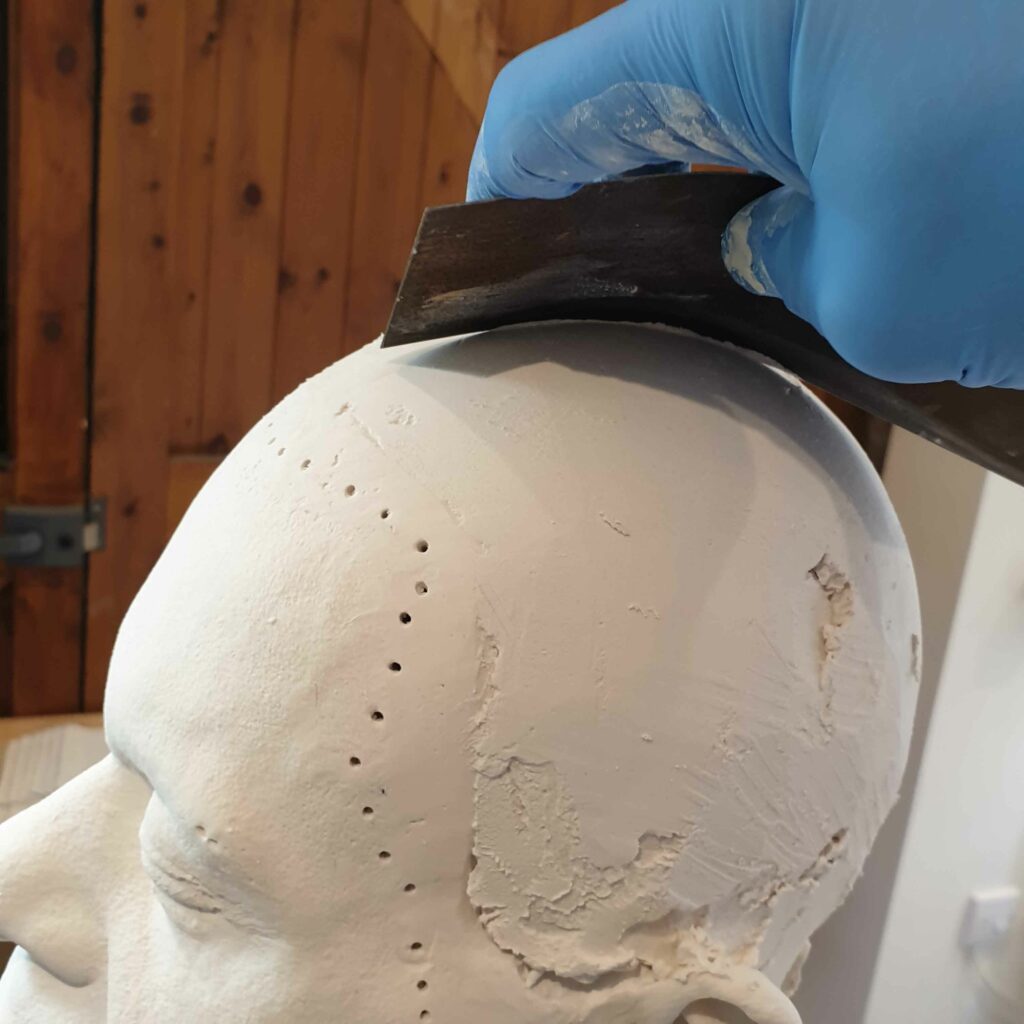
Stuart then attacked this as best he knew how by cleaving the entire hair portion off from the head and rebuilding it to the correct dimensions shown above, taken using a tailors tape on the head before lifecasting. It’s always important to measure the actual head, as hair can be pressed down in the act of measuring to secure accurate dimensions for wigs etc.
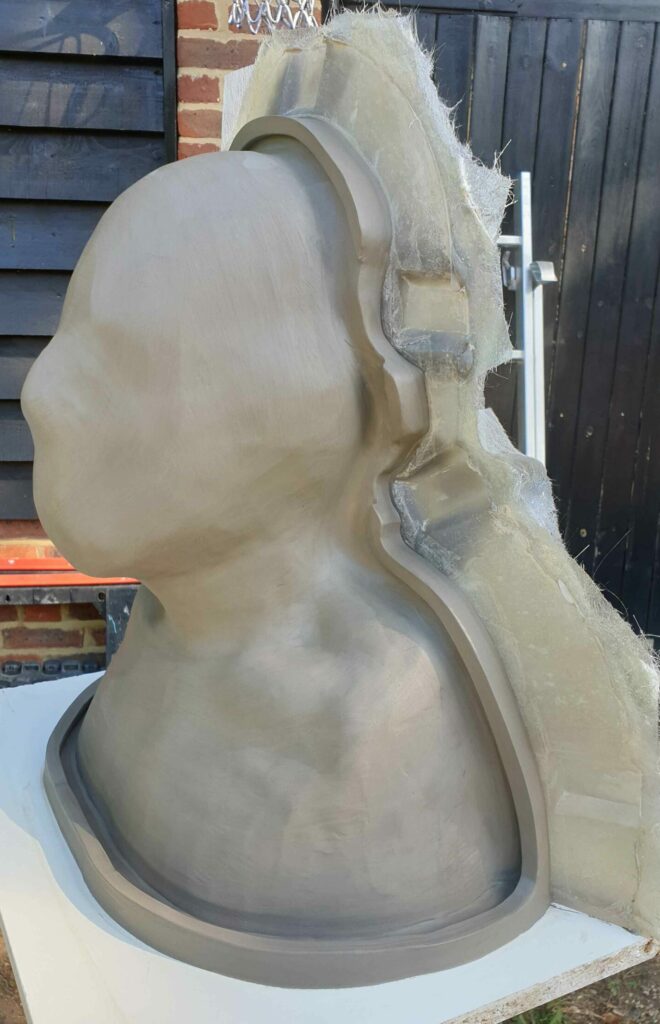
Step 5. Once the head is cleaned up and corrected, sat level on a baseboard and clean, the silicone master mould begins. The back portion of the head has no details we desperately need, so this was done in GRP, Polyester resin and fibreglass.
Then the front is made using a blanket of clay, cut to approx 10mm thickness and applied all over the front. This is smoothed over, and keys placed around the perimeter. These keys will ensure the silicone portion can remain in the jacket when required to later.
The front was then fibreglassed, same as the back. It was made in two halves, however, to assist in opening later. It’s often a good idea to consider how easy it will e to open the mould later, as opening a mould made of fewer parts can be a false economy when it is strained and stressed with huge amounts of leverage required to separate parts. More parts means more work now, but an eternally easier-to-open mould later.
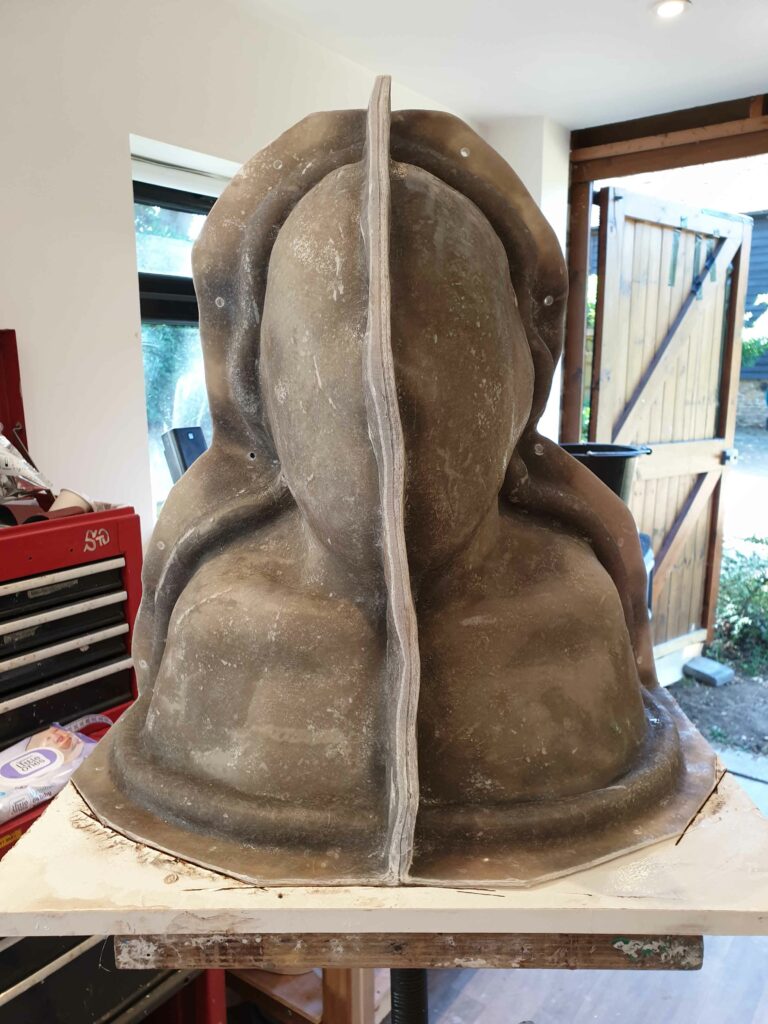
Once set up and allowed to firm up properly over a few days, it was opened and the clay cleaned out, reassembled and then prepped for silicone.
The clay used kept, as the volume of that clay will be the same volume of silicone required to replace it – plus a little extra for the pour tube and what will leak out of the bleeders used to let the air out of the mould as it is poured.
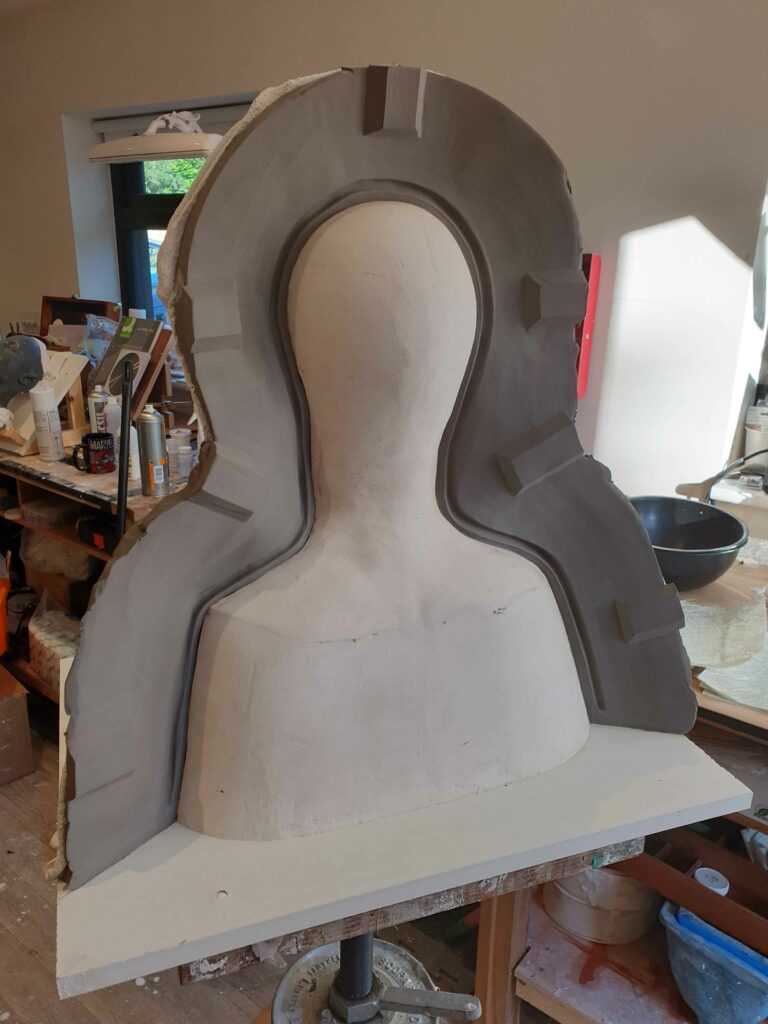
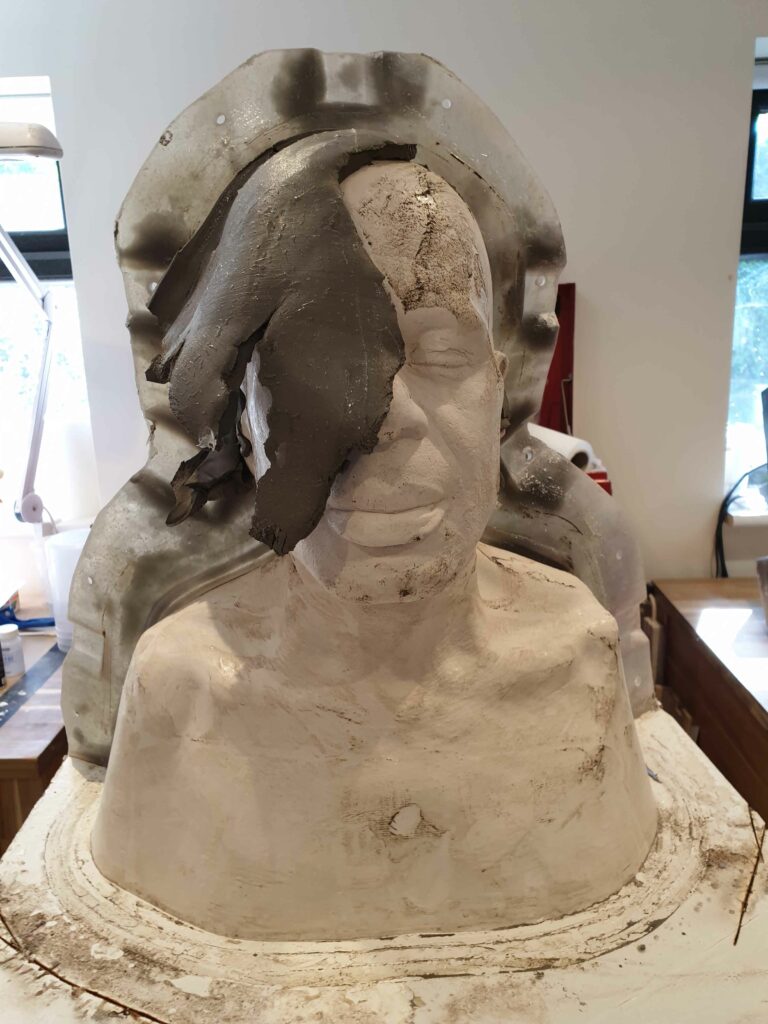
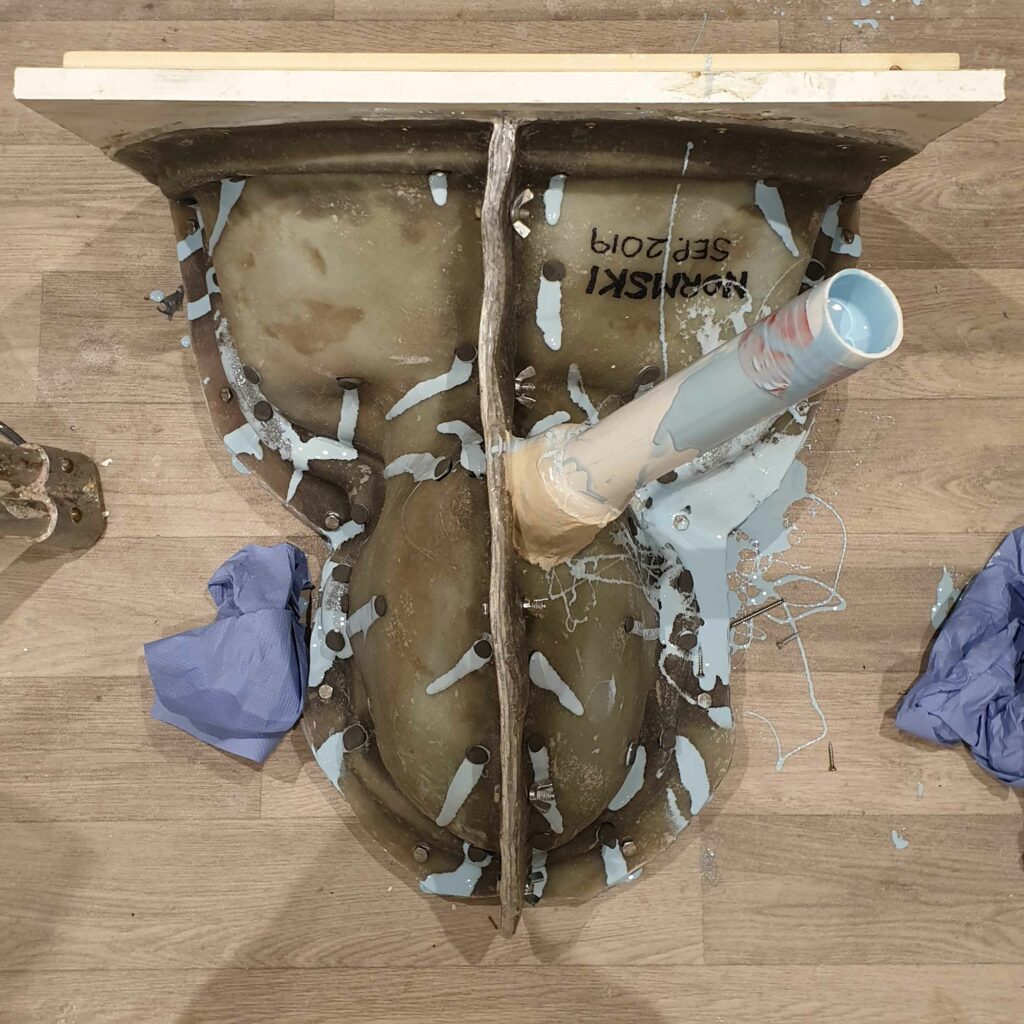
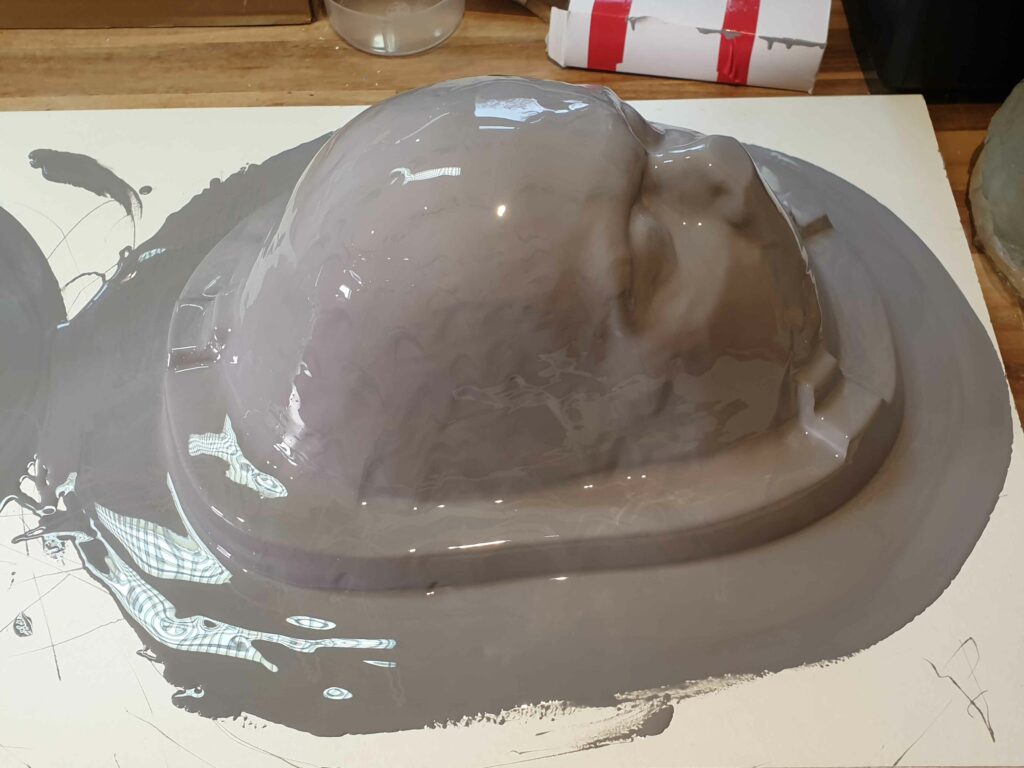
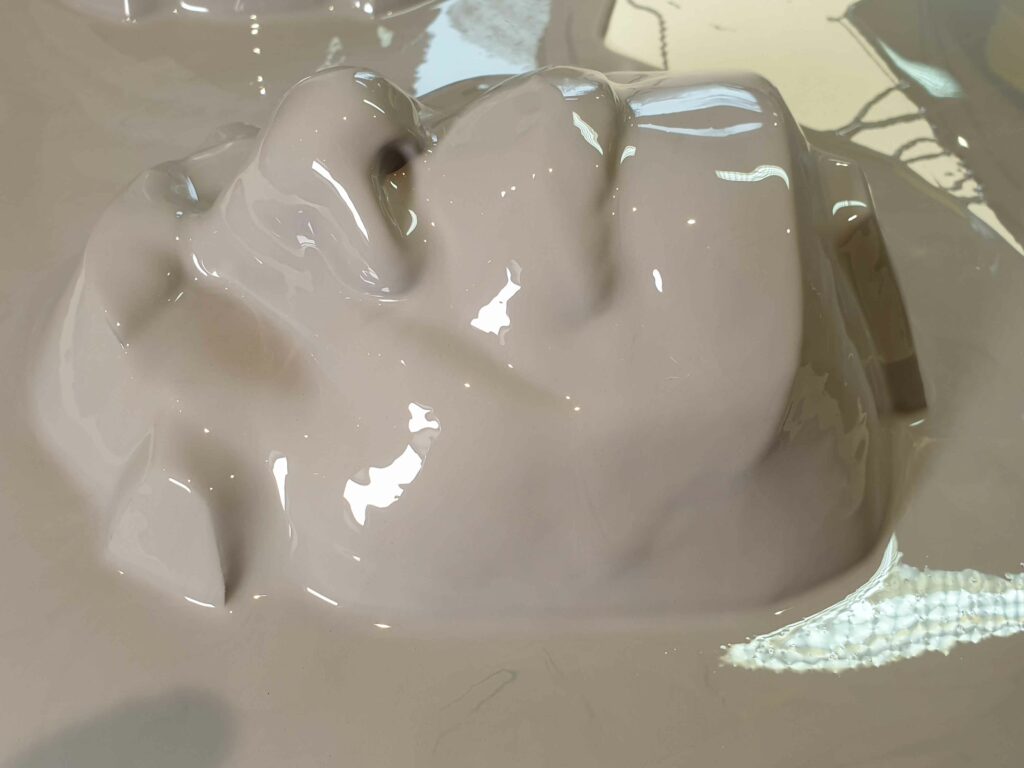
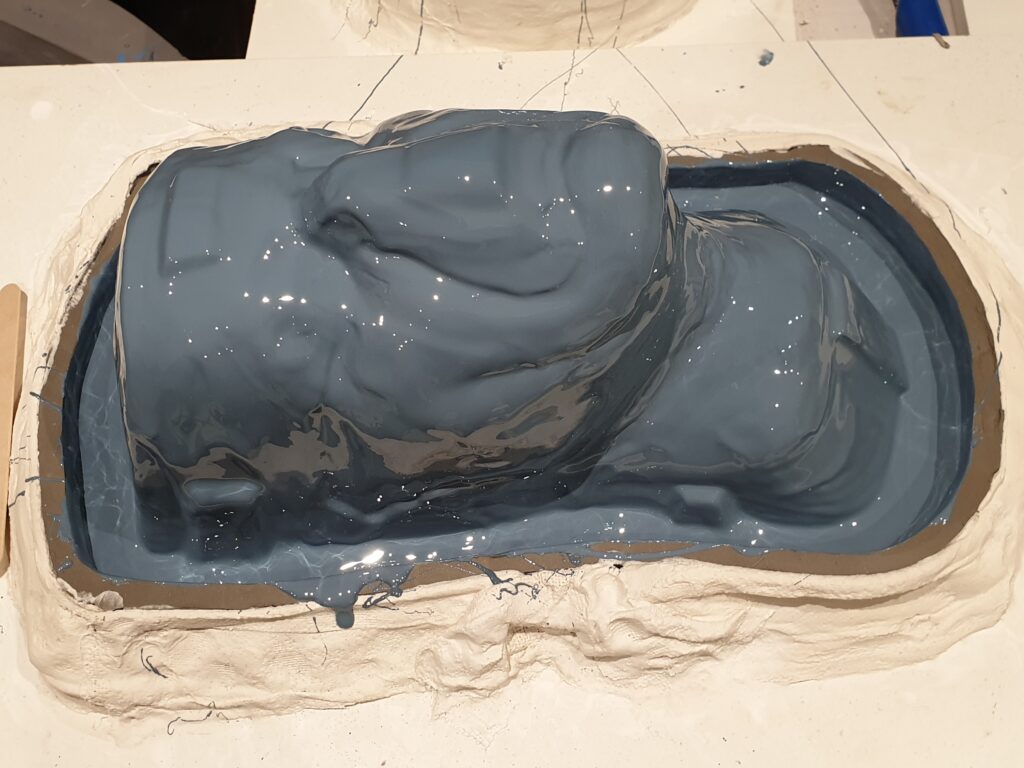
Here, with one half of the front fibreglass jacket in position, you can clearly see the gap the clay made all around the head. This will now be replaced with silicone. We used Dow Corning 3481 with a slow catalyst to allow plenty of time to vacuum degas the mix and pour in an unhurried fashion.
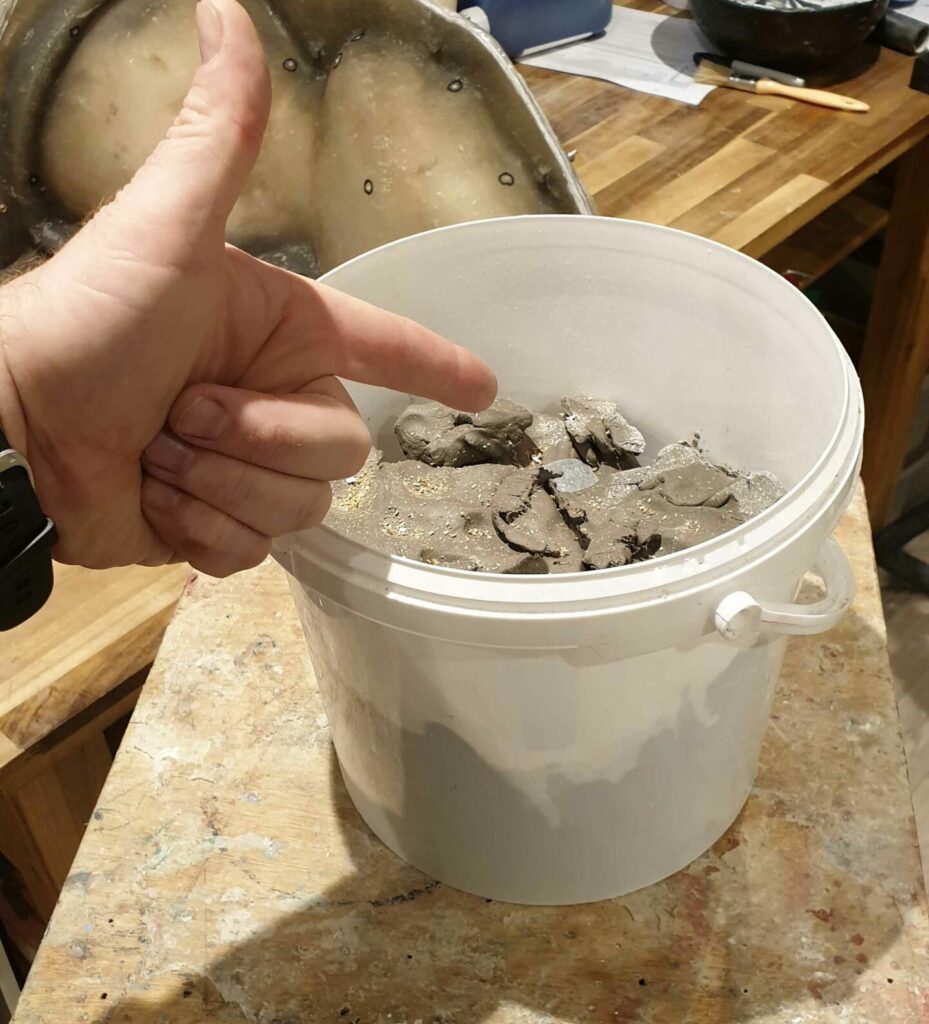
This is the clay scooped out and kept from the fibreglassed front jacket. It is the same volume (not weight) of silicone required to replace it. By smashing it into a container like this large paint kettle, I know how much silicone I will need to fill the mould.
Silicone poured and left overnight to fully cure.
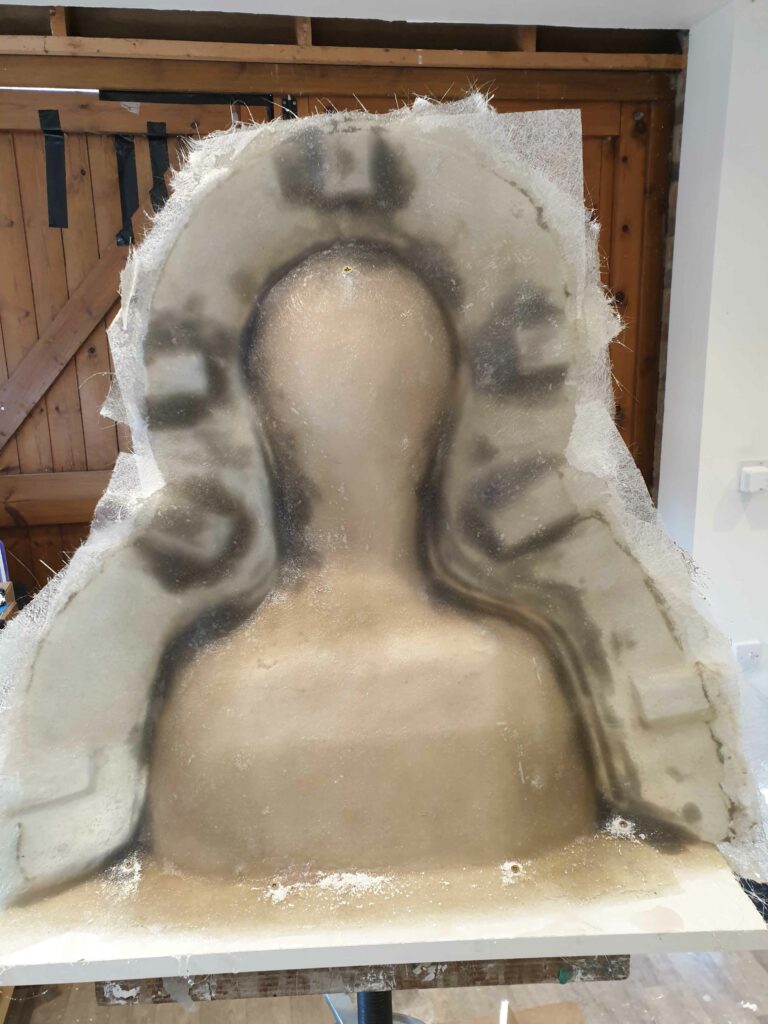
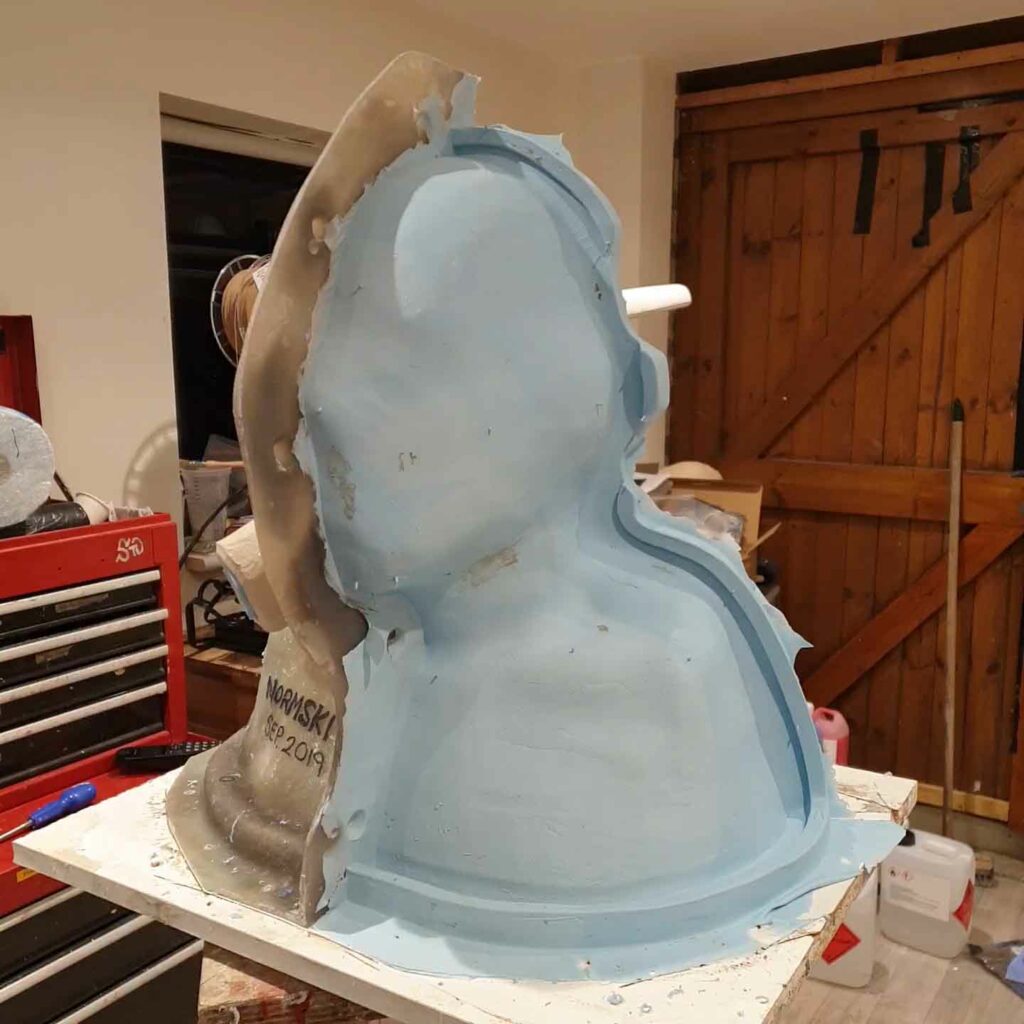
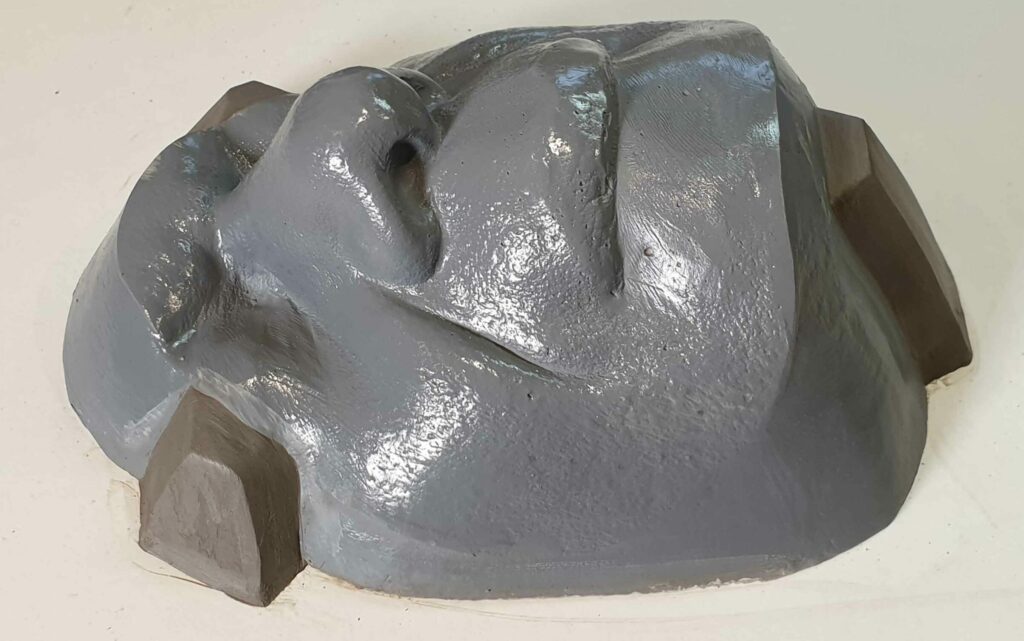
Step 6. The mould is opened up and checked for any issues. It cae out fine, no leaks or air bubbles so all good! Now we await the arrival of the sculpts from Neil in Toronto.
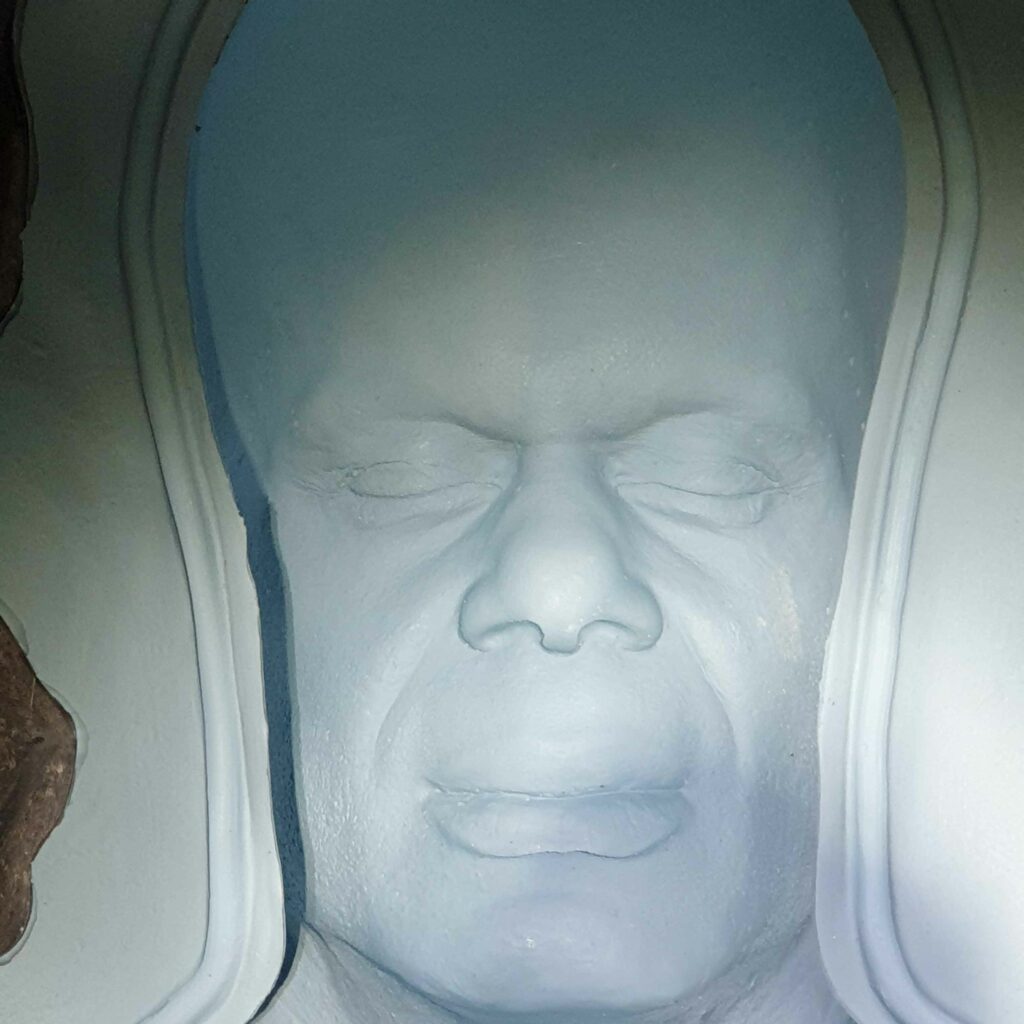
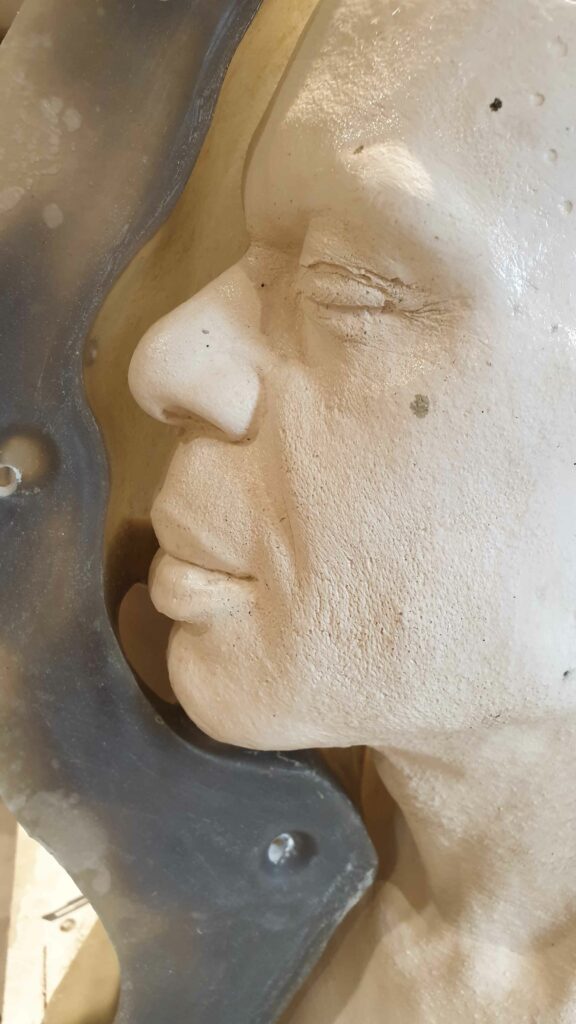
The face as seen from inside – this is the silicone negative which appears to be coming out towards us rather than being in reverse. A trick of the light in photographs.
Step 8. Whilst I have been making the master mould of the head, Neill has been busy sculpting away on a plaster he made out from the original silicone lifecast mould I sent to him a couple of weeks before.
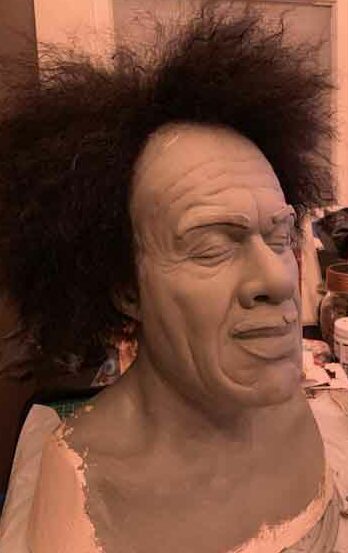
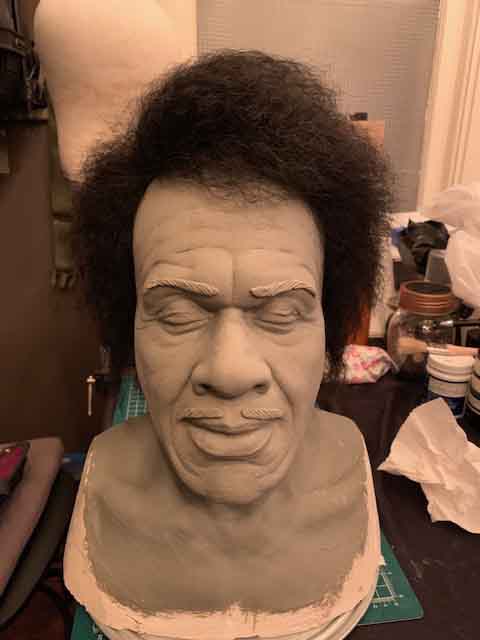
After a number of back and forth chats, the wig Neil acquired is trimmed and placed on the head, as we realise much of the character comes from the volume of hair. The wig is actually a pretty inexpensive wig, which was perfect but needed a lot of barbering to cut it to the size and shape.

This is the wig as seen when ordered. Some TLC, careful scissor work and a keen eye meant this store-bought wig would fit the bill and do our Rev Brown justice.
Step 9. The sculpts arrive back from Canada. They made it intact! Huge sigh of relief as we begin the next stage.

Step 10. I make core moulds based on the pieces sent over. The sculpt is made as a single piece at first and once the look is approved, it is then decided where the makeup is to be split. Usually, there are logical reasons behind the choice, and often it is where the sculpt is thinnest and where there are already creases or natural areas such as crows feet where a join would be preferable.
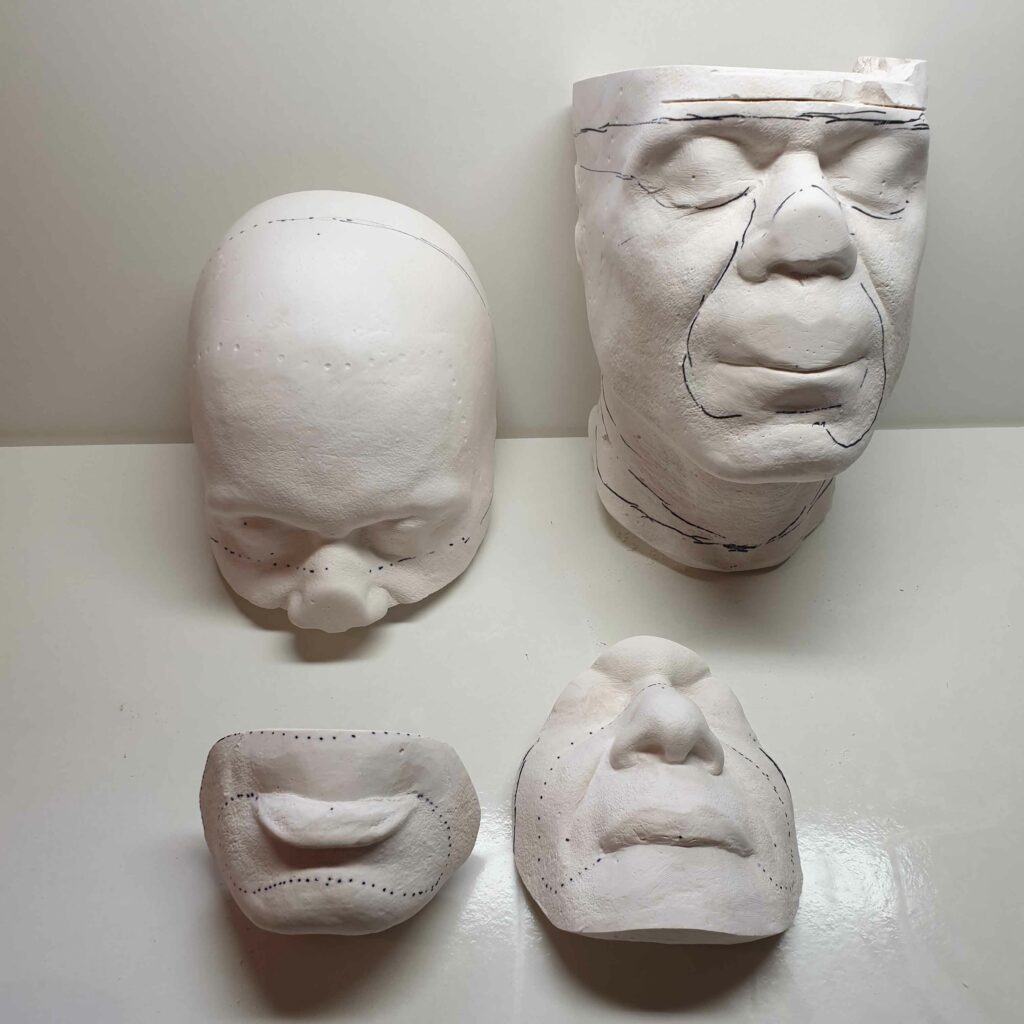
Here we settled on 4 pieces – Lower lip, nose and upper lip, forehead and wraparound face with both cheeks and chin all as one large piece.
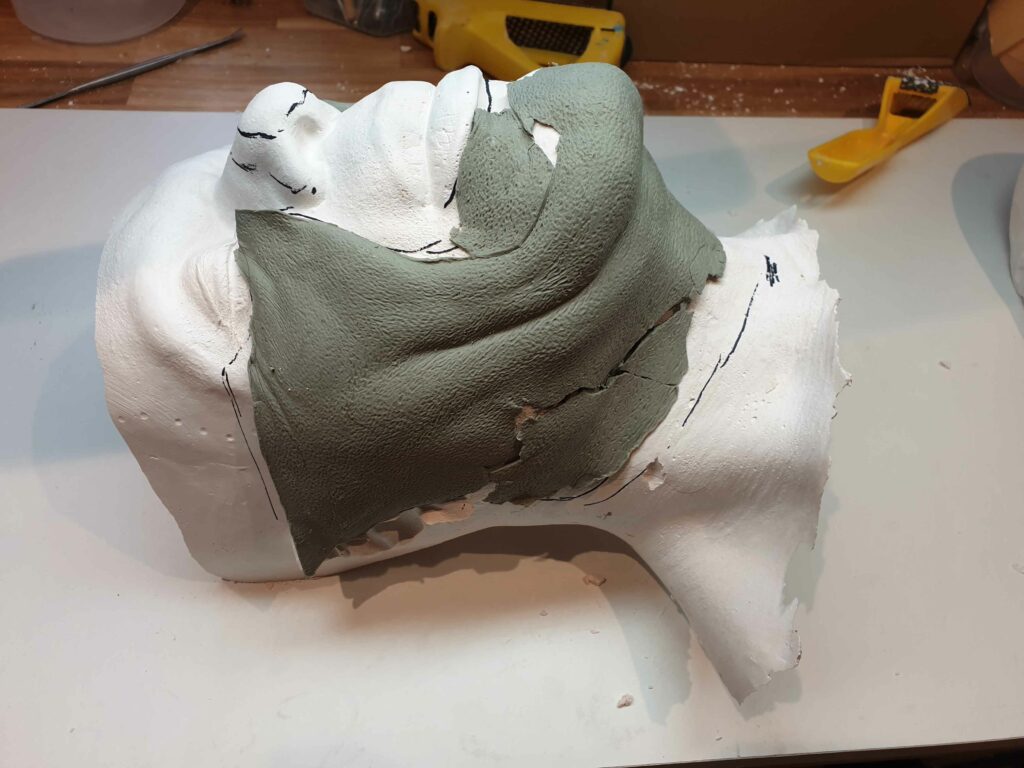
Here you can see the boundary line of where the sculpt stops marked with a Sharpie. The core then can be shaved down to be just a little larger than that line, so the cores are no bigger than needed to minimise waste.
Step 11. These plasters now need to be smoothed out level onto a baseboard and any undercuts taken out and keys added. I used plaster to smooth it out and make the sides flat and angled down to the board. A flange is added to the larger pieces to assist the opening of moulds later on. The plasters are then sprayed with grey primer to seal them and show up any air bubbles or holes I may have missed. Clay keys are also added as the last thing.
These finished plasters with their primer and keys are the right shape but not the right material for the cores. These are now moulded in silicone so resin positive versions can be made.
The silicone in these moulds was Tinsil 8030 from Polytek which was supplied by Neills Materials. Two coats drizzled on, each allowed to set before a third layer was applied with a thickener added to make the liquid silicone more of a paste to build up a decent thickness quickly.
Step 12. We used Axson F40 as a really durable urethane for the smaller pieces and Epopaste 400 Epoxy for the larger moulds. The biggest challenge was how to overcome the undercuts of the jaw (see our post dedicated to undercuts here).
A straightforward single-piece mould would have locked, and I didn’t fancy a seamline down the middle of the face. Often I like to flare out the core, but having doine this before plenty of times, I fancied something different. I figured I would try a ‘collapsible’ core, made up of several parts, allowing the mould to remain as one piece and keeping any seams on the inside of the piece.
To do this, I poured up the two sides of the face which contained the deep jaw section as separate pieces. Essentially, I flooded the face core mould whilst it was held at the correct angle and left overnight to set and cool down.
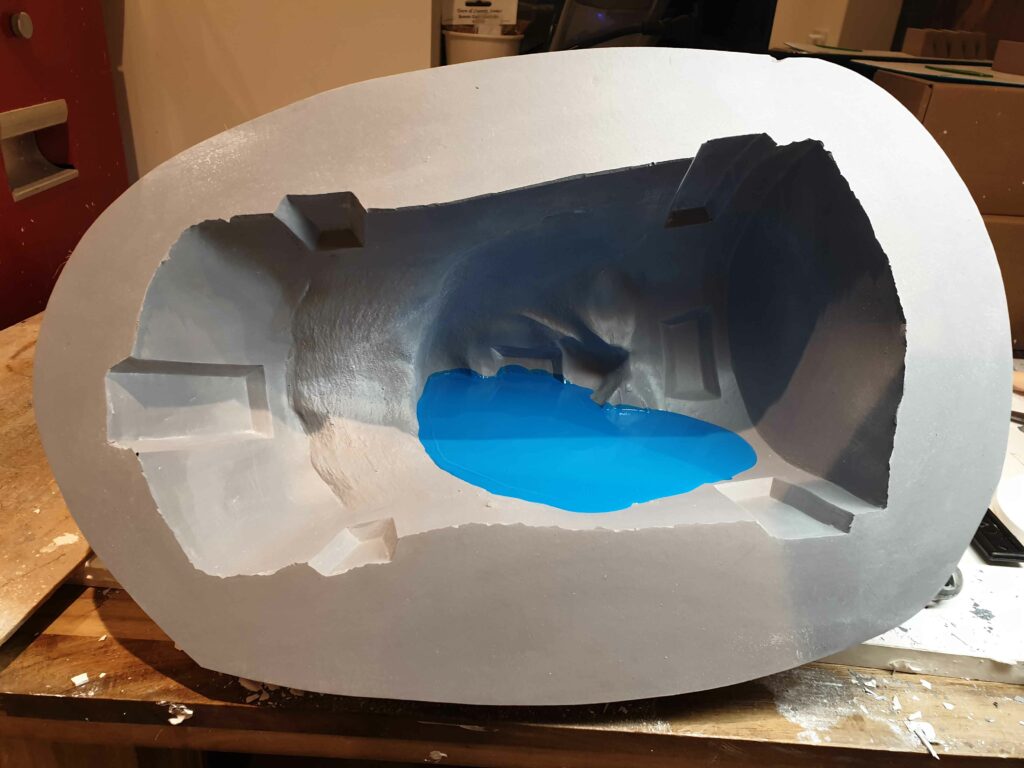
The next day I removed the resin piece, flipped the head and did the same thing on the other side. Then once that had set, I removed that and using a Dremel rotary tool, carved keys into the back of each piece. I also carved a hollow to set magnets into the back, so I would be able to attach these two resin pieces into a third piece I have yet to make.
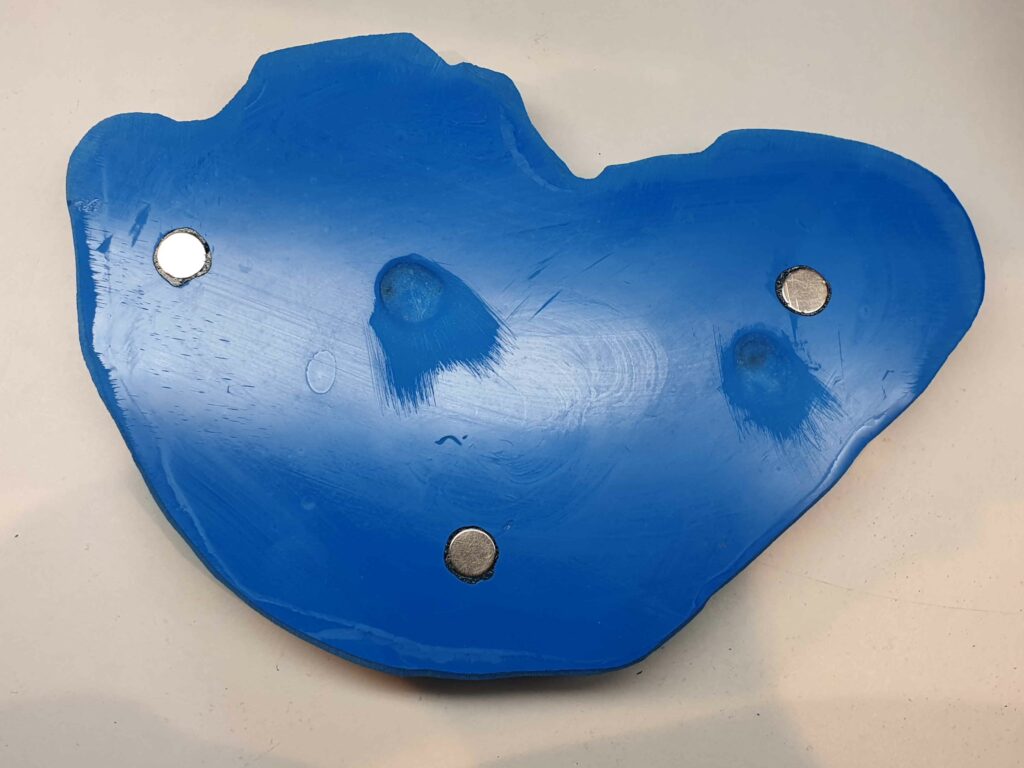
Two keys and three magnets inserted, held in place with a two-part epoxy adhesive. Care must be taken when Dremelling in keys to NOT create new undercuts inadvertently. It’s all about angles!
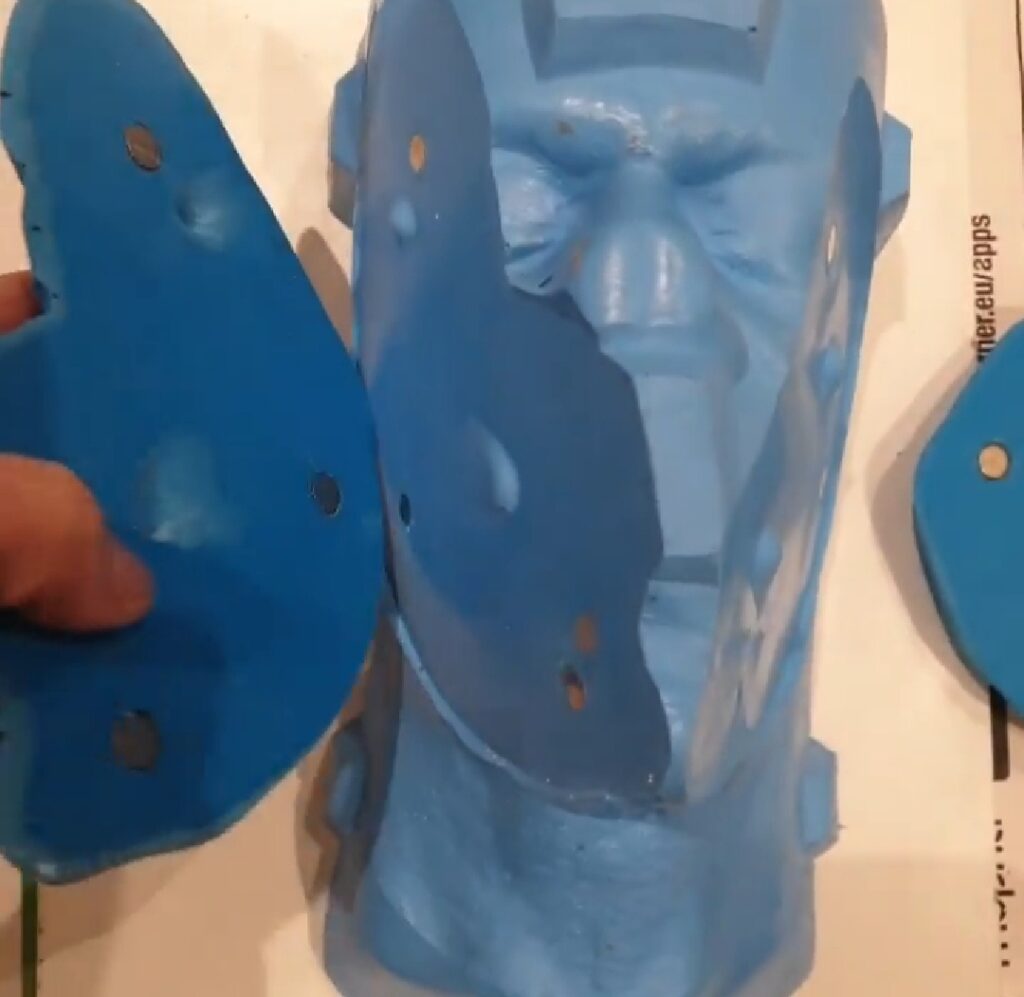
Once finished, both resin pieces are cleaned and placed back in their respective locations in the silicone from which they came.
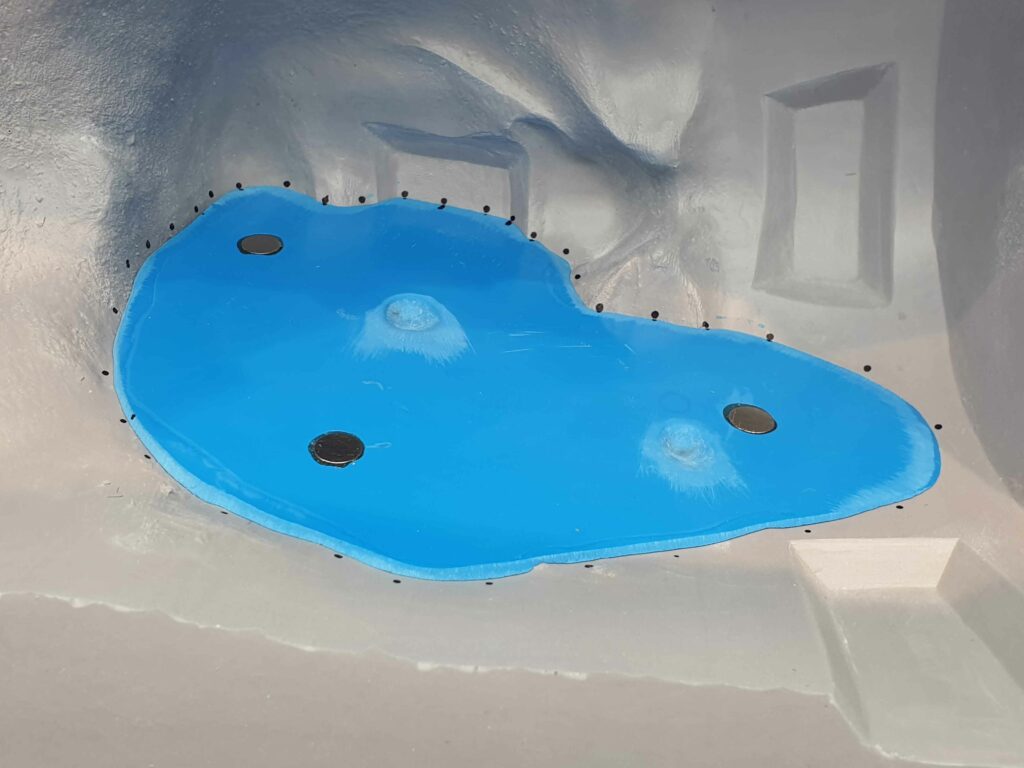
Because of both pieces were cast at angles, it follows that when the face is upright, both these resin pieces will not obligingly stay in place. I brace them in place with some thin wooden sticks and construct a wooden brace across the top to push them firmly in place while an epoxy gelcoat is applied to the back of the pieces and the remainerof the silicone face which is not covered by the resin inserts.
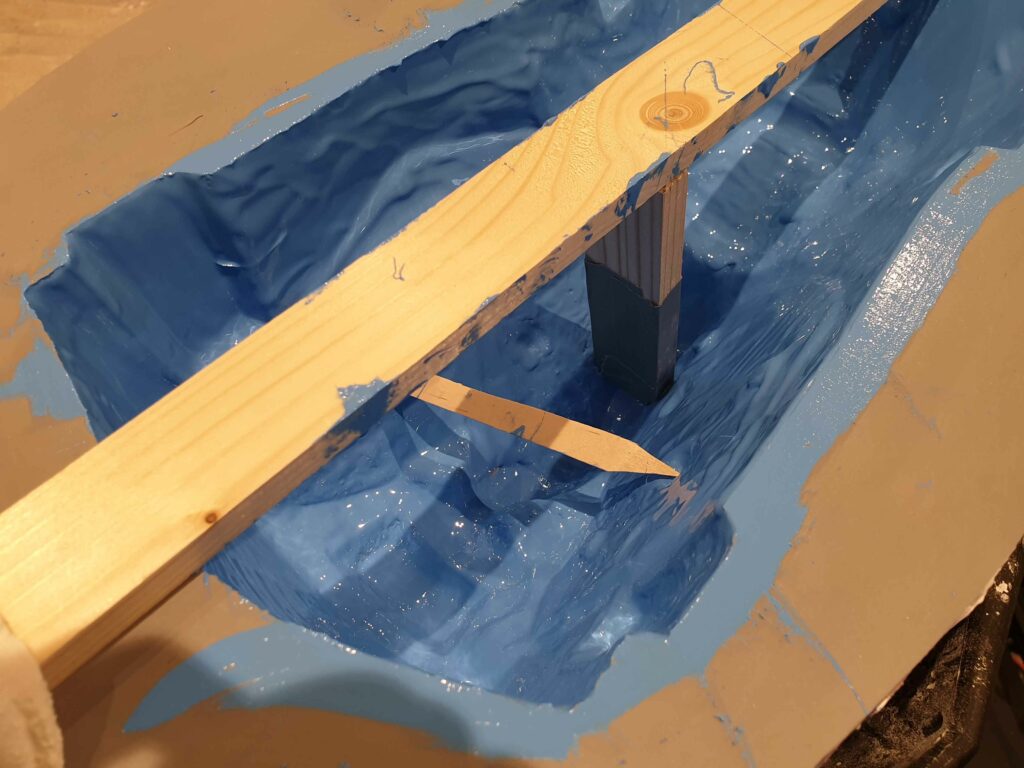
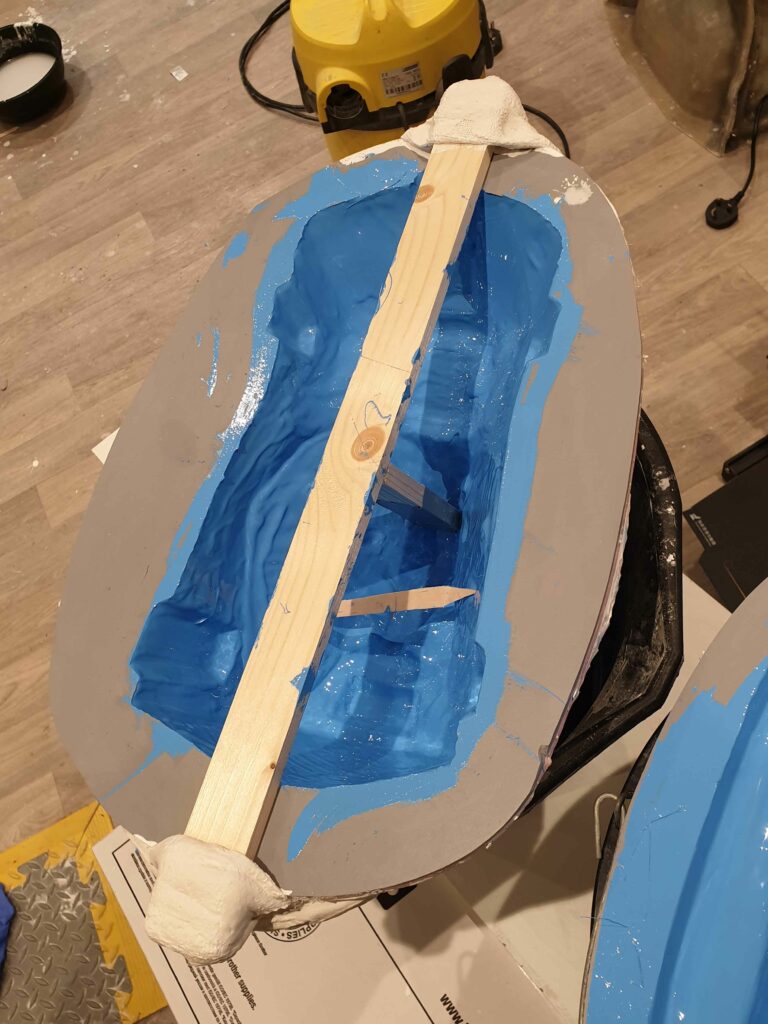
It seems a bit of a hassle, but I absolutely need these resin pieces to remain pressed into their correct location throughout this process, to remain accurate and correct to the face.
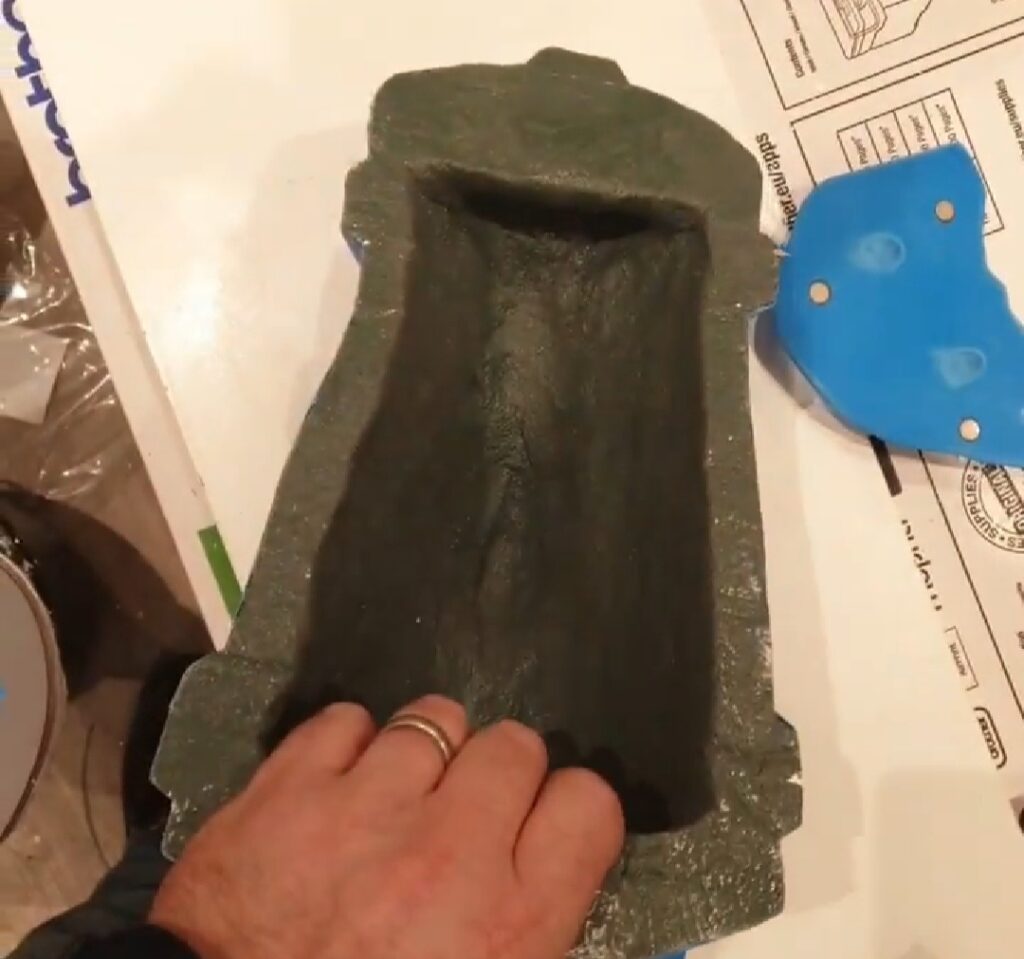
Once the gelcoat has set up overnight, the wooden braces can be removed. I then apply Epopaste 400 Epoxy paste all over the inside, about 12mm/half-inch thick. This is then left for 24 hours to fully harden. Once opened the following day, this is what we have:

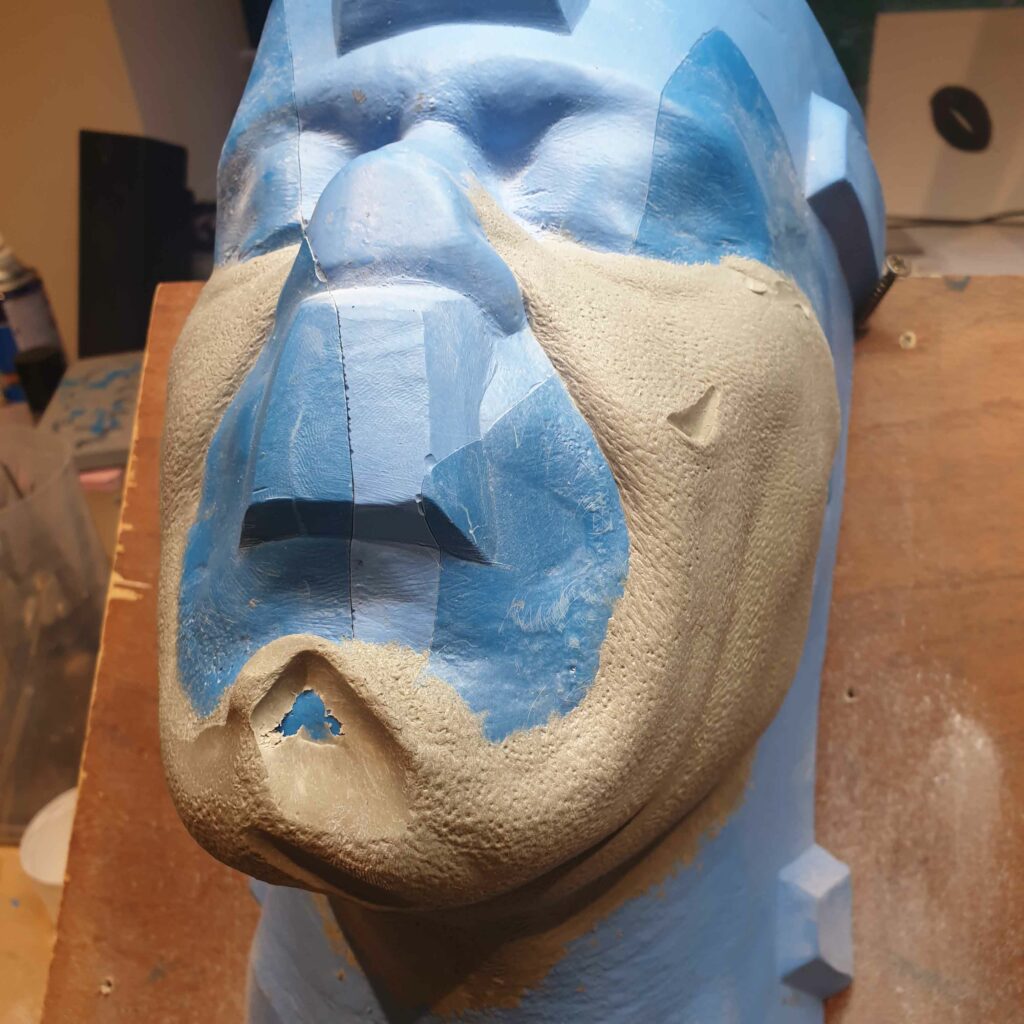
Step 13. Once all made, the plastiline sculpts are finally placed on their respective cores and finished. Textures are added and any inevitable damage caused when being removed from their initial plaster core back in Toronto is repaired.
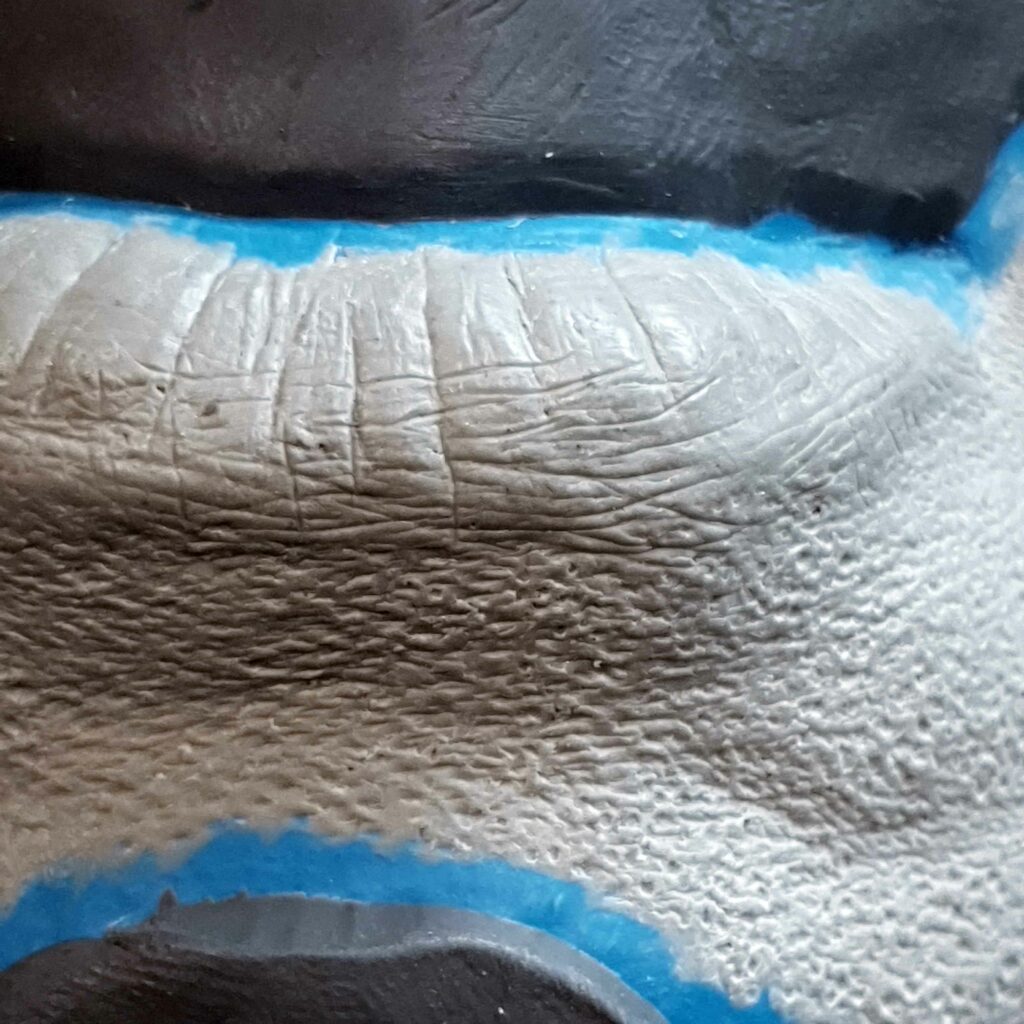

I did manage to drop the facepiece which was rather infuriating – it was a mere twenty minutes to repair but still….it was a bit upsetting at the time. To have travelled so far without incident and then once in my hands it gets smacked about. Oops.
Step 14. Clay walls built up to contain the poured F40 resin on the nose and bottom lip pieces. The forehead and facepiece were moulded using Epopaste 400 just like their cores. The epoxy gelcoat goes on first and was left overnight to harden.
The Gelcoat I had was white, and I prefer a darker surface on a mould as typically, it shows where the cap plastic lands when applying encapsulant, and it’s easier to see the surface details. To that end, I used Smooth-On So Strong pigments (black and dark blue).

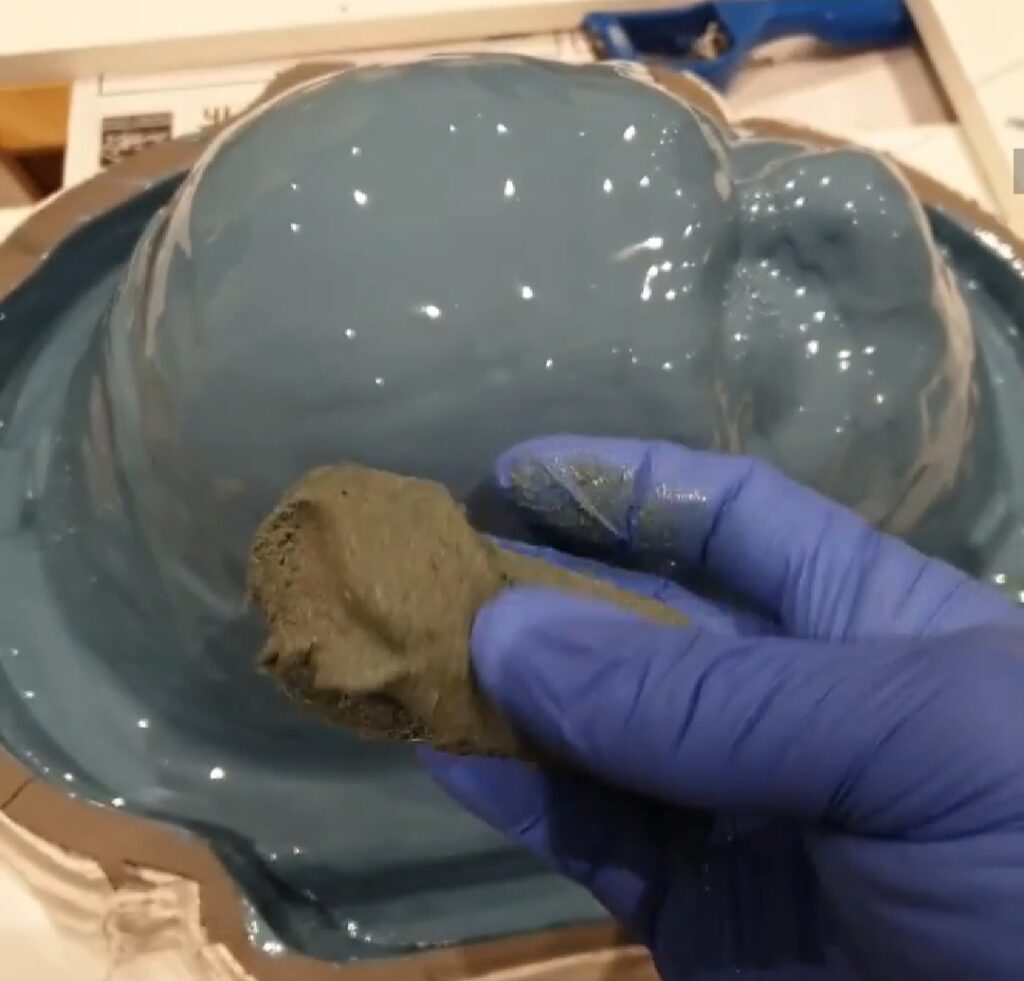
The Epopaste looks kind of like animal dung, but it mixes with the catalyst easily and is easily smoothed onto the surface. I LOVED using it, and as I say, slower than the usual mould materials I liked to use but made a very stable and strong mould.
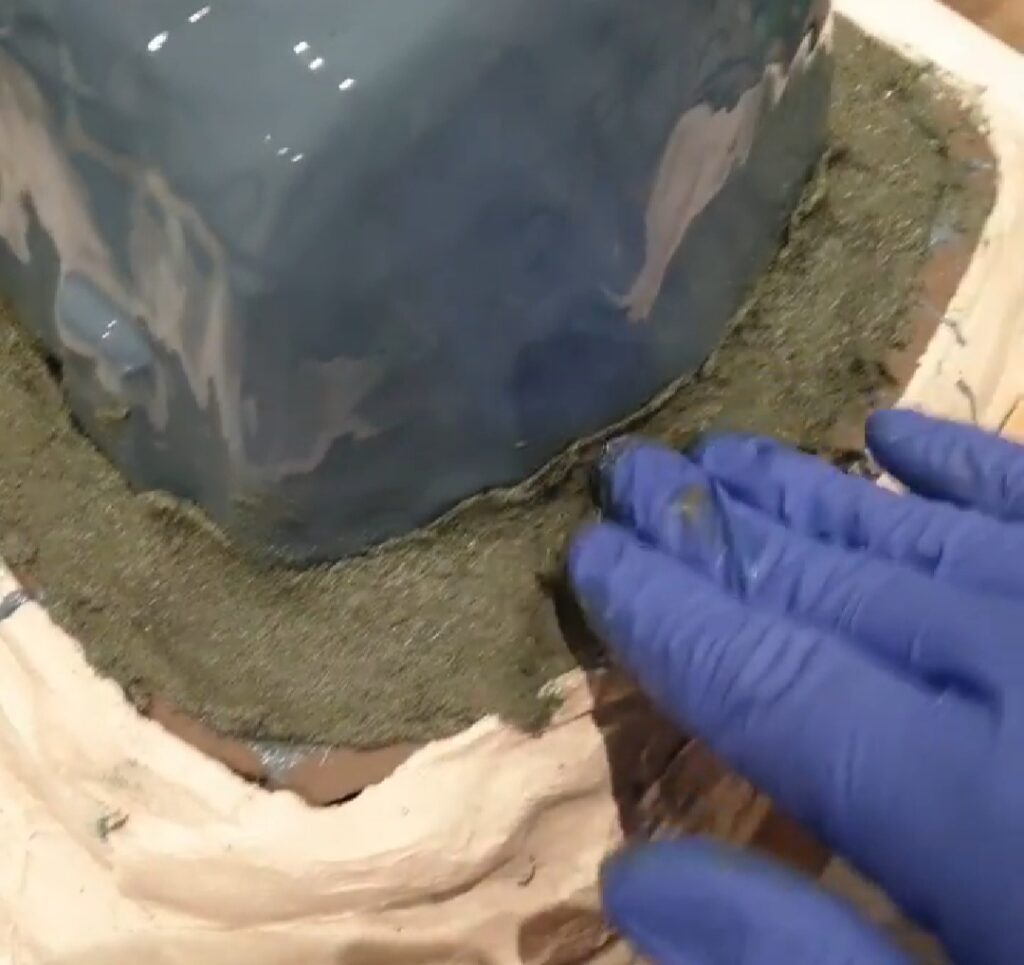
It’s a good idea to make the edge, the area against which we pry when opening the mould, really strong so I started on this area with my limited remaining Epopaste.
Then the outside was packed with the remaining Epopaste. I didn’t have much left so after the thin layer I applied (about 6mm thick) set up, I applied a few layers of plaster and scrim to reinforce the mould. This was all left until the following day when everything had hardened fully. Epoxy moulds are good but slower than polyester and glass moulds.
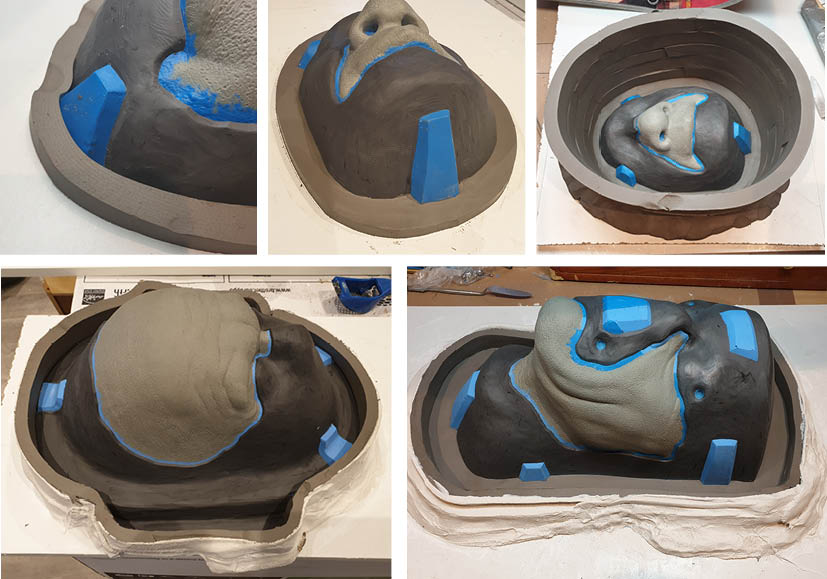
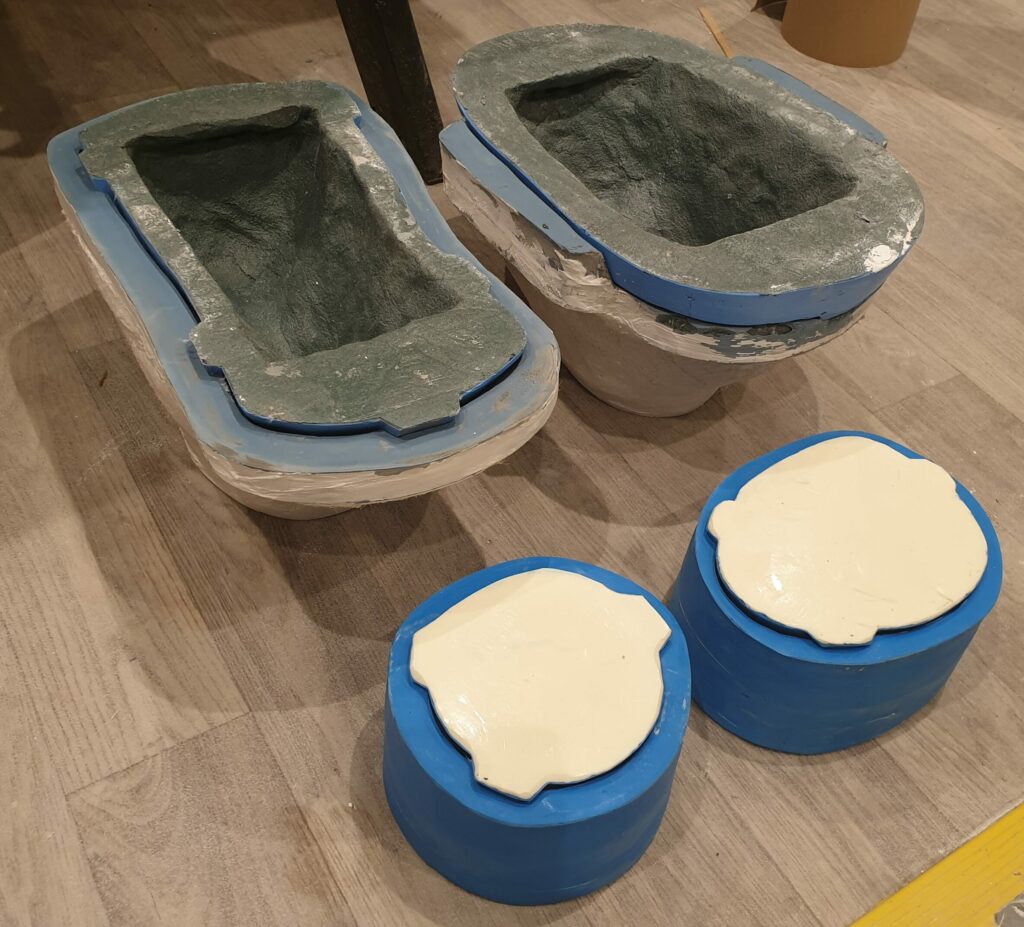
Below are the finished moulds, opened and cleaned out.
Whilst all this was going on, Chris Lyons of Fangs FX was busy getting our dentures ready – more on this later.

I will cover the running of pieces in the next post – this one is pretty hefty and I think I have waffled on enough for one post.
One of the amazing products we used which I was unfamiliar with but Neil recommended was the 4k Longwear Creme makeup which was great for the final look. This makeup is a waterproof, silicone-based buttery cream consistency which can be applied with a brush or sponge, bt also thinned and airbrushed which we showed on the stage. Neil even tinted our anti-shine with it so we kept colour consistent throughout the process. We will cover this in a later post when we look at the application.
Thanks so much for taking a look – we will be back soon with more!
-Stuart