
 Flat moulds are very handy, and can be used to make even rather sophisticated makeups.
However, each time you cast out an appliance it is a performance, and of course things can go awry.
Here are five of the main mistakes often made when making pieces with flat moulds and how to address them! Scroll down to check out the video Mitch and I made at Brick In The Yard to illustrate these easy to avoid issues!
#1. Not releasing the moulds properly.
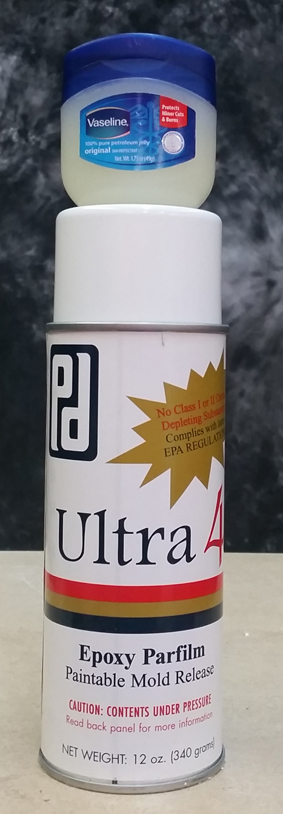
Vaseline, cheap and cheerful and readily available. Ultra 4, a good Epoxy Parfilm isn’t cheap but t is excellent!
Silicone is renown for it’s release properties – it’s one of the reasons its a great material to make moulds out of. However, it it can grip cap plastic well enough to ruin a piece during removal.
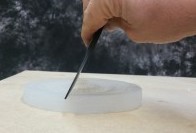
If cap plastic sticks a little to the mould, it can cause the silicone gel of the appliance to come away from the cap plastic, and this is known as delamination. It can be repaired if it happens in a small patch, but it’s naturally better to avoid this completely by ensuring the mould is correctly released before the cap plastic is applied.
Silicone is a material which is thirsty for oils. It is certainly waterproof (show close up of mould in water and beading up) but oils and some solvents can be absorbed into the surface of the silicone mould – solvents including those of the cap plastic. It is possible to paint your cap plastic onto a bare mould and have it stick either completely or just slightly enough to damage the edges of the delicate appliance.
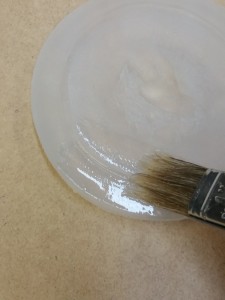
The way to help stop this from happening is to smother the mould in a thick layer of Vaseline and leave it for an hour or two. Let the thirsty mould absorb and drink in as much of the oily Vaseline as it wants. Then, you can wipe out the excess which is filling in all that precious detail, and either apply a thin layer of Vaseline (or any petroleum jelly -I’m not brand-fanatic!) rubbed well in, or spray it with a mould release such as an Epoxy Parfilm.
This is especially true of new moulds which have not yet had any release applied to them.
The point is, if the mould has been allowed to suck up all that oily Vaseline, it won’t suck the release you apply or the thinned cap plastic. The result is the appliance should more easily come out from the mould, meaning less stress on that precious, fine cap plastic barrier.
#2. Not Applying The Cap Plastic Barrier Correctly.
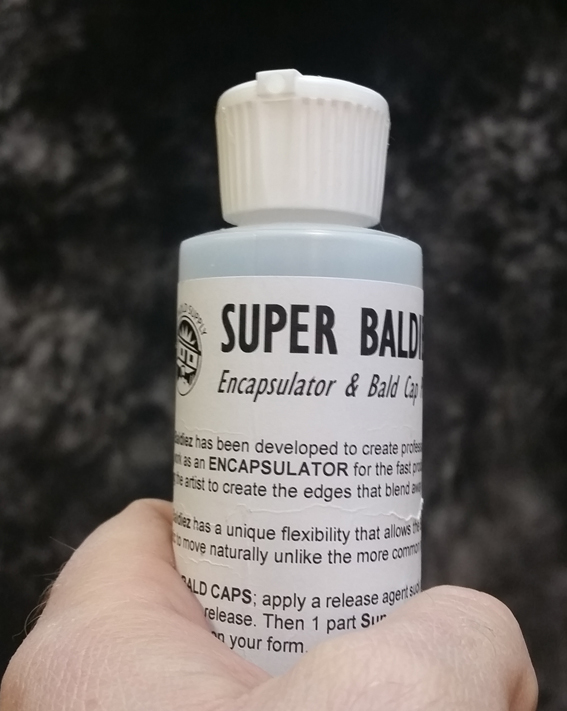
Super Baldies, the magical barrier which works amazingly well for appliances.
Appliances obviously need a thin edge to successfully blend into the surrounding skin, but it is possible to apply it too thinly which can result in a barrier which has holes in it.
This could mean it can tear when removing the piece from the mould, and make it difficult to apply if the flashing is no longer attached.
If airbrushing, make sure the cap plastic is thin enough to successfully go through the airbrush without clogging or cob-webbing, but also not so thin that there isn’t enough cap plastic actually being left behind on each pass. The more thinned the cap plastic is, the more layers you will need to apply in order to achieve a desirable thickness.
It is important to spray your cap plastic right to the edge of the mould, so that you can pick up the edge and lift it with a pin to see the thickness remaining.
 Remember the solvents will evaporate – it is the cap plastic which remains.
By lifting the edge with a pin on a few different places around the mould, you can monitor the actual thickness of the barrier. If it isn’t thick enough, you can add more and by checking at the edge of the mould, you won’t damage the appliance itself.
If you get the barrier too thick and apply too many layers, then the final appliance will leave a noticeable thick edge on the skin and make it hard to blend. If you do have a barrier which is too thick, it’s better to pull out the barrier and start over, making sure to step back this time. You can add more layers if it’s too thin, but you can’t take them away again!
How thick is too thick?
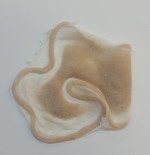
It’s hard to define it because the thickness’s involved are too small to measure, but once you have a cap plastic barrier which has tiny pinholes visible when stretched out on the pin, it’s time to add another layer and that should do it.
I usually thin cap plastic with 5 parts solvent when airbrushing, and 3 parts when applying with a standard brush.
It is hard to say just how many layers you apply, as more solvent-heavy mix means you will need more passes to accumulate the plastic thickness. Remember, the solvents evaporate away – only the small percentage of that mix which is cap plastic will remain! It may appear like a heavy slick applied, but most of that will evaporate away!
Some people panic and whip the airbrush across the mould really quickly, leaving a light coat each time. Others are slower or use more pressure when spraying, and consequently leave more cap plastic as a result. The trick is to do what you do, and regularly check the result at the edge of the mould to see what you have left. That way, you will get a feel for how many layers YOU need to apply, based on how you work.
Airbrushed barriers are thinner, more consistent and evaporate quicker but naturally require you to have access to an airbrush and compressor. If you have a wide makeup brush (or even a chip-brush at a push) to use instead, this will be fine as an alternative.
It won’t be as neat, but it will work!
#3. Not Scraping The Mould Properly.
Once the cap plastic is applied, you pour in your silicone gel and you need to scrape the moulds quickly and cleanly to make sure edges are thin. Make sure you use a scraper which is wider than the mould so you can do the manoeuvre in one, swift movement. You can use plastic or steel scrapers – it really doesn’t matter which.
Scraping at a good angle will help ensure the silicone is scraped properly. Too low an angle means that the blade of the scraper flexes too much. If the scraper is held at 45° or more, then you are likely to get a cleaner edge.
It may take a few attempts, but if you press firmly when you wipe the scraper, you should completely wipe clean the silicone from the cutting edge.
If you place a light source such as a desk lamp on the opposite side from your viewpoint, you can see the light reflecting off the shiny surface of the silicone. This will make it much easier to see if the cutting edge of the appliance is totally clear of silicone. You will know it is clean when you can see the edge of the mould as a bone-dry ridge, surrounded either side by shiny silicone. If it isn’t bone dry, then you need to scrape it again or use cotton tipped swabs to wipe it.

The bone-dry cutting edge of the appliance is a sign that the appliance should have good edges.
Using cotton swabs will take a little longer than scraping it correctly, so if you have many moulds to run at once, it really helps to get your scraping technique down!
Wiping the edges of twenty moulds at once with cotton swabs may mean the silicone starts setting up before you get to the last mould and that stress isn’t fun.
If you do have lots of moulds to run or the weather is warm where you are, consider running fewer moulds at a time so you have enough time to adequately scrape them. You can also chill the components or use a retarder to slow the cure!
Obviously make sure you pour and scrape on a flat and level work surface, and allow some space between each mould. If you are using he same scraper for multiple moulds then be sure to keep some paper towel handy to help clean the scraper and deal with any spills or drips that can easily happen when you are working fast.
#4. Not Allowing The Cap Plastic Enough Time To Evaporate Before Removing Appliance.

Patience, Jedi! Allowing time for the cap plastic to mature and firm up is an important consideration.
This is a big one, and can make a huge difference to the quality of your appliances. Essentially, it takes a while for cap plastic to reach it’s full strength, and rushing the demould can stretch out the cap plastic too much.
The solvents used in cap plastic, either alcohol or acetone, do appear to evaporate quite quickly. However, small amounts can remain for some time and this can mean the cap plastic remains weak until it has completely flashed off. It’s a good idea to leave the cap plastic to dry up for an hour or more before filling with silicone if possible, and leaving the mould for a few hours or preferably overnight before actually removing the piece from the mould.
If you do leave it long enough to mature like this, you will find you can get pieces out of a well released mould with much thinner edges than you thought, making it possible to have pieces which blend into the skin much better.
#5. Storing Appliances Badly Before Use.
A appliance stored badly can fold and flap about, damaging it permanently.
The best way to keep appliances safe until they are ready to use is to pin them to foam core board through the flashing. This way they are kept flat and secure, allowing them to be transported more easily.
By trimming the foam core to a size which fits neatly into a box, you stack layers of pieces in this way, protecting the lower layer from the one above it with layers of tissue paper or paper towel.
If appliances flap around and get folded over or crushed, they can take on creases and become damaged permanently. By pinning them onto a board carefully, you can be sure that the piece is kept flat and won’t move around during transit.

Pin that bad boy down, and it will stay nice and flat no matter how bumpy the ride!
I like those beaded pins you can get, although T-Pins (the kind used for holding wigs to wig blocks) are also pretty good. They don’t need to be especially long pins either – 25mm/1 inch would be plenty long enough.
When pinning them, make sure the pins go in at an acute angle rather than 90°. That way, they appliance won’t slide off the board, and the pins will stay in the foam core better rather than poking through the other side. If that happens, you can damage the piece underneath, or even yourself. Ouch!
If foam core isn’t easy for you to get hold of, then sections cut from a cardboard box will do the job okay. Essentially, it just needs to be flat and thick enough to retain the pins. The ‘Really Useful Box’ company make various sizes of plastic storage boxes. These kinds of boxes are ideal for stacking layers of foam core laden with appliances for ready access later.
Check out the BITY YouTube channel for a ton of cool videos. Those guys keep it fresh!
Drop me an email or comment below. I’d love to hear from you! My direct email is stuartbray@yahoo.com
-Stuart
dose it will work with me if i use only Vaseline ?
I want to put the advertisements in blog, so I can get payments?.