
 Ready to start making the mould.
Now the sculpt is done, I am making the mould in fibreglass. This will be in two pieces, so I need to pop a clay wall on the head to make the two halves.
First though I need to make the cutting edge around the appliance, to make the mould touch down onto the core around the edge of the piece. This makes the mould that will sit on here very tight on that edge, so we (hopefully) get a better thin edge.
I am using plastiline to make the edge, and the technique I prefer is to have the plasteline sitting on a warm heater for a few hours so it is soft – not molten, but soft like clay. That way it is easy to roll into sausages and pop around the edge, extending out a couple of inches back from the appliance edge. It takes me about half an hour to roll out the sausages, push them flat and blend them with a tool to create a smooth plastiline-blanket of even thickness (about 2-3mm). This will act as an ‘overflow’, so excess material can escape when we fill this mould later.
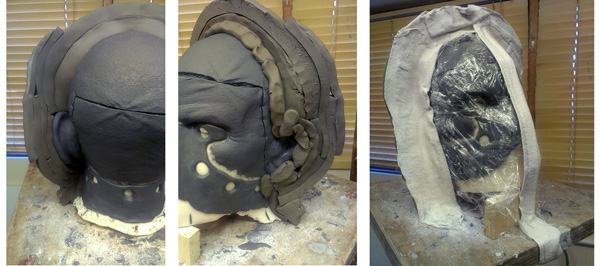
This will stop the mould from touching the core except around this edge and the touch-down keys which I add next. These are just little holes about 12mm/½” which will be evenly spaced around the overflow. I will add screws or bolts through these to attach the mould later.
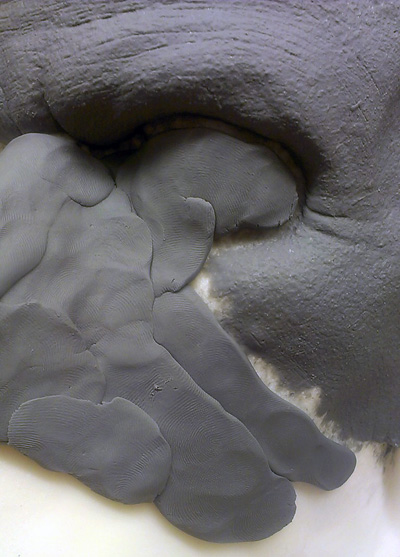
Then there is the business of adding the clay wall. I want to quickly do this, and usually I have a clay cutter to slice the clay…but in my haste I can’t be bothered to hunt it down so I instead roll out a clay sausage and flatten it out. Then, slicing it neatly to make a long rectangle with straight sides, I can lay then carefully onto the head to create the wall, building them up in layers. This is a technique I believe I use since I saw an amazing mould maker called Brian Best.
[stextbox id=”black”]To see Brian’s incredible stuff, do check out his Facebook page Advanced Mould Making Design & Casting techniques. It is a real treat for mould nerds. I have known Brian for years, and we have made many, many moulds together.
A consummate professional and incredibly nice guy. [/stextbox]
Once the clay is on, I cover the front in cling-film and add plaster bandage to support the walls. The cling film allows me to pop all this off later, hopefully leaving an unscathed sculpt underneath. When the bandage has fully set, I can press against the clay to flatten it smooth with a tool.
Why not make the wall in one piece of bigger clay, I hear you ask? Well, thinner strips bend more easily around curves, and once the bandage has set up, it actually takes little more than ten minutes for me to smooth the joins out to make a smooth clay surface.
I usually do the back half first, as my habit is to get warmed up on the back, the side usually least seen, and then you can in theory lay the head on it’s back to do the front with greater ease. In this case, I don’t actually do this – as I glass the front with it still upright. But that is the habit I have and it works out for me.
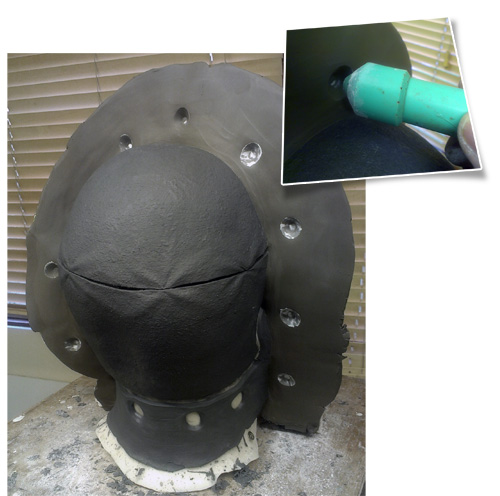
To make the two halves of the mould sit tight, I put keys around the clay at regular intervals. I use talc to stop the key tool from sticking to the damp clay, as suction can cause the clay to come away with the tool.
This tool is a resin cast of an aluminium tool turned up a while ago – I can’t recall who made the original but I’ll bet there are hundreds of these rolling around tool boxes in the industry. It’s often happens with left over materials.
Then I wax this fella up using a liquid wax I have. You can of course use an aersol/spray wax but guess what I don’t have? So, being a budget job, I rustle up something from the depths of a store cupboard, and wax this bad boy up with two coats.
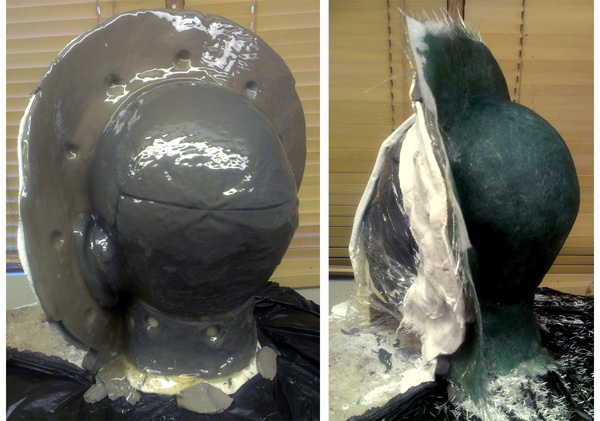
That is the back half glassed up, gelcoat…left for 30 mins, and then backed up with two layers all over, an extra on the flange and tissue it for good measure. Now, just gotta go do the front. Which reminds me, the gelcoat will have set …
Like NOW, Scoob.
See you tomorrow!
-Stuart