
Sometimes you break stuff.
Knowing how to fix it is handy!
Fuck!
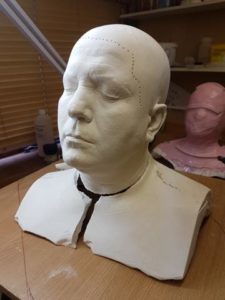
I was an utter arse recently when I tried to save a few minutes work by just using plaster when casting out a head.
Normally, it wouldn’t be an issue as good plaster is strong, and I have almost never had a cast break through neglecting to reinforce it, especially as this was just a master to clean up and remould. It was never intended for punishment.
Well, I trimmed the shoulders off and got impatient, and after cutting part way through the shoulder, decided to whack the crap out of it with a mallet in the hope such percussive persuasion would cause said section to leap helpfully off the remaining cast without whine or worry.
This did not happen.
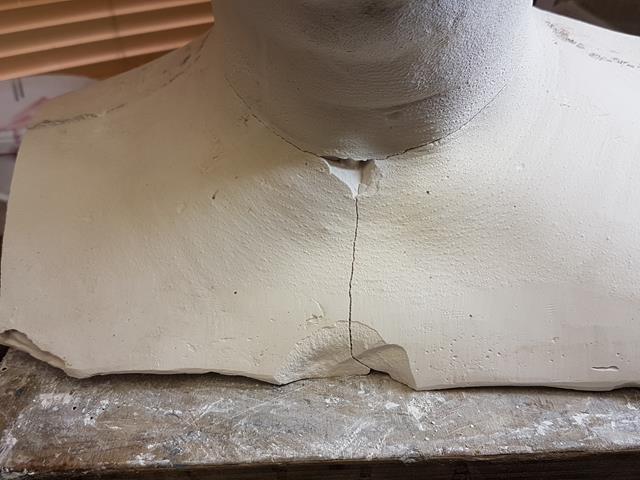
Instead, the hollow shoulders suddenly broke and the head tipped back, broken clean through across a fold in the neck where presumably the plaster was thinnest.
 I fortunately caught the head before gravity played its full measure of trickery, but even so, it meant my beautiful lifecast was now in three pieces instead of the convenient single article. Utter fuck.
Still, what’s learned is profit. Here is what I did to repair it, and rather jolly it was too.
Step 1: Get Over It
Invent your swearwords, mourn the loss of the imagined perfection and soothe the strain with a cup of tea/beer/shot of single/malt/all of these. Point is, if you’re still fuming, you aren’t likely to improve the situation with uninformed haste. Doing the first thing you think of very quickly and whilst swearing isn’t likely to help you, so make your peace with it.
Step 2: Check The Fit
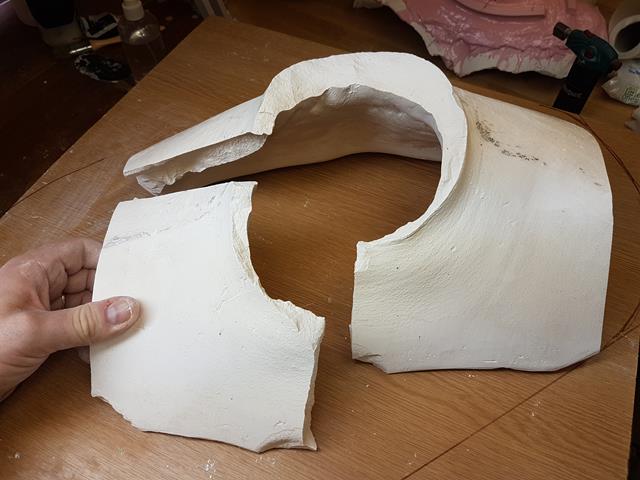
The pieces were quite complete and readily fitted back together. Check the joining faces are clear of debris or loose crap.
Step 3: Stick It Back Together
I used PVA glue (the cheap white water based glue used in sealing brickwork for plastering) to glue the shoulder pieces back together. I left this for an hour or so and then I used plaster bandage to reinforce the plaster from inside the shoulders.
You could use superglue, that would work fine too but I had the other head to work on so I wasn’t in a hurry. The trick with repairs like this is to accept the time penalty, and not to hasten things too much or else incur further error and damage. I leave the glued parts alone for an hour and then carefully back it up with some plaster bandage to add some mechanical strength.
Plaster bandage is used to carefully supply support whilst the glue dries.
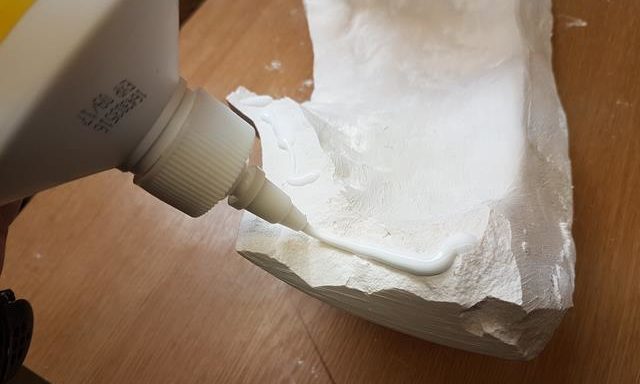
Popping the head upside down into an empty plastic paint kettle (a bucket filled with sand or gravel is an excellent device for holding peculiar objects at convenient angles – see this video & post on supporting a tongue mould I did a while back) I apply glue to the broken edge of the neck.
Apply a generous amount, and seat the shoulders in place, ensuring that it sits at an angle at which it can remain – don’t need the shoulders falling off when your back is turned.
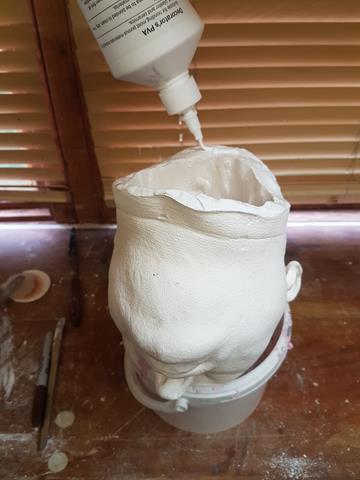
With sufficient glue applied, you will no doubt get excess squidging out as the plaster faces meet. If so, wipe this clean with a damp cloth or tissue (I keep a pack of cheap wet wipes on hand by the bench) before it dries as this will be a pain to do so later.
Ensure to wipe clean any beads of excess glue which creeps out of the join before it hardens.
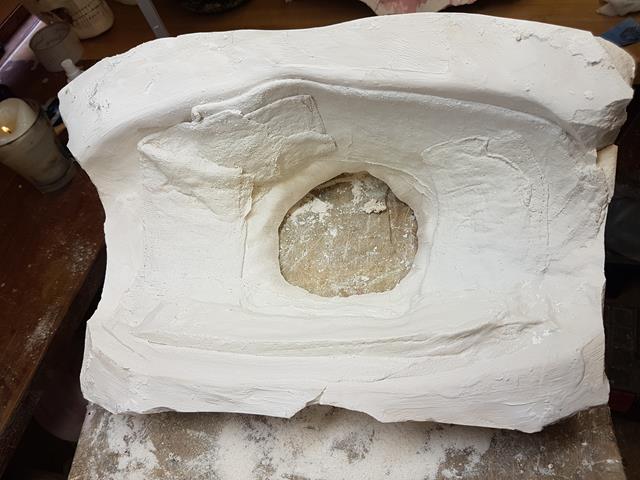
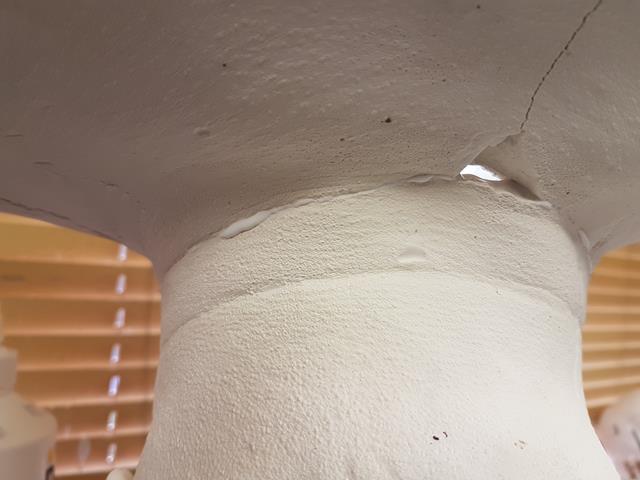
Step 4: Reinforce the Billy-O Out Of It
Whilst the head is still inverted, some scrim fabric and a runny mix of plaster is used to reinforce the inside. The runnier plaster is so that it grabs a hold of the existing plaster better. Were I to add a thicker mix of plaster then it will have its reduced water content sucked out by the drier and absorbent making it a weaker join.
After an hour or so, the whole thing is sound and secure. It doesn’t look especially pretty but now nothing will drift or loosen. I can now mount this to a board and make good.
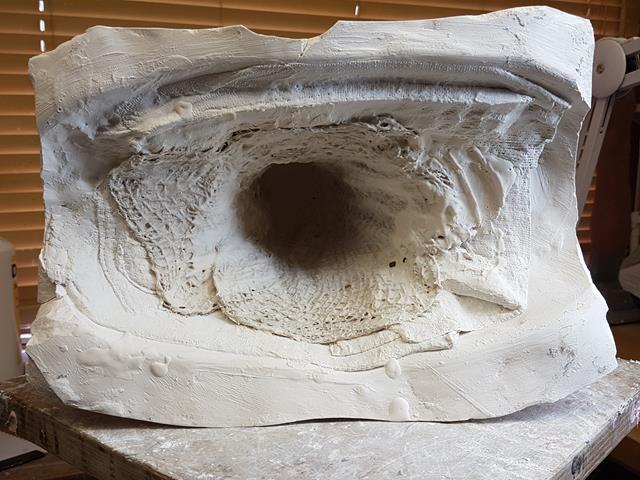
Once the head is leveled and attached to the board with screws, a batch of plaster is worked into the open shoulder ends and any cracks, bubbles or deficiencies which need filling or leveling out.
I like to scrape it back just as it sets to smooth it and rinse water as it hardens to achieve an alabaster smooth finish. By using a weaker plaster to fill the remaining holes and cracks, I am less likely to inadvertently damage the cast head itself with the scraping and smoothing tools.
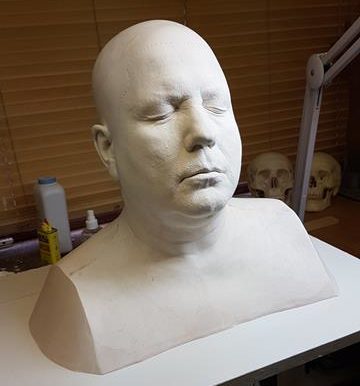
The finished repair, ready to master mould.
For a more extensive example of fixing plaster, check out these three previous blog posts covering the fixing of a new face and how to mount the shoulders to a baseboard for secure fixture:
- http://www.learnmakeupeffects.com/bending-the-faces-of-vampires-part-1/
- http://www.learnmakeupeffects.com/bending-the-faces-of-vampires-part-2/
- http://www.learnmakeupeffects.com/bending-the-faces-of-vampires-part-3/
Right, I’m off back to the workshop to finish these moulds!
TTFN
Stuart