At IMATS London 2019, I sat and had a great chat with Rick from Bolton University. For those that may not be aware, a breif Rick bio:
“Richard is a senior lecturer and Programme Leader of the Special Effects for Film and TV degree at the University of Bolton. He’s been teaching at the university for several years and specialises in character work, in both the prosthetic make-up effects and model-making fields. “
In the episode, we talk about the massive effect 3D printing and technology is having on what was previously a traditional skills area. What is cool is that new blood is coming in, taking on board the new tech and learning old skills for the first time in equal measure, making something new and quite special as a result.
He is an interesting chap and has, I think you will agree, a very good voice for radio! Give us a listen and let us know what you think.
Stream or download below, we are also on Spotify, iTunes, Soundcloud and YouTube … basically, wherever you get podcasts!
Subscribe to make sure you don’t miss the latest episodes!
Incidentally, all the lecturers at Bolton have been doing great work there for years, making a real impact on the quality of work and competence the students leave with. The lecturers and support crew in all the courses at Bolton have been so generous and supportive, they really do deserve a shout out.
We recently collaborated with various mentors to support their recent Island of Dr Moreauproject which was filmed this past week. More on this exciting collaboration with Matt Winston from the incredible Stan Winston Character School of Character Artshere.
In the chat with Rick, we discuss various things, and I mention a He-Man and a Skeletor suit made for a Money Supermarket commercial built by Legacy FX. Check out the cool behind the scenes video of David Monzingo, Brian Best and Myself wrangling suits for the commercial shoot in London here. I was lucky enough to help out just for a day – David and the Legacy FX team handled the build and full shoot days – it was a blast!
Todd and I chatted about safer mould materials, which is great for anyone with limited workshop access, open spaces and extraction. This led to an interesting discussion about comparing plaster and resin use in the UK and USA for mould making. The materials we mentioned were acrylic polymers to be used with Gypsum, and sound similar in regards to mixing and properties:
We also discuss the workspaces used by students in makeup schools and colleges, measuring accuracy in CAD and ZBrush and the amazing work of Landon Meier. If you haven’t seen his stuff, it really is incredible and you can do a lot worse for entertainment than check out his stuff here: http://www.hyperflesh.com/
In this episode, I got to chat with Matthew Mungle and visit his jail cell!
Matthew and his company, WM Creations have been responsible for makeup effects on scores of shows and racked up a lot of awards and nominations in the process – for a deep dive into that, check out Matthews IMDb profile.
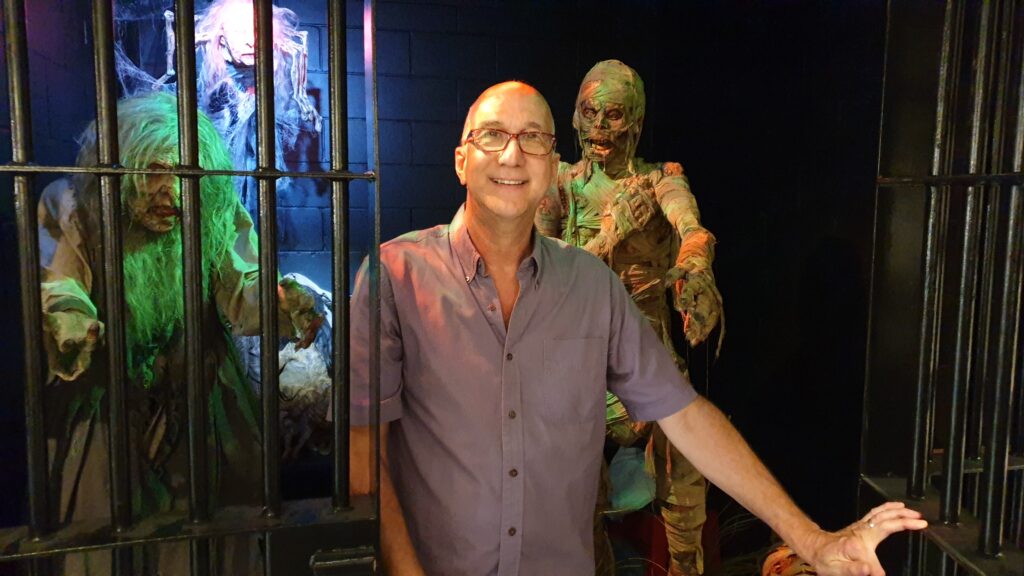
The actual real-life holding cell in the studio, now decked out with suitably spooky decorations and effects! So much fun.
Todd and I also wax lyrical about the joys of epoxy and plaster, silicones we like for flat moulds and release agents for Pros-Aide transfers. We both like a firmer silicone as there is naturally some pressure that goes on when pressing a scraper over the back of the mould – so a soft silicone mould will compress too much and underfill if you are not careful!
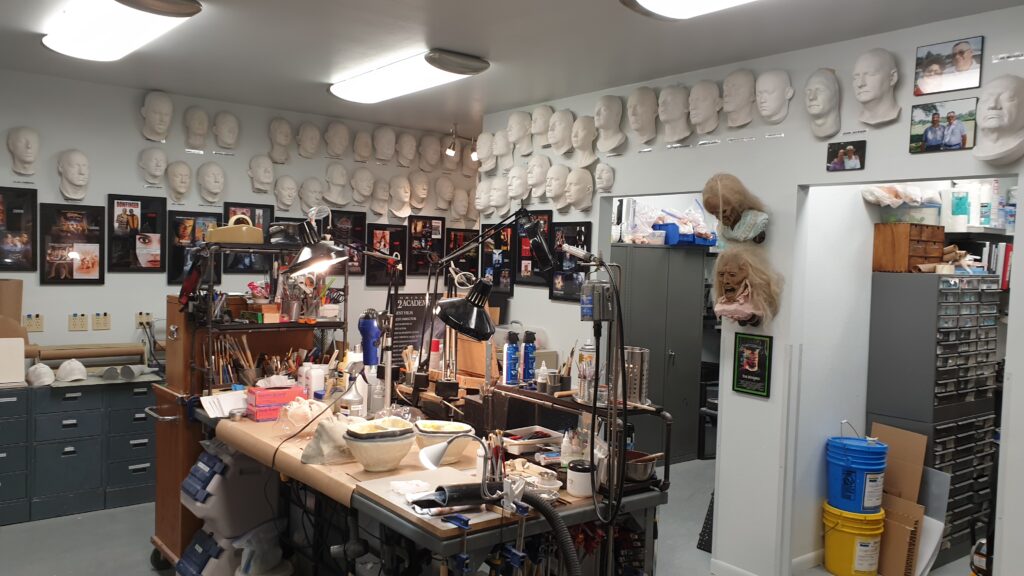
One of the sculpting areas in Matthews studio.
Matthew talked at length about the process of taking a script, breaking it down and assigning it into a series of tasks – details which you don’t often hear people talk about. He always wanted to do his own thing, and so he learned how to please a crew and producers before being a freelancer – getting the priorities right:
Learning how to delegate and let things go whilst still controlling quality.
How a job gets from words on a page to a series of jobs, and then pieces of rubber on a set.
How a TV show is like a train that leaves the station that doesn’t stop until it gets to the end of the line.
Deciding what will be practical or visual fx.
Will an effect be suitable for the target audience to keep director, producer and network happy.
Discussing the effect with the appropriate crew like DOP and what to prep for.
Stream or download below, we are also on Spotify, iTunes, Soundcloud and YouTube … basically, wherever you get podcasts!
Subscribe to make sure you don’t miss the latest episodes!
Listen on YouTube too:
The video tutorial I mentioned on Freeform Sculpt and Freeform Air is here. (It was a squirrel – not a duck as I mentioned).
WM Creations have a range of FX materials such as Soft Sealer, Old Age Stipple and Alcohol Colours, and are available from good retailers such as BITY in the US and The Makeup Armoury in the UK.
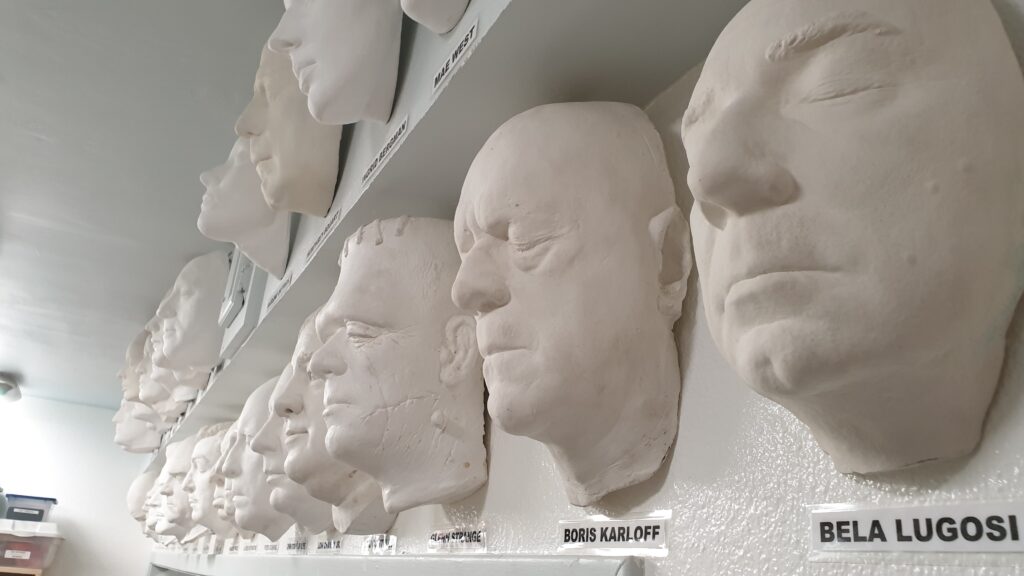
There are endless rows of lifecasts all over the studio – talk about reference material!
Thanks for listening! If you enjoyed this podcast, please consider letting everyone know – tell a friend, share this episode on the socials and leave a comment or review on iTunes if you feel moved to do so!
In this episode, Neill Morrill joins me in the workshop as we hit up Todd in Colorado and chat about our collaborated efforts on the makeup we did for The Prosthetics Event 2019.
Neil is originally from the UK but moved to Toronto in the early 2000’s and has worked on a number of high profile shows over the years such as 300, The Strain, Suicide Squad, Hereditary, It, Shazam! and the What We Do In The Shadows series.
Stream or download below, we are also on Spotify, iTunes, Soundcloud…wherever you get podcasts!
Subscribe where you get your podcasts to make sure you don’t miss the latest episodes!
It was an absolute joy working with Neil on our homage to Rick Bakers‘ ‘Reverend Brown‘ makeup on Arsenio Hall from 1988 classic Coming To America. Neil had the idea when chatting to our makeup sponsor Sian Richards when bouncing ideas around. The upcoming sequel recently finished shooting, and so Neil picked that as a good contender as a challenge for us to do – separated as we are by 3, 500 miles of Atlantic ocean.
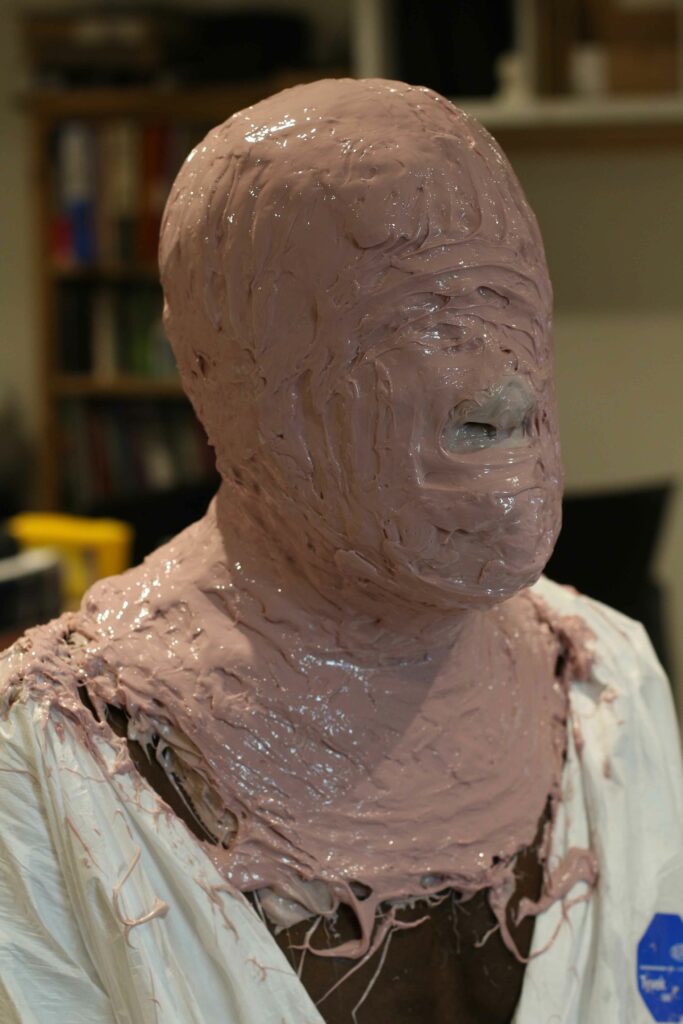
British Rapper and DJ Normski agreed to be our victim, and so we set about hatching the plan. Obviously distance like that adds tricky elements to a physical process such as sculpting and moulding pieces, so we worked out a share of labour which was as follows. Video was shot and I will edit together the whole thing as a complete tutorial in more detail, so this is an abridged verion:
Step 1. Stuart lifecasts Normski at his studio using silicone to make a durable mould of his full head. Weight is a consideration as this silicone and plaster bandage will be shipped to Neil in Toronto.
Step 2. A plaster is cast out and kept in the studio as a backup and to be master moulded there.
Step 3. The silicone and plaster bandaged lifecast mould is carefully packed and shipped to Toronto. (A prayer is said to both the Gods of Lifecast Safety and Safe Shipping).
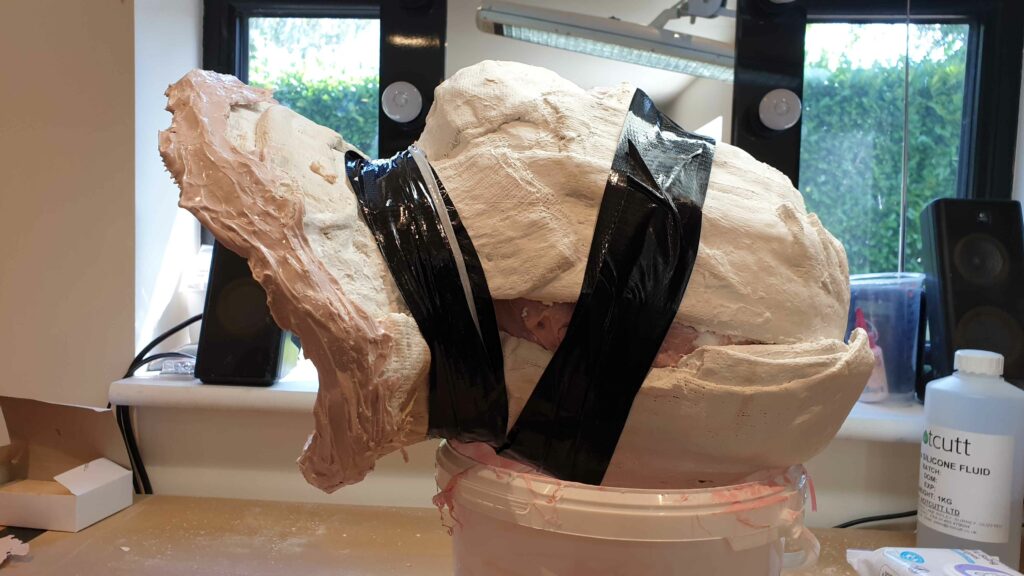
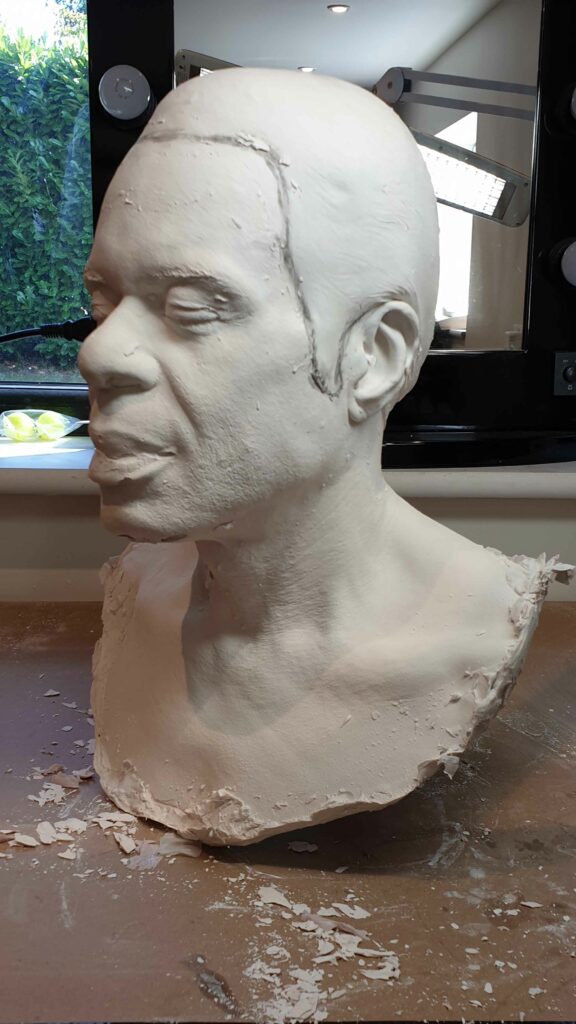
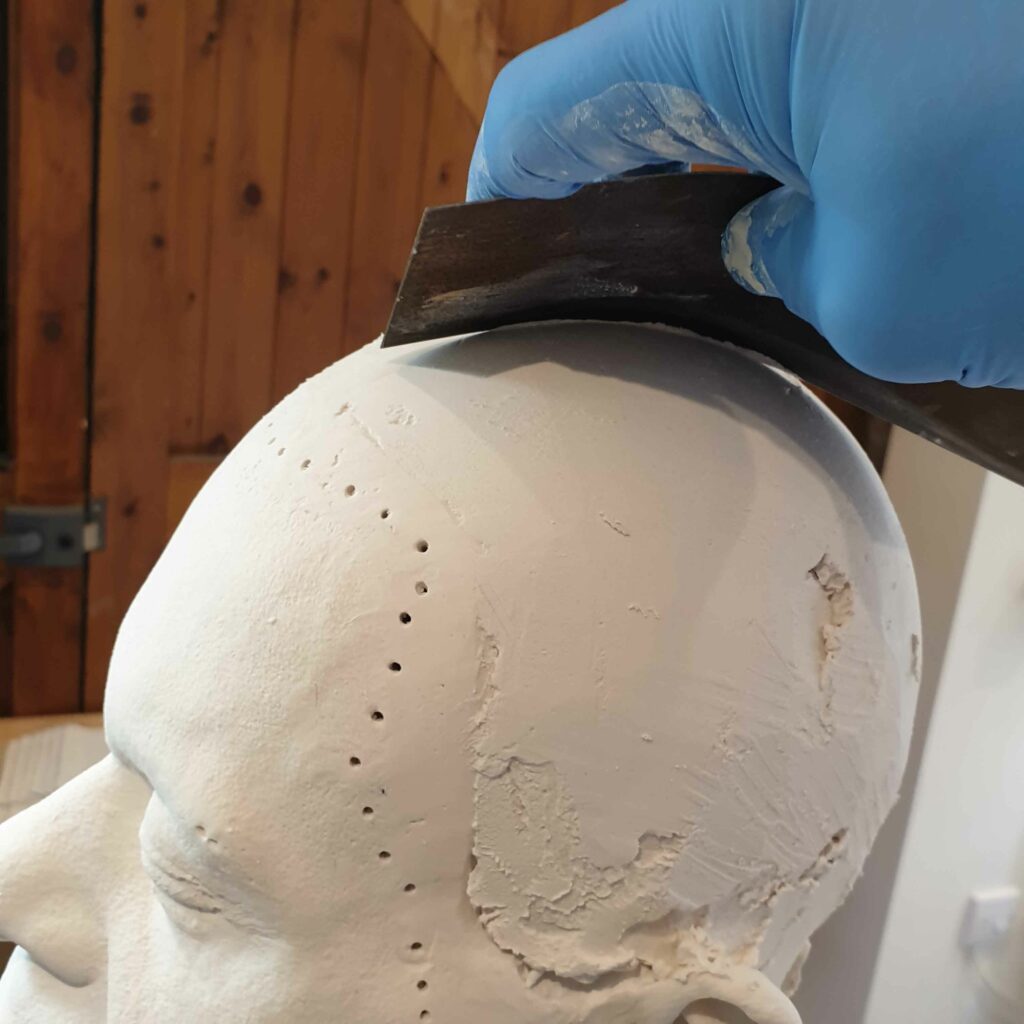
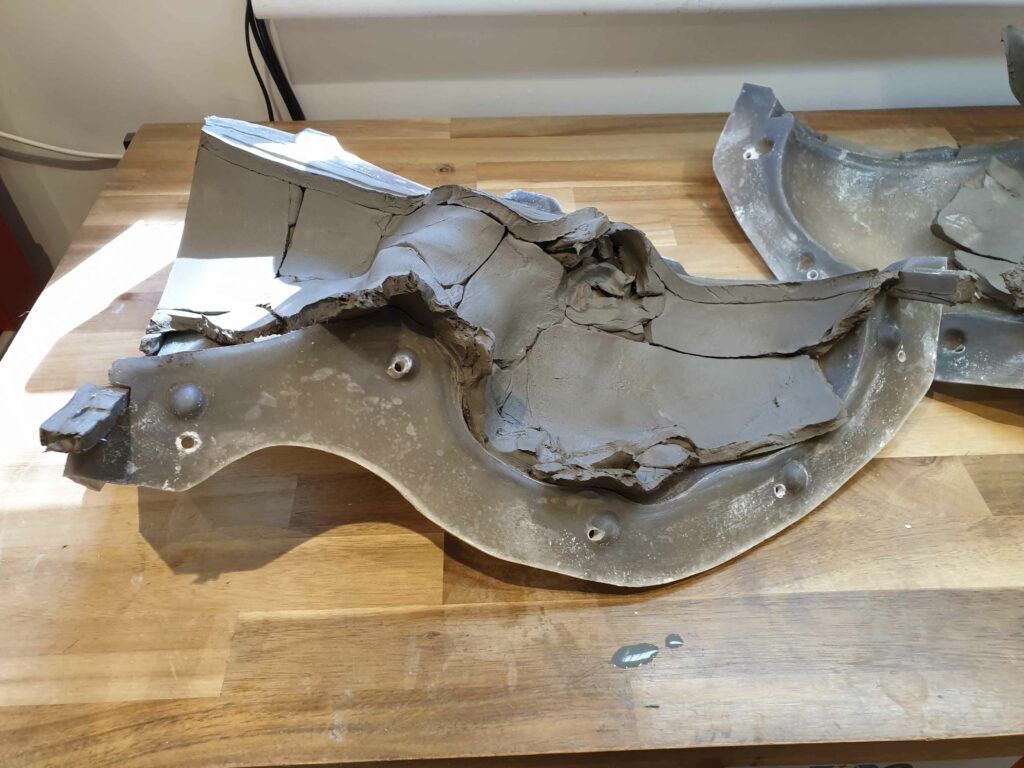
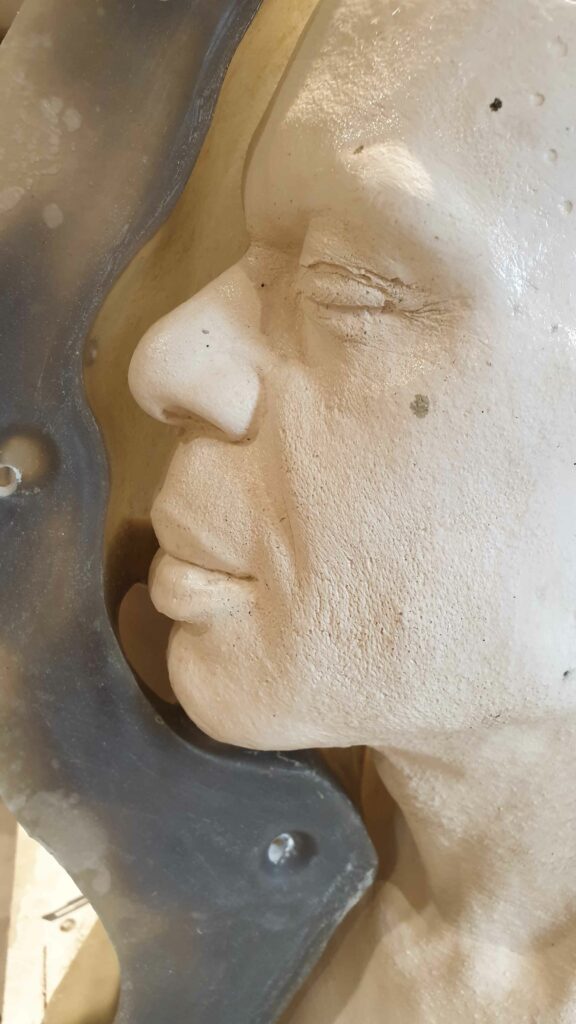
Step 4. As the precious cargo is making it’s way West, Stuart begins to clean up the plaster ready to remould. The man issue is Stuart’s lazy hair management – the afro beneath the baldcap was not flattened down. This means a volume of plaster as seen in the picture above has resulted in a solid mass which is larger than Normskis actual head measurement.
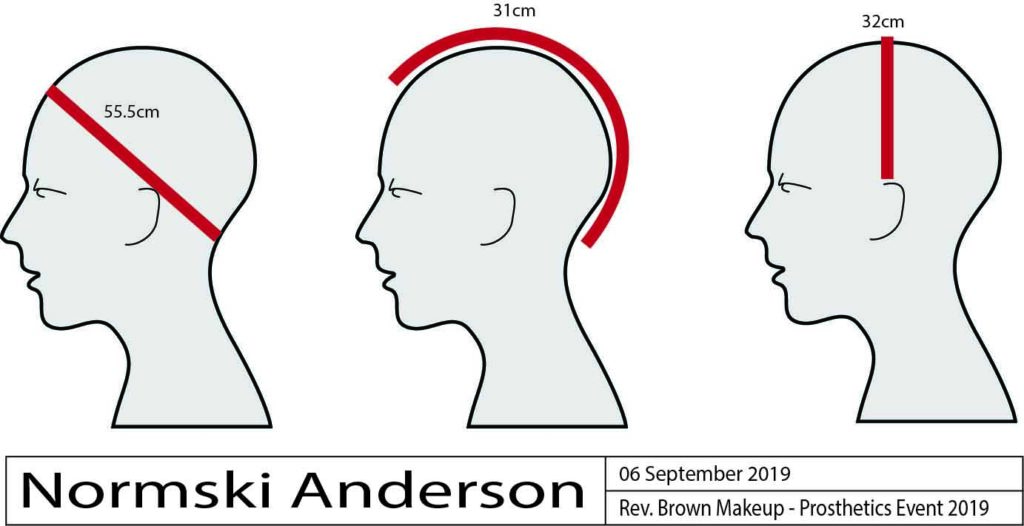
Stuart then attacked this as best he knew how by cleaving the entire hair portion off from the head and rebuilding it to the correct dimensions shown above, taken using a tailors tape on the head before lifecasting. It’s always important to measure the actual head, as hair can be pressed down in the act of measuring to secure accurate dimensions for wigs etc.
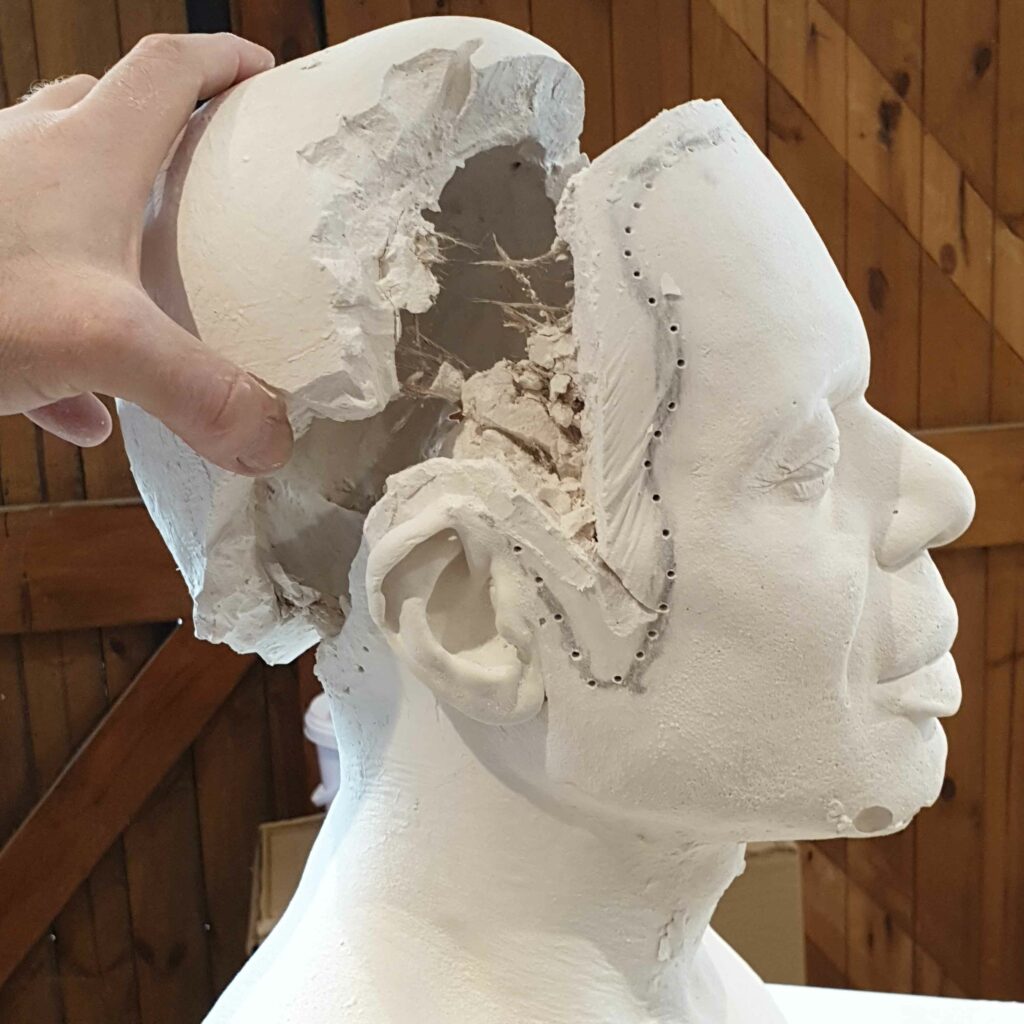
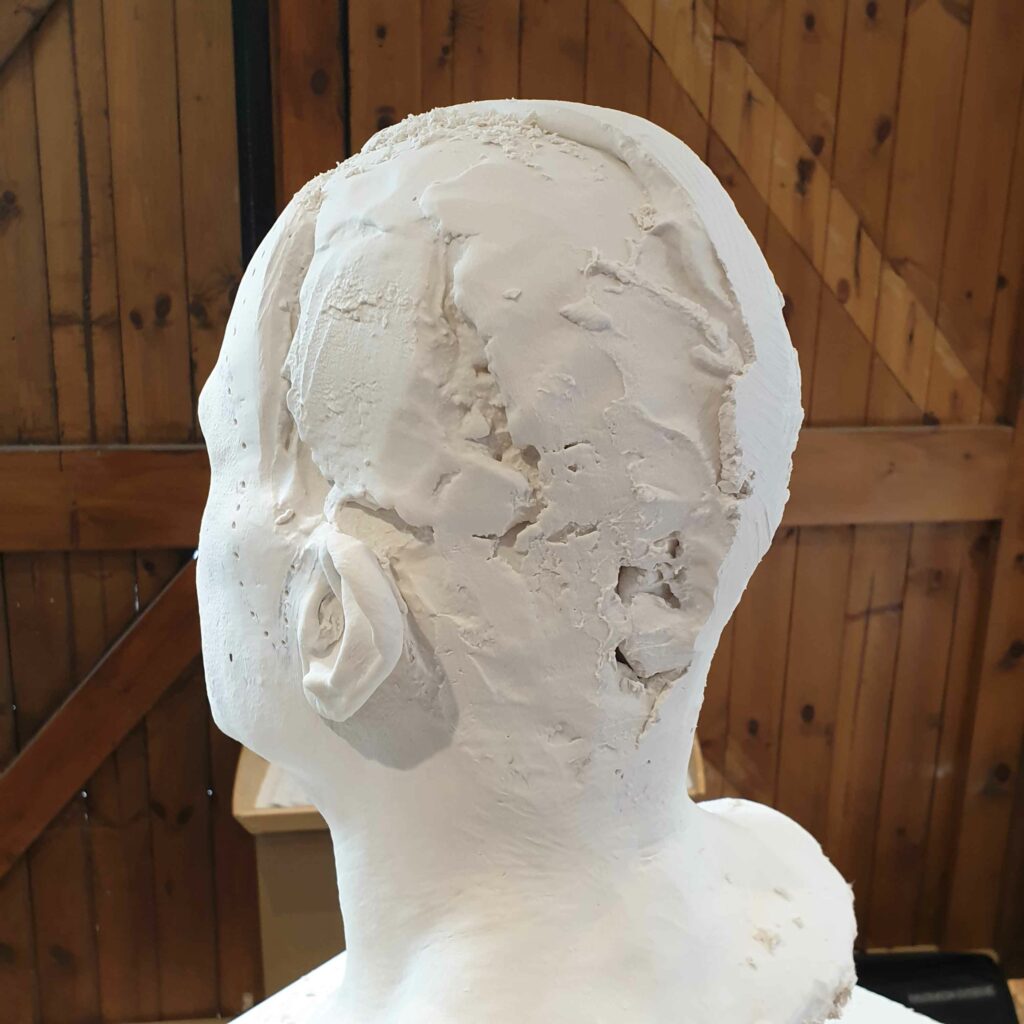
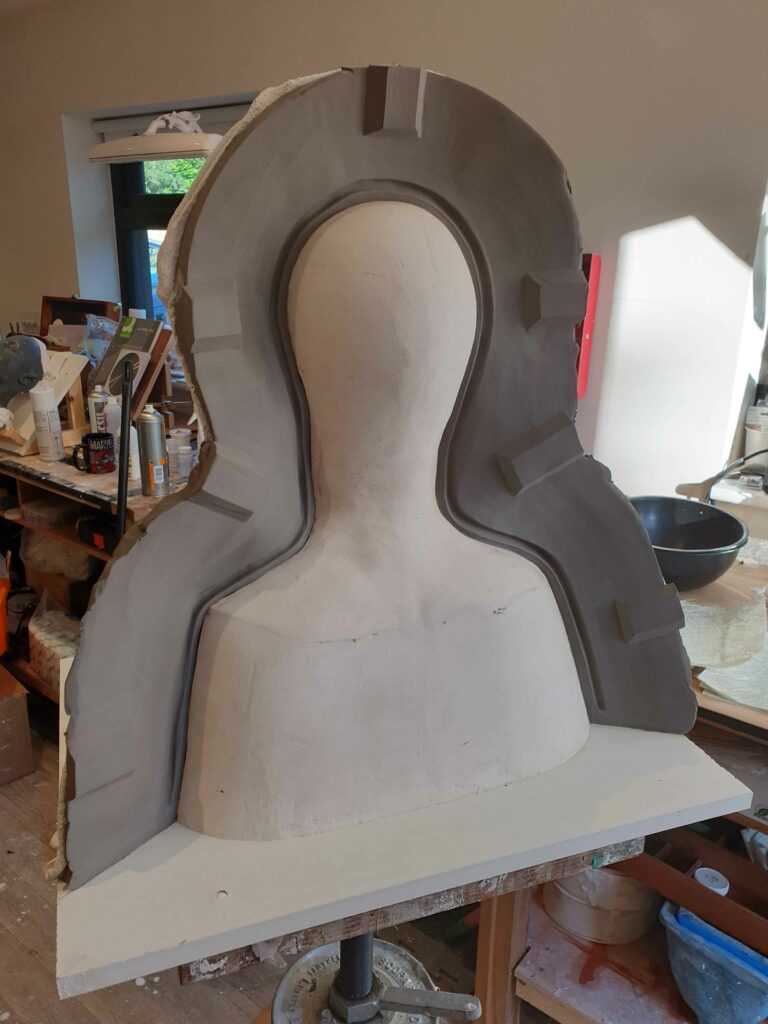
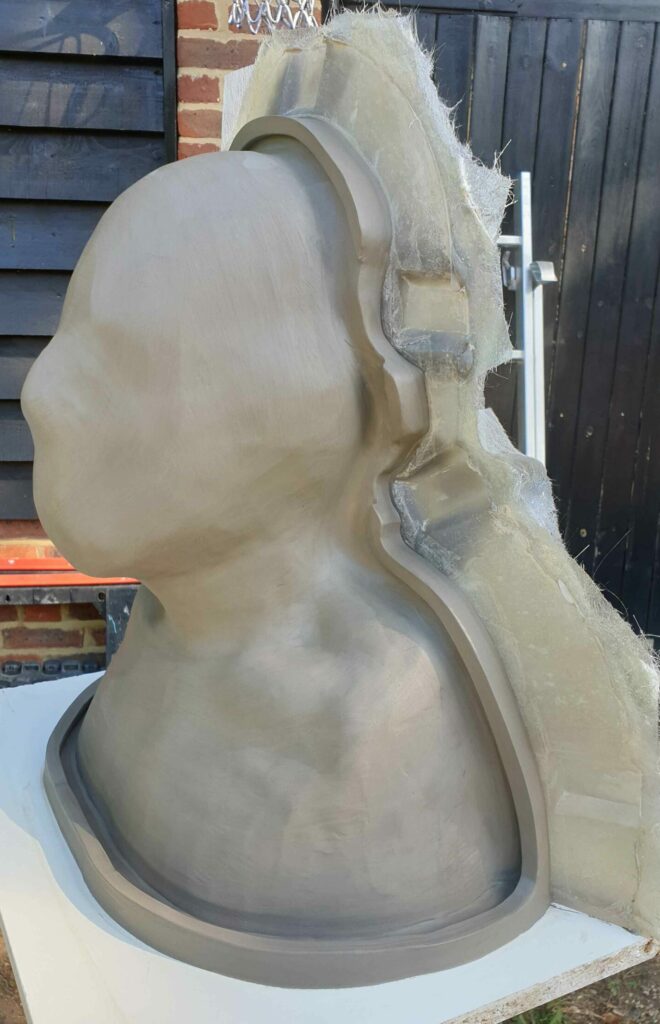
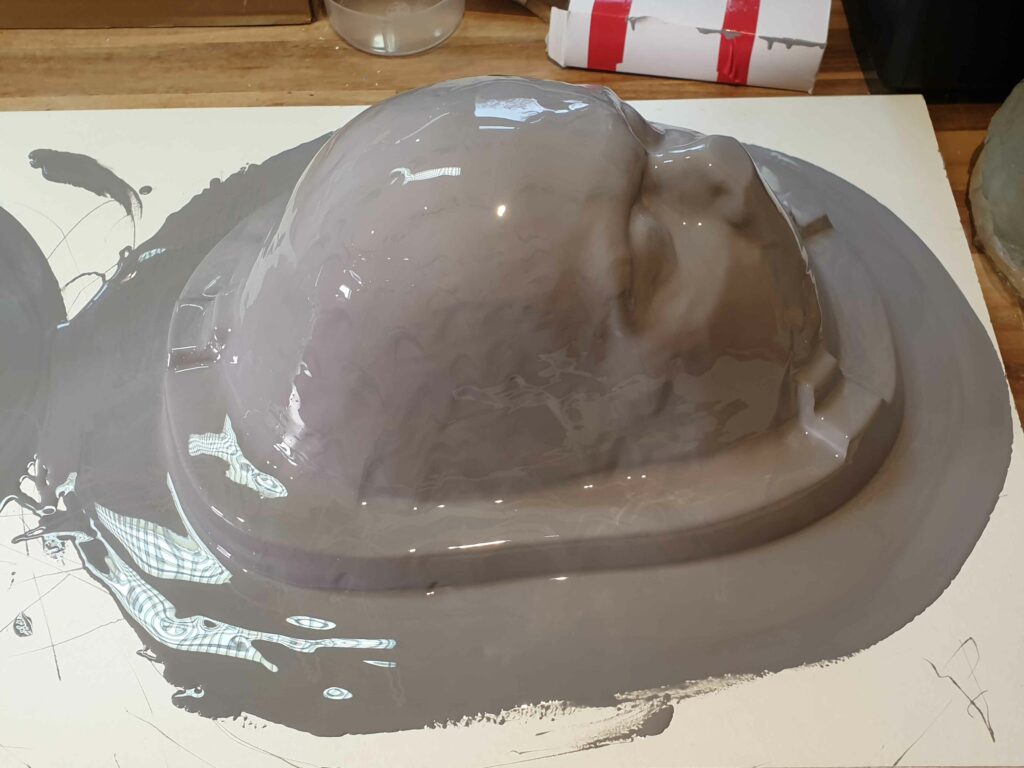
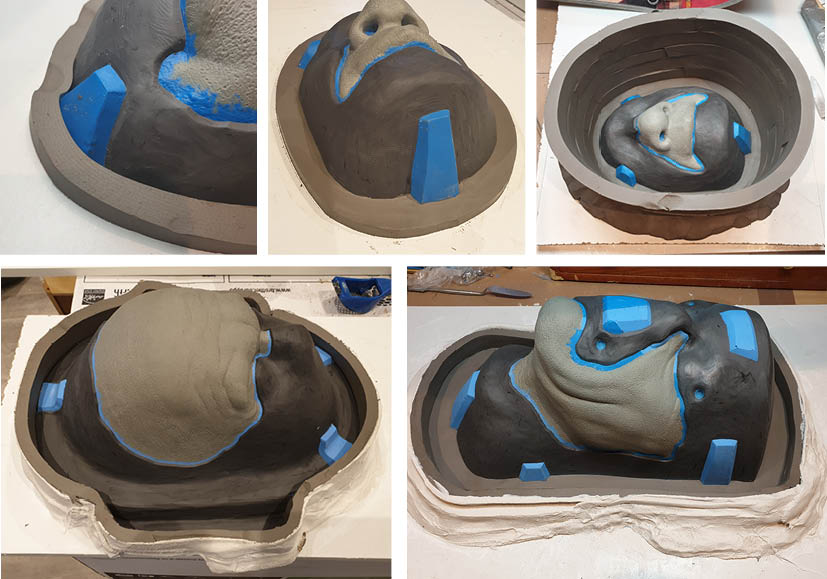
Step 5. Once the head is cleaned up and corrected, sat level on a baseboard and clean, the silicone master mould begins. The back portion of the head has no details we desperately need, so this was done in GRP, Polyester resin and fibreglass.
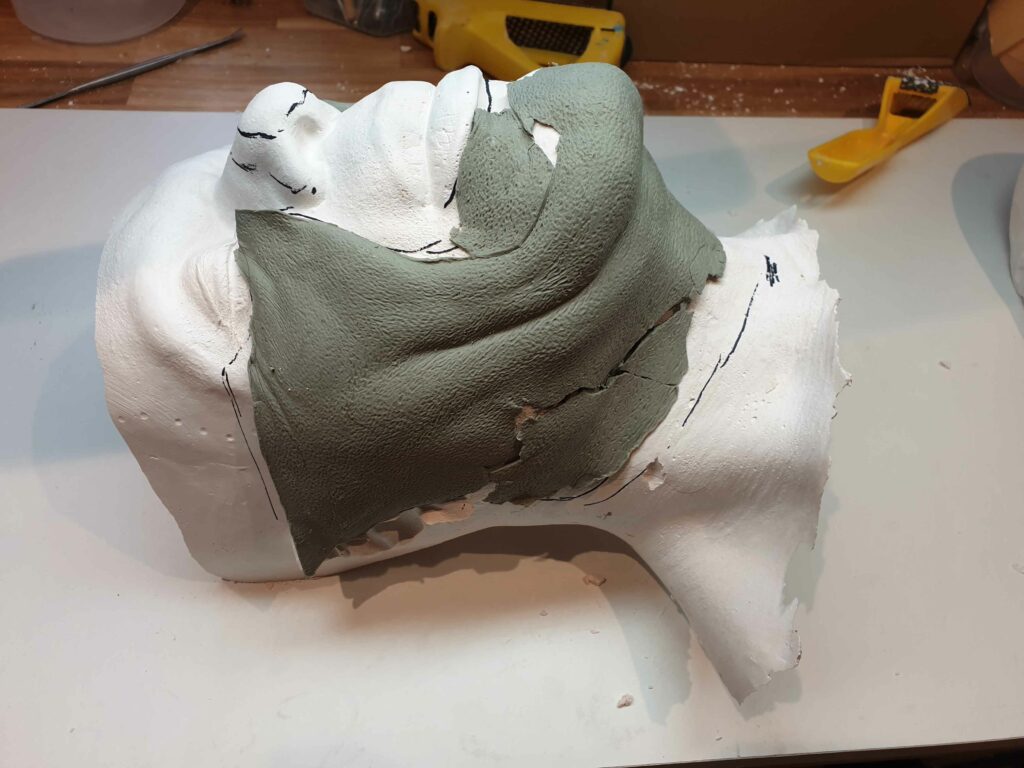
Then the front is made using a blanket of clay, cut to approx 10mm thickness and applied all over the front. This is smoothed over, and keys placed around the perimeter. These keys will ensure the silicone portion can remain in the jacket when required to later.
The front was then fibreglassed, same as the back. It was made in two halves, however, to assist in opening later. It’s often a good idea to consider how easy it will e to open the mould later, as opening a mould made of fewer parts can be a false economy when it is strained and stressed with huge amounts of leverage required to separate parts. More parts means more work now, but an eternally easier-to-open mould later.
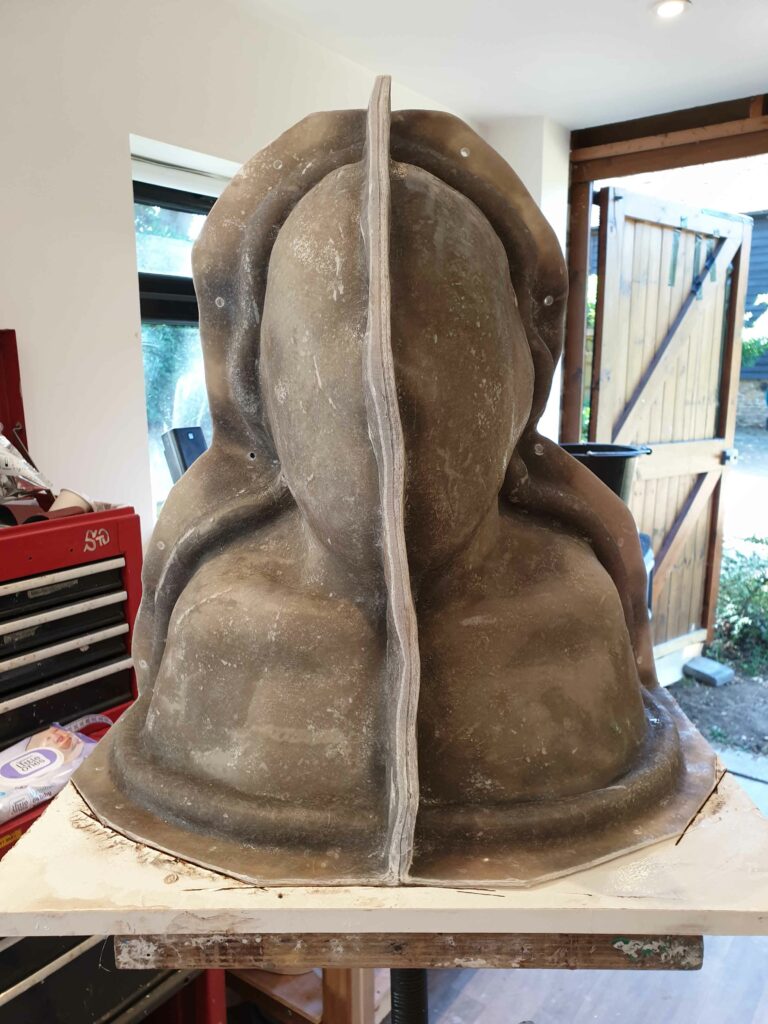
Once set up and allowed to firm up properly over a few days, it was opened and the clay cleaned out, reassembled and then prepped for silicone.
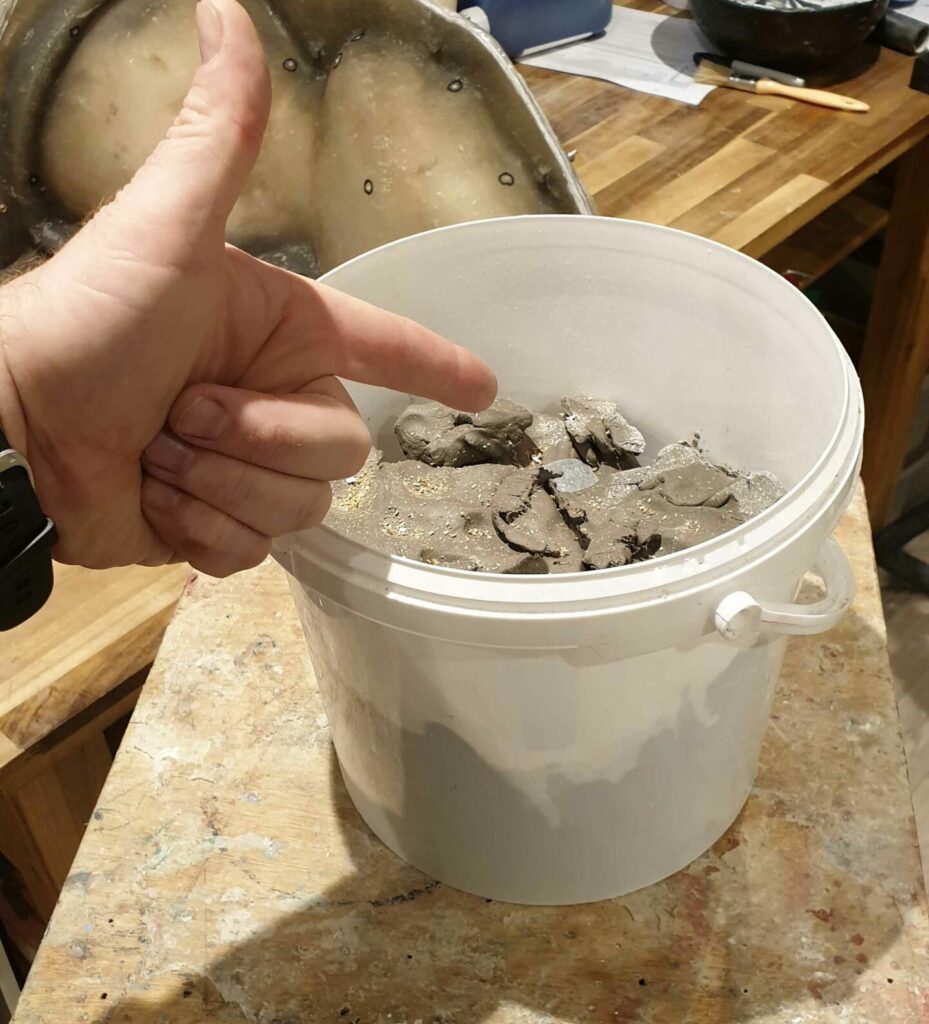
The clay used kept, as the volume of that clay will be the same volume of silicone required to replace it – plus a little extra for the pour tube and what will leak out of the bleeders used to let the air out of the mould as it is poured.
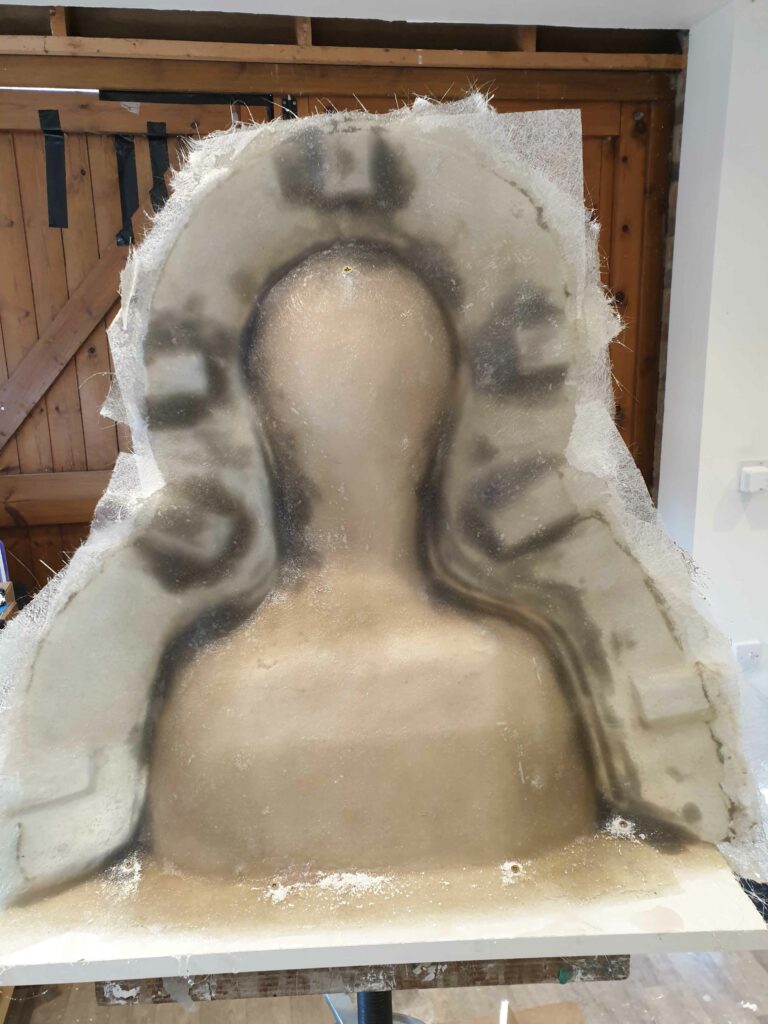
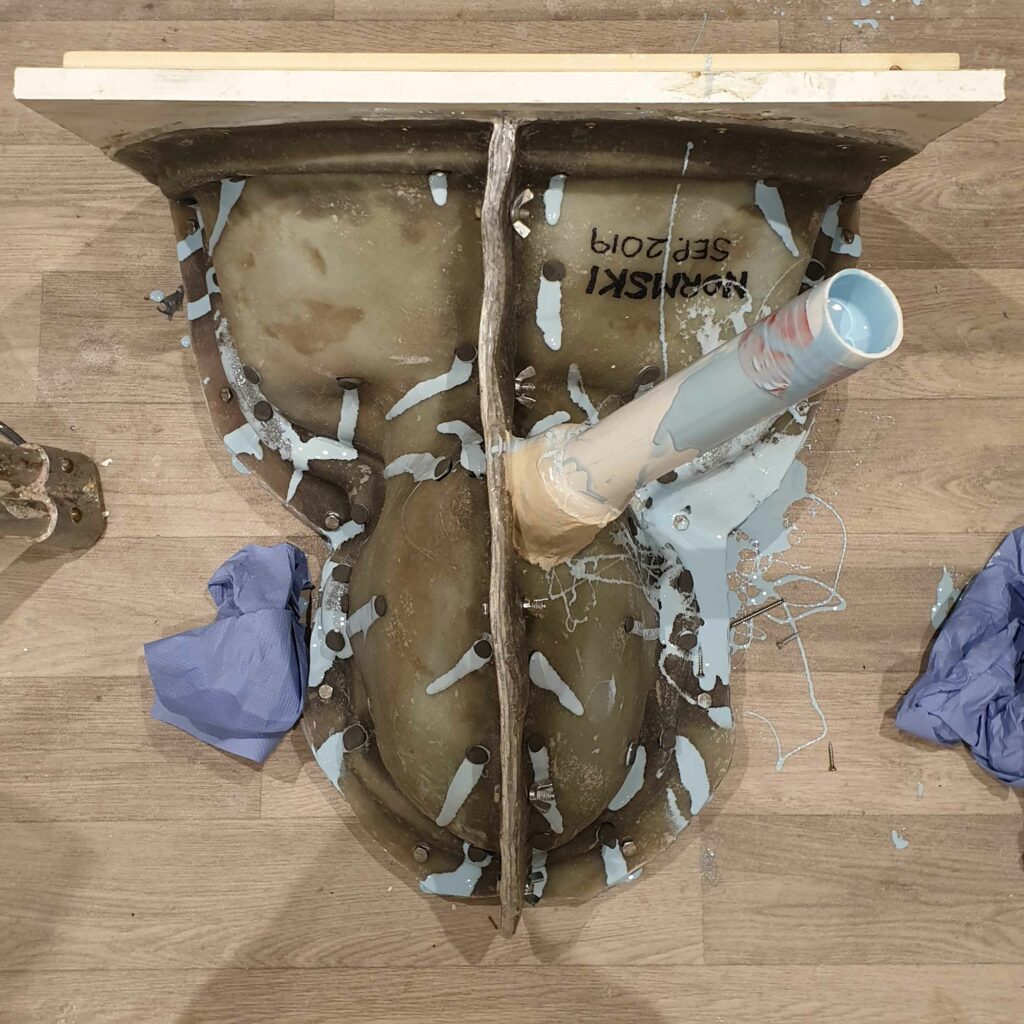
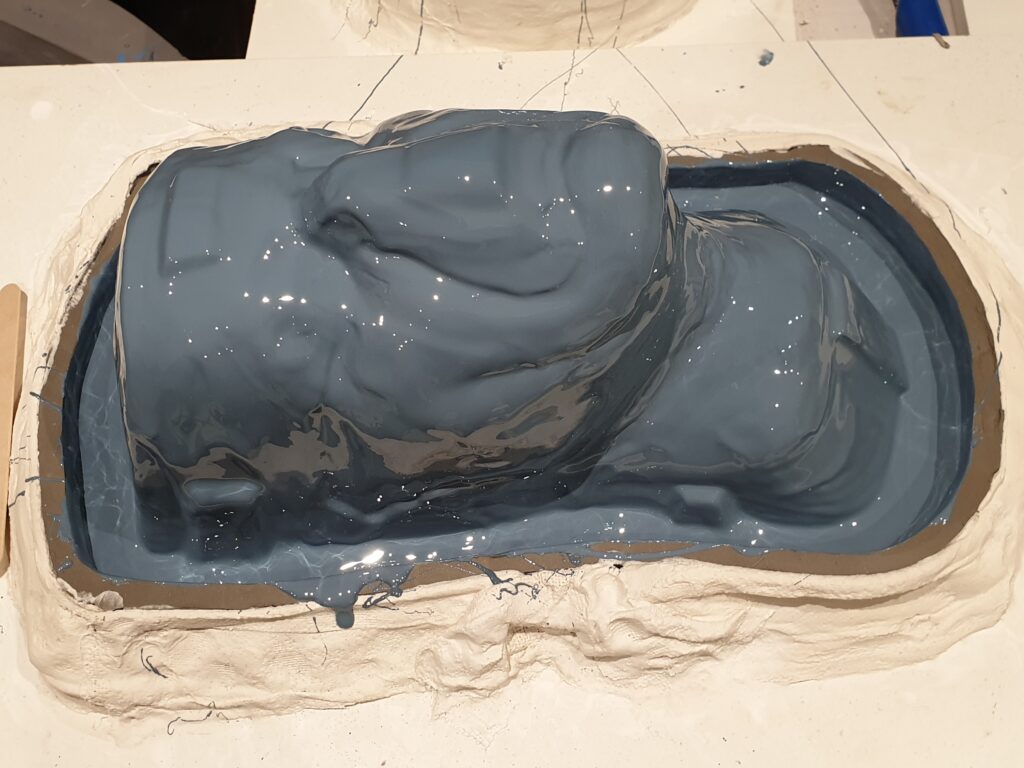
Here, with one half of the front fibreglass jacket in position, you can clearly see the gap the clay made all around the head. This will now be replaced with silicone. We used Dow Corning 3481 with a slow catalyst to allow plenty of time to vacuum degas the mix and pour in an unhurried fashion.
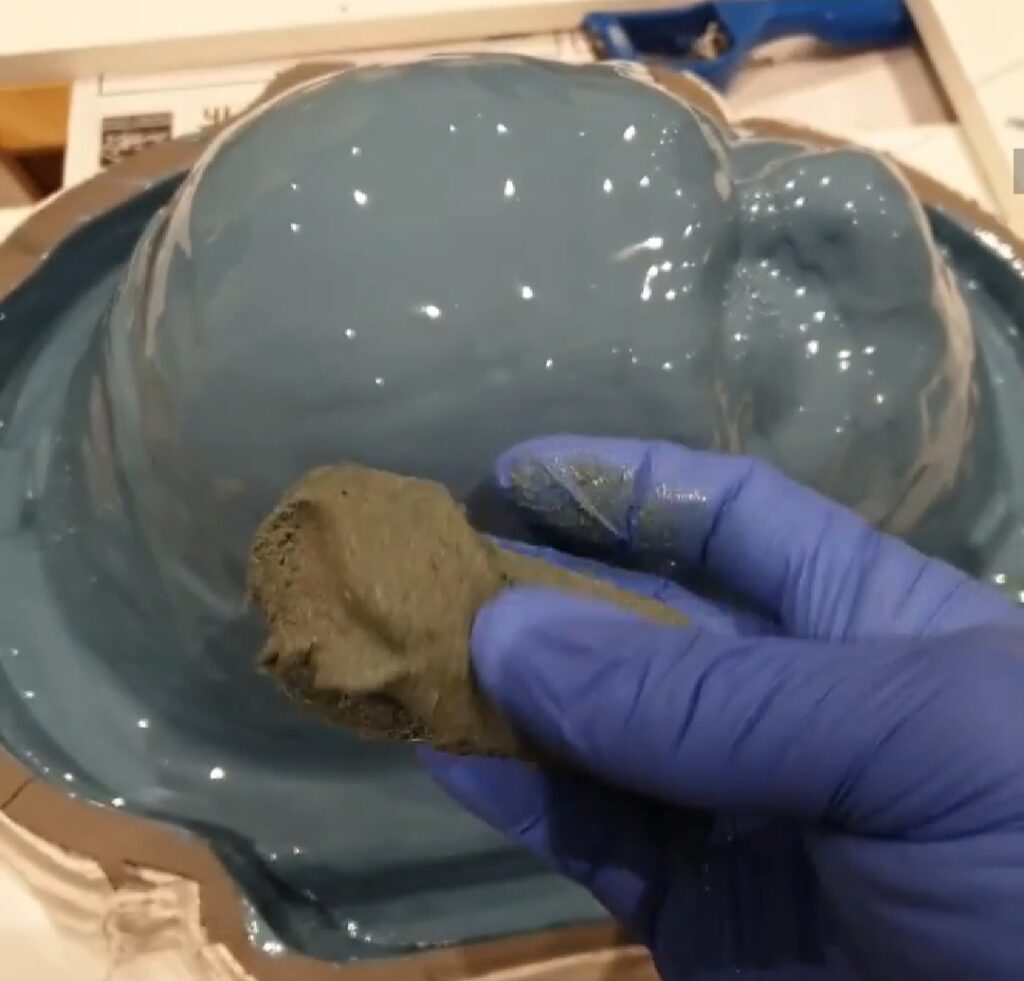
This is the clay scooped out and kept from the fibreglassed front jacket. It is the same volume (not weight) of silicone required to replace it. By smashing it into a container like this large paint kettle, I know how much silicone I will need to fill the mould.
Silicone poured and left overnight to fully cure.
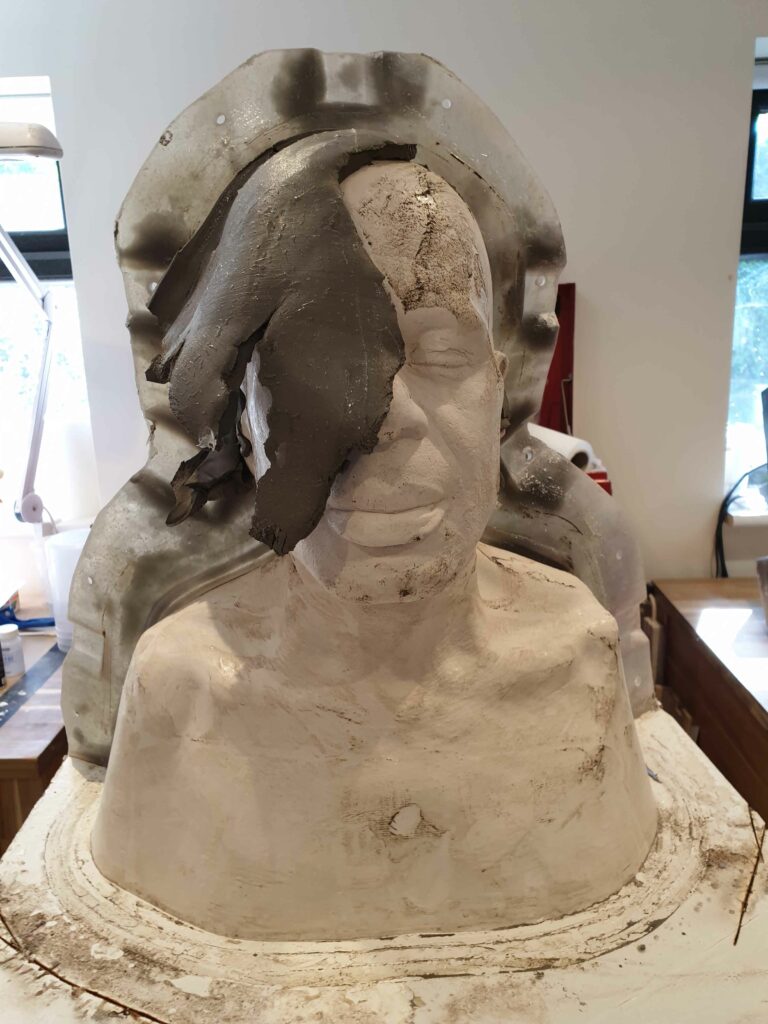
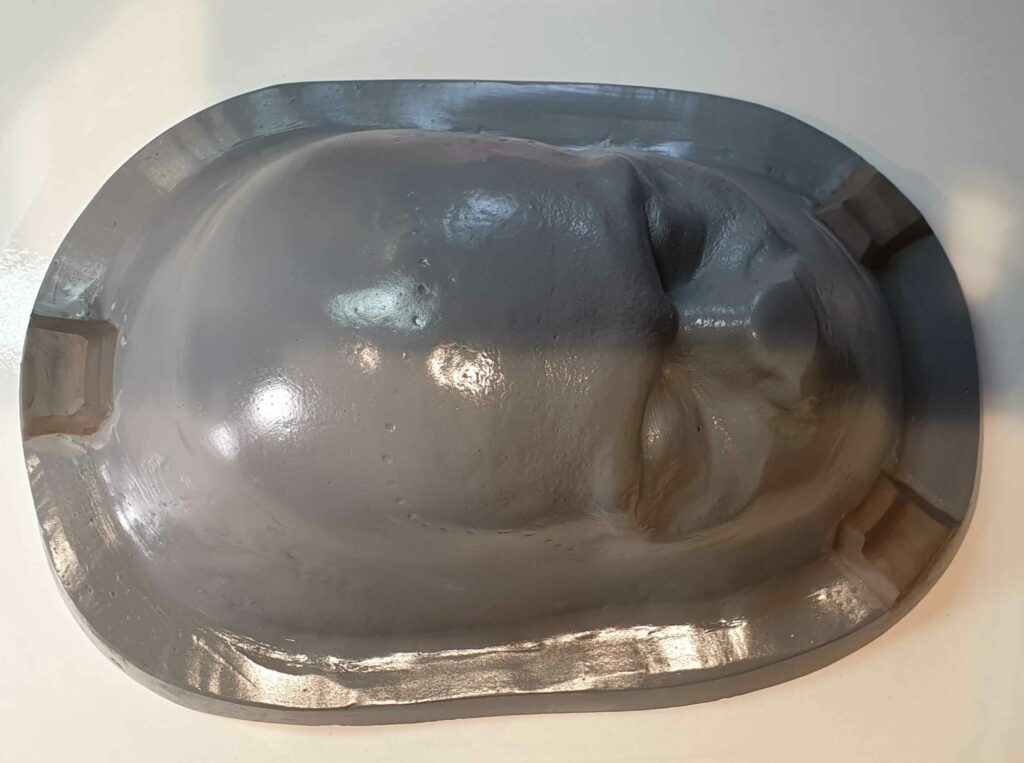
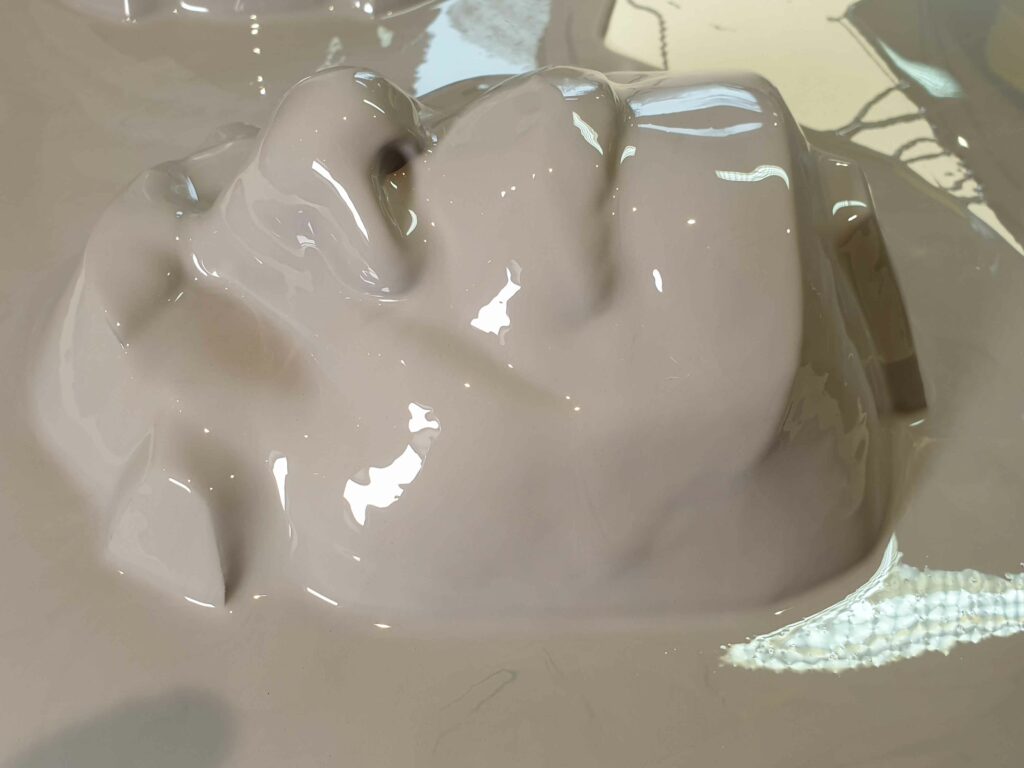
Step 6. The mould is opened up and checked for any issues. It cae out fine, no leaks or air bubbles so all good! Now we await the arrival of the sculpts from Neil in Toronto.
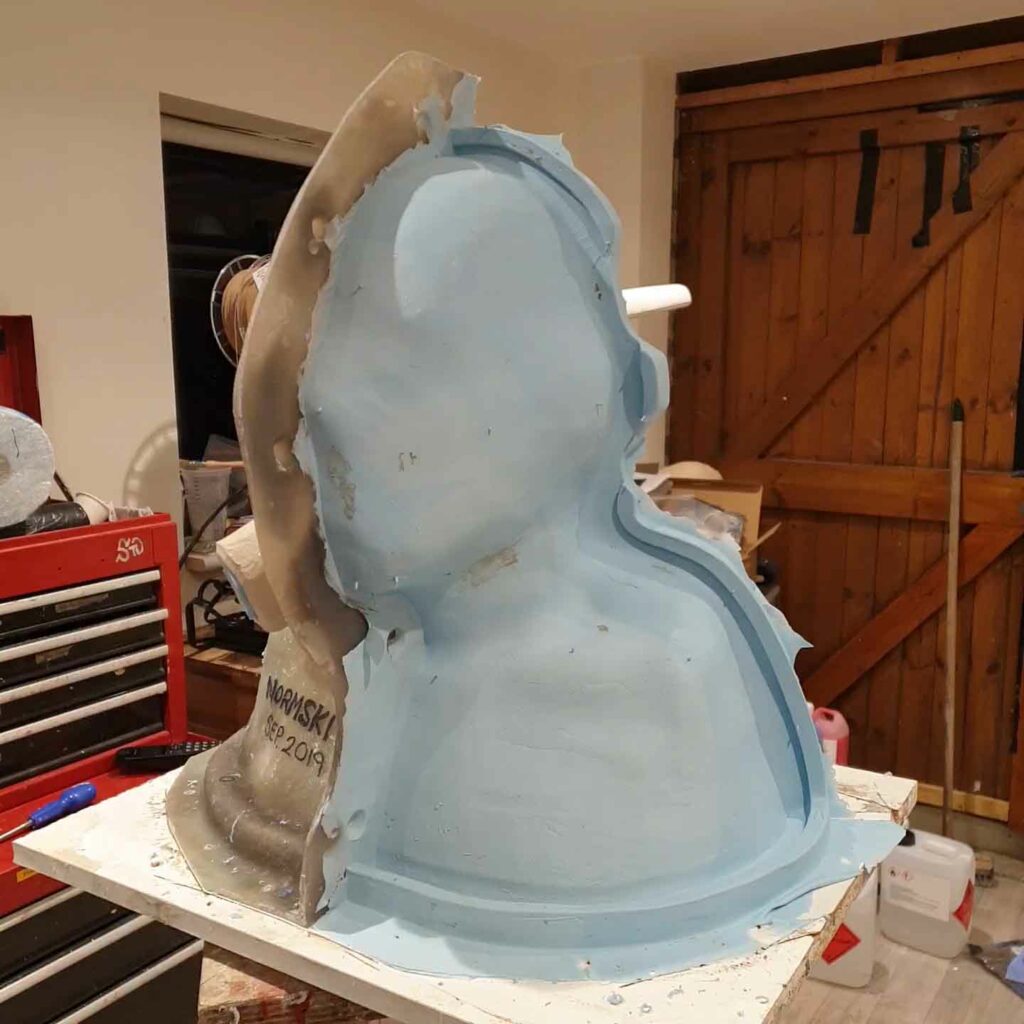
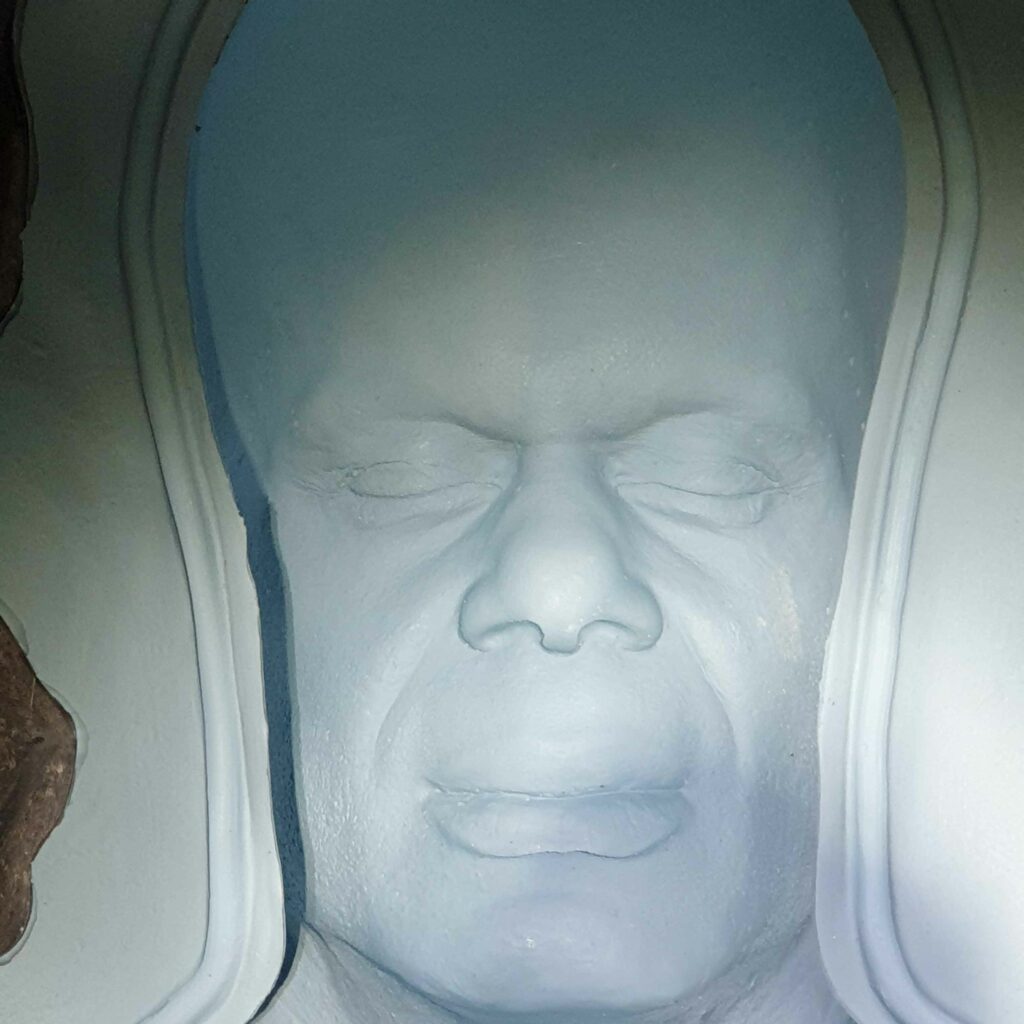
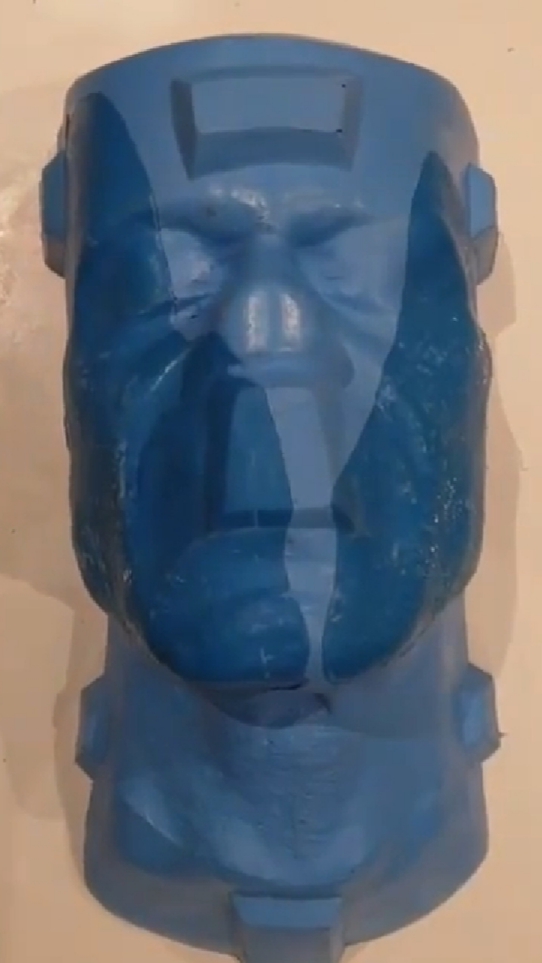
The face as seen from inside – this is the silicone negative which appears to be coming out towards us rather than being in reverse. A trick of the light in photographs.
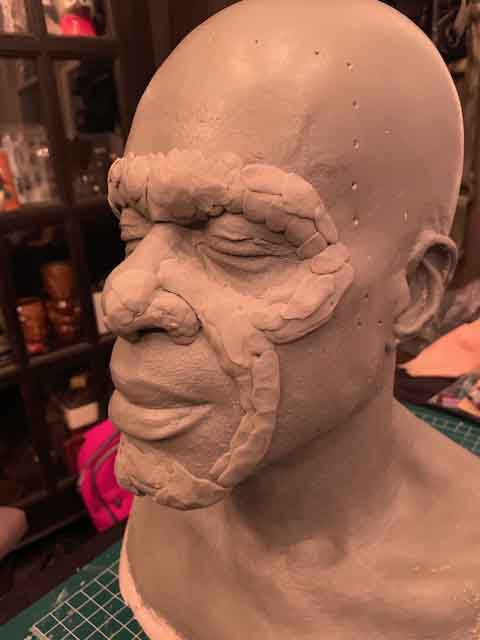
Step 8. Whilst I have been making the master mould of the head, Neill has been busy sculpting away on a plaster he made out from the original silicone lifecast mould I sent to him a couple of weeks before.
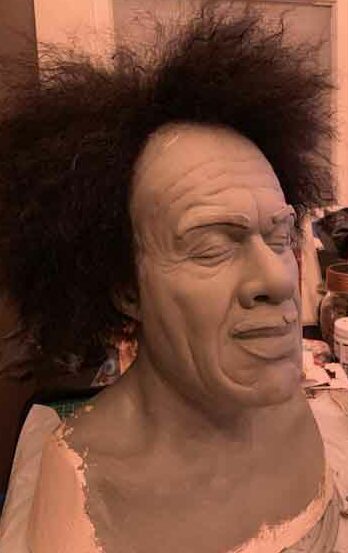
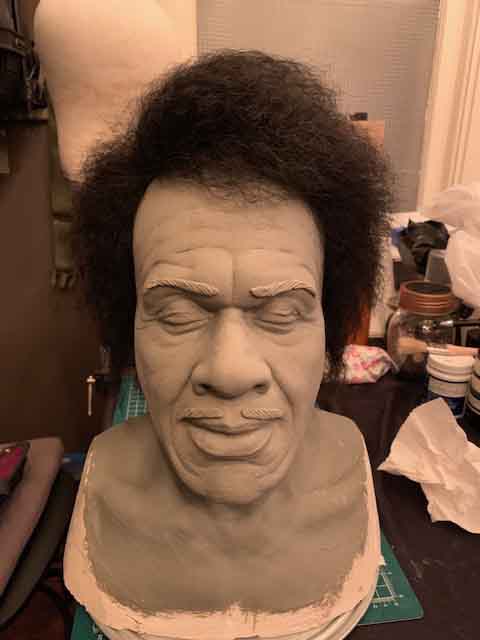
After a number of back and forth chats, the wig Neil acquired is trimmed and placed on the head, as we realise much of the character comes from the volume of hair. The wig is actually a pretty inexpensive wig, which was perfect but needed a lot of barbering to cut it to the size and shape.
This is the wig as seen when ordered. Some TLC, careful scissor work and a keen eye meant this store-bought wig would fit the bill and do our Rev Brown justice.
Step 9. The sculpts arrive back from Canada. They made it intact! Huge sigh of relief as we begin the next stage.
Step 10. I make core moulds based on the pieces sent over. The sculpt is made as a single piece at first and once the look is approved, it is then decided where the makeup is to be split. Usually, there are logical reasons behind the choice, and often it is where the sculpt is thinnest and where there are already creases or natural areas such as crows feet where a join would be preferable.
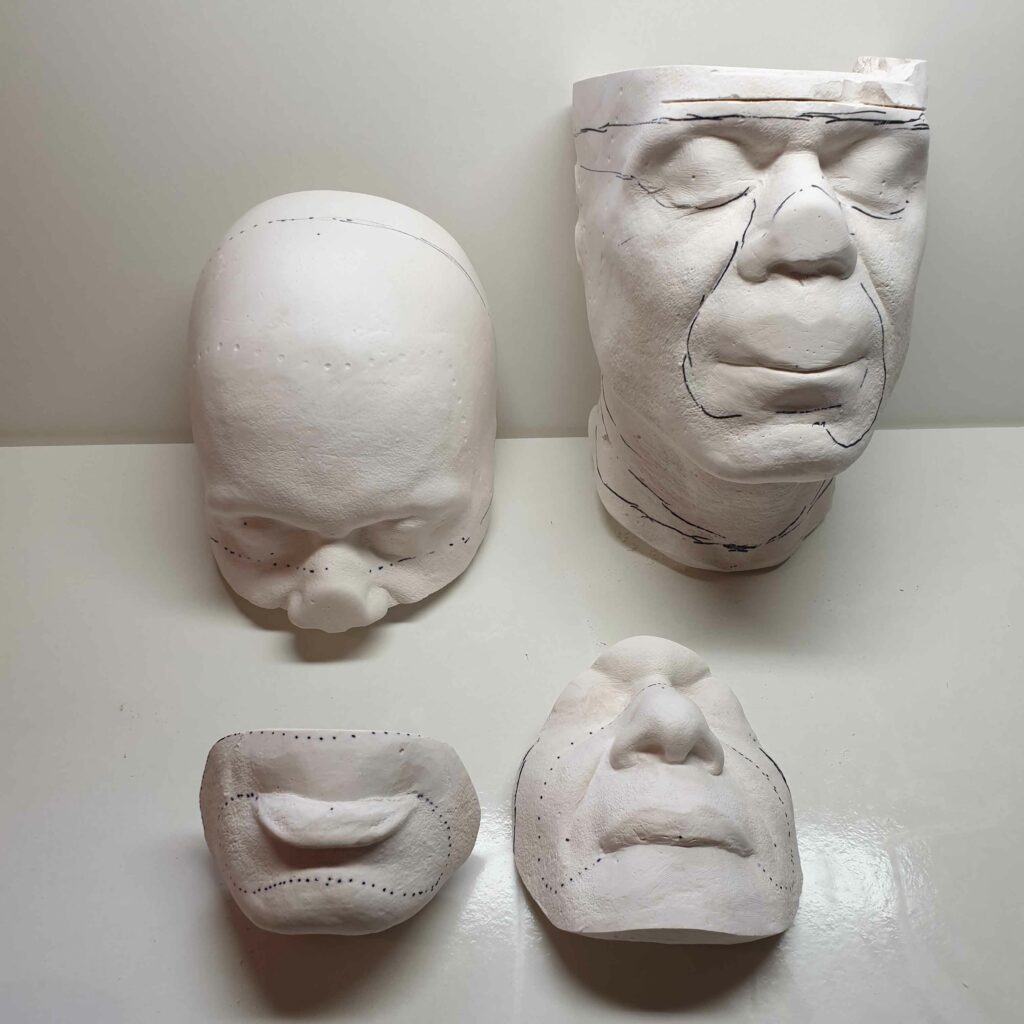
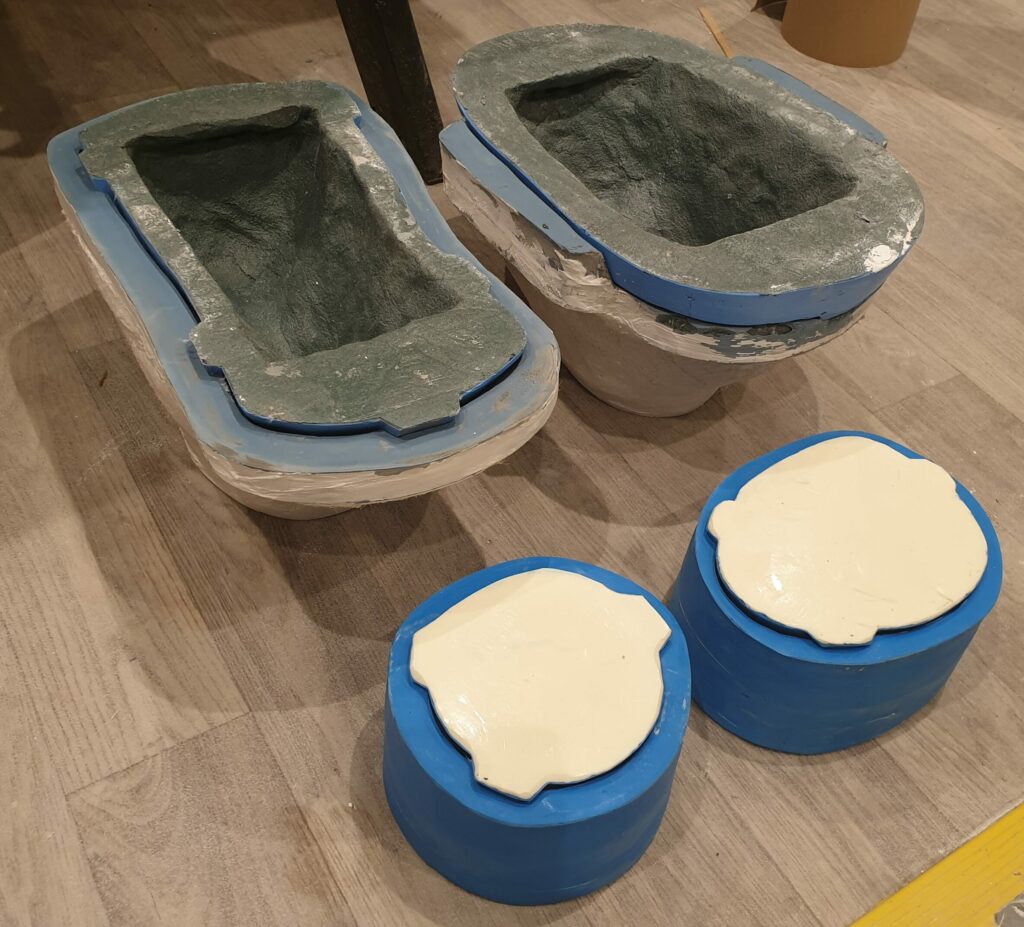
Here we settled on 4 pieces – Lower lip, nose and upper lip, forehead and wraparound face with both cheeks and chin all as one large piece.
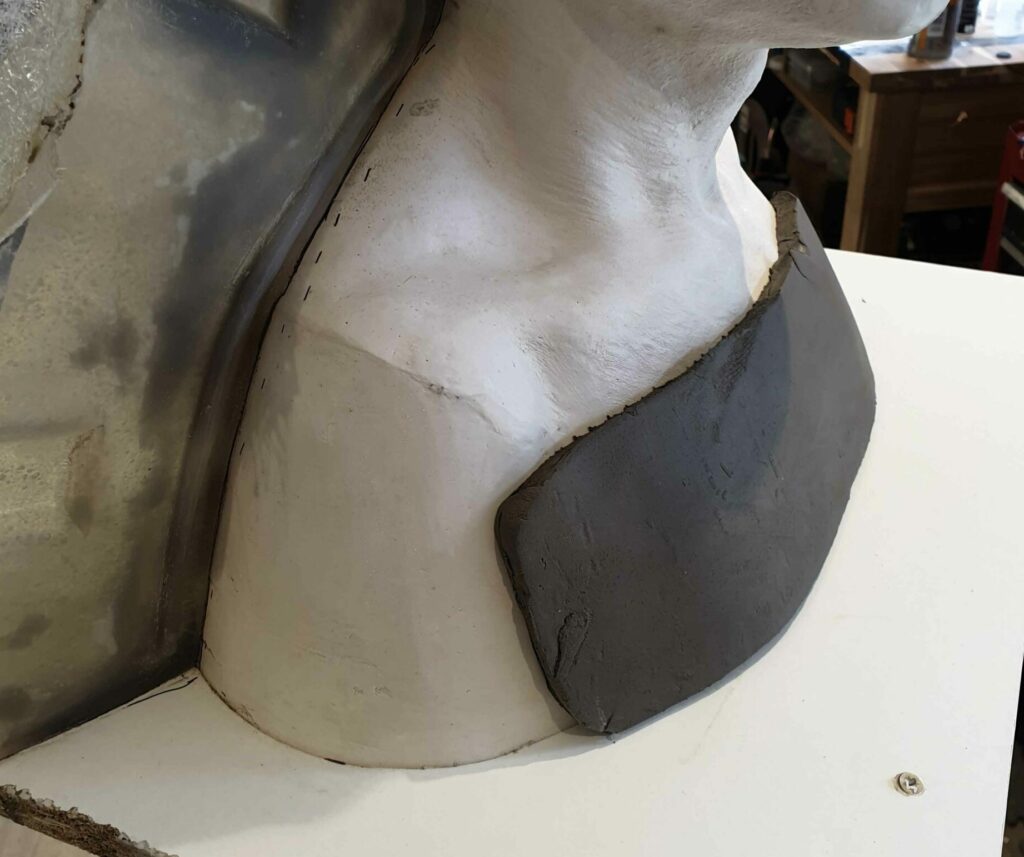
Here you can see the boundary line of where the sculpt stops marked with a Sharpie. The core then can be shaved down to be just a little larger than that line, so the cores are no bigger than needed to minimise waste.
Step 11. These plasters now need to be smoothed out level onto a baseboard and any undercuts taken out and keys added. I used plaster to smooth it out and make the sides flat and angled down to the board. A flange is added to the larger pieces to assist the opening of moulds later on. The plasters are then sprayed with grey primer to seal them and show up any air bubbles or holes I may have missed. Clay keys are also added as the last thing.
These finished plasters with their primer and keys are the right shape but not the right material for the cores. These are now moulded in silicone so resin positive versions can be made.
The silicone in these moulds was Tinsil 8030 from Polytek which was supplied by Neills Materials. Two coats drizzled on, each allowed to set before a third layer was applied with a thickener added to make the liquid silicone more of a paste to build up a decent thickness quickly.
Step 12. We used Axson F40 as a really durable urethane for the smaller pieces and Epopaste 400 Epoxy for the larger moulds. The biggest challenge was how to overcome the undercuts of the jaw (see our post dedicated to undercuts here).
A straightforward single-piece mould would have locked, and I didn’t fancy a seamline down the middle of the face. Often I like to flare out the core, but having doine this before plenty of times, I fancied something different. I figured I would try a ‘collapsible’ core, made up of several parts, allowing the mould to remain as one piece and keeping any seams on the inside of the piece.
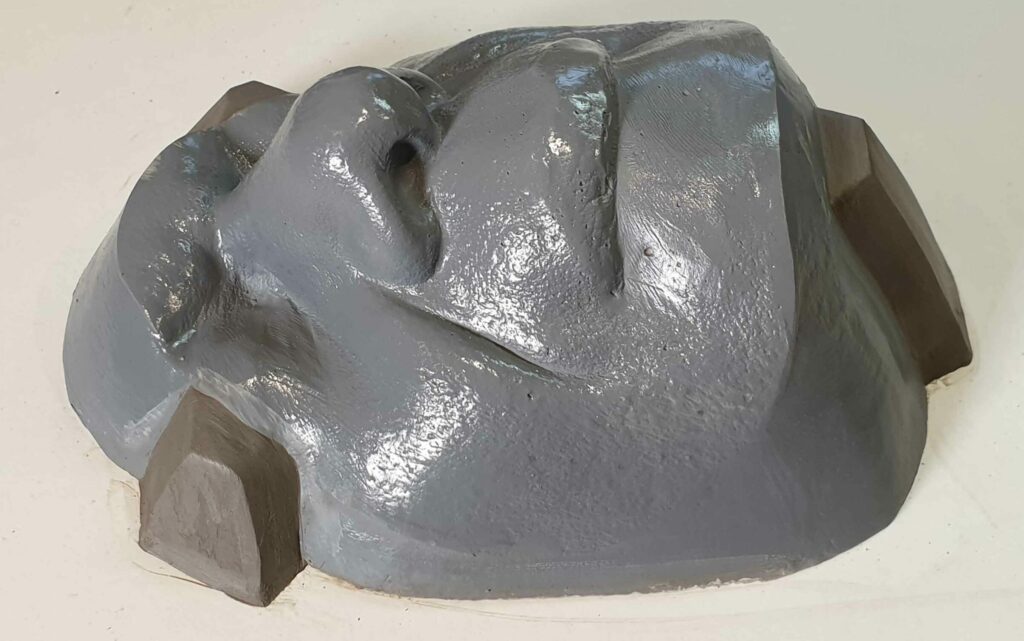
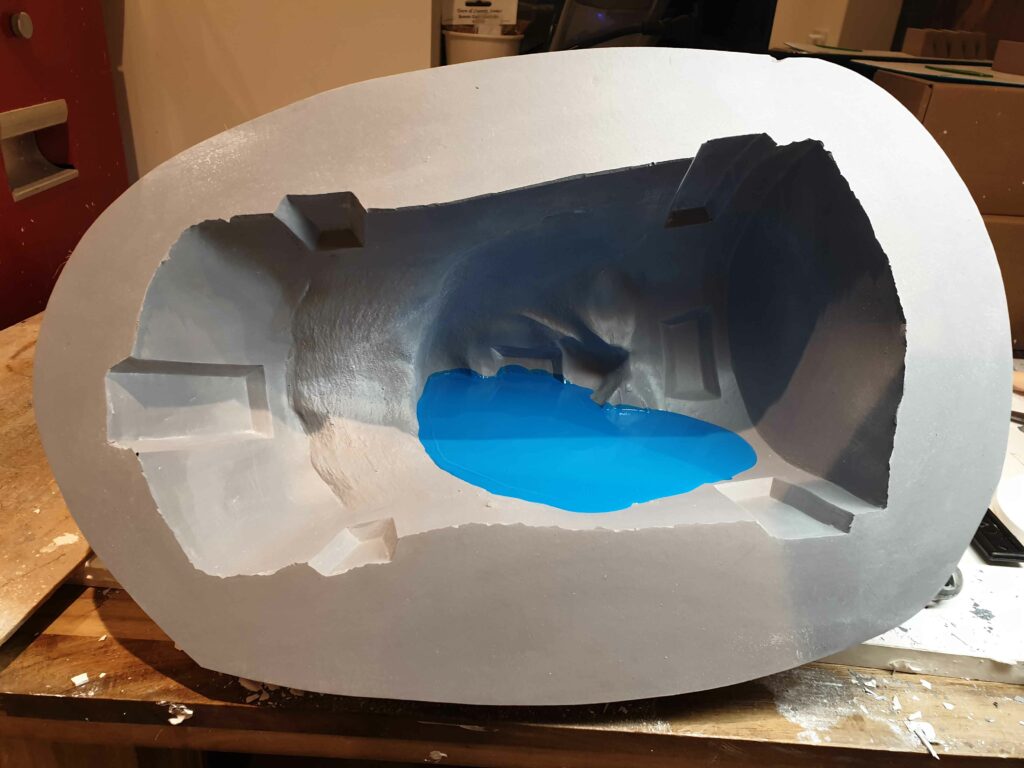
To do this, I poured up the two sides of the face which contained the deep jaw section as separate pieces. Essentially, I flooded the face core mould whilst it was held at the correct angle and left overnight to set and cool down.
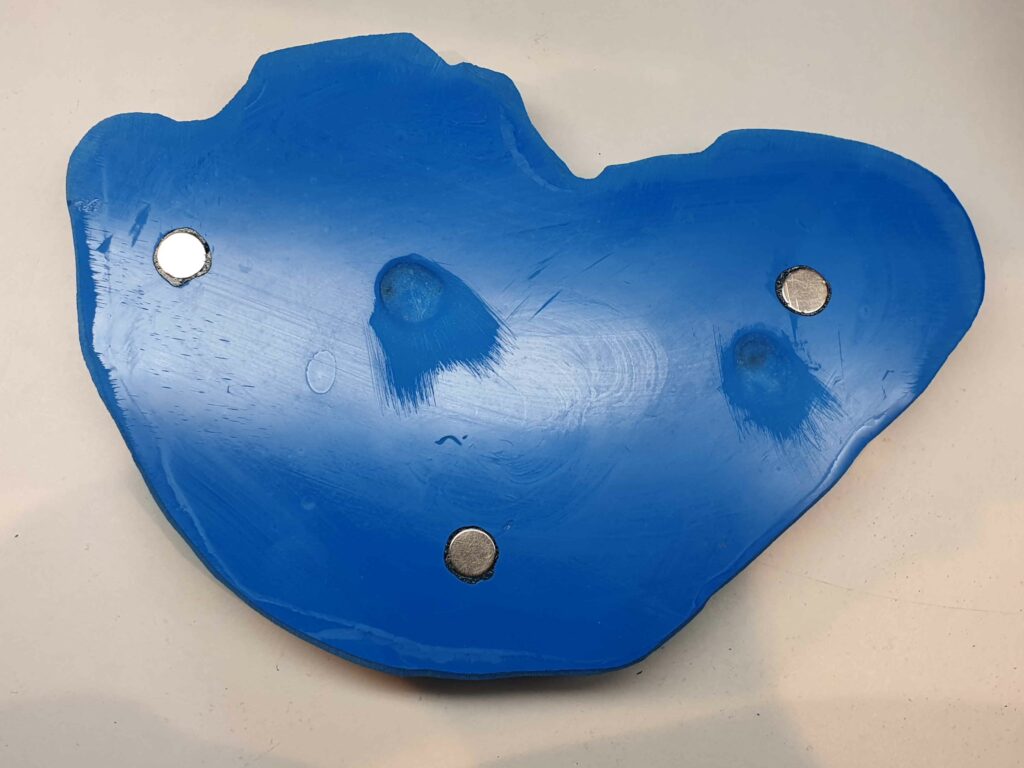
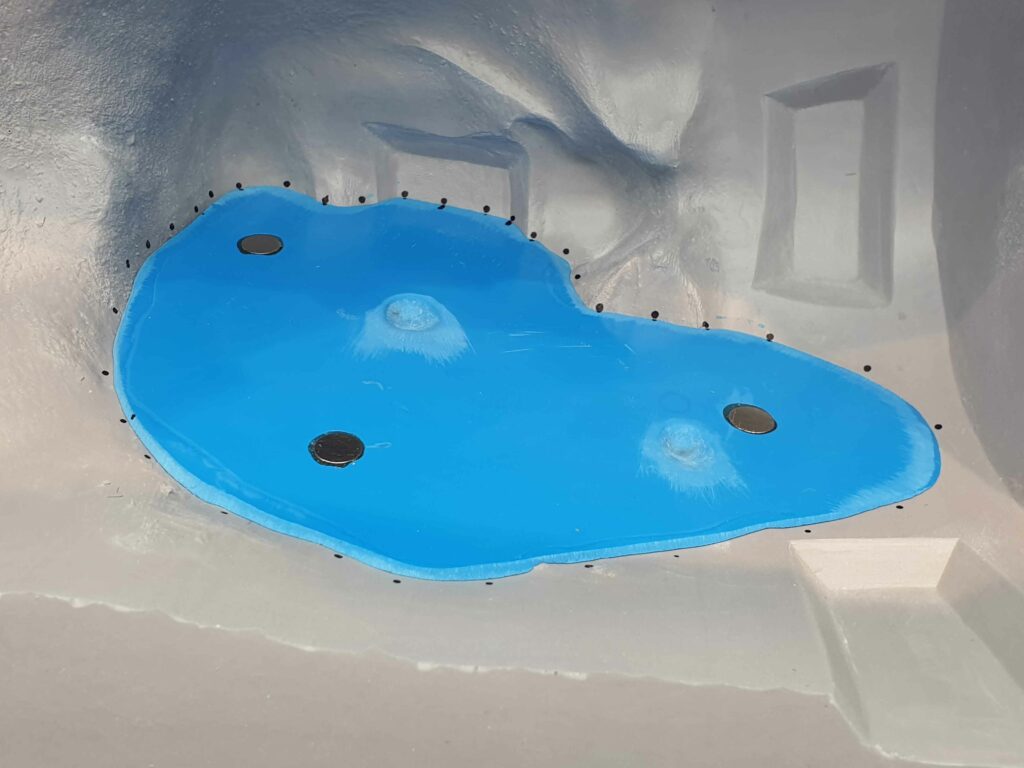
The next day I removed the resin piece, flipped the head and did the same thing on the other side. Then once that had set, I removed that and using a Dremel rotary tool, carved keys into the back of each piece. I also carved a hollow to set magnets into the back, so I would be able to attach these two resin pieces into a third piece I have yet to make.
Two keys and three magnets inserted, held in place with a two-part epoxy adhesive. Care must be taken when Dremelling in keys to NOT create new undercuts inadvertently. It’s all about angles!
Once finished, both resin pieces are cleaned and placed back in their respective locations in the silicone from which they came.
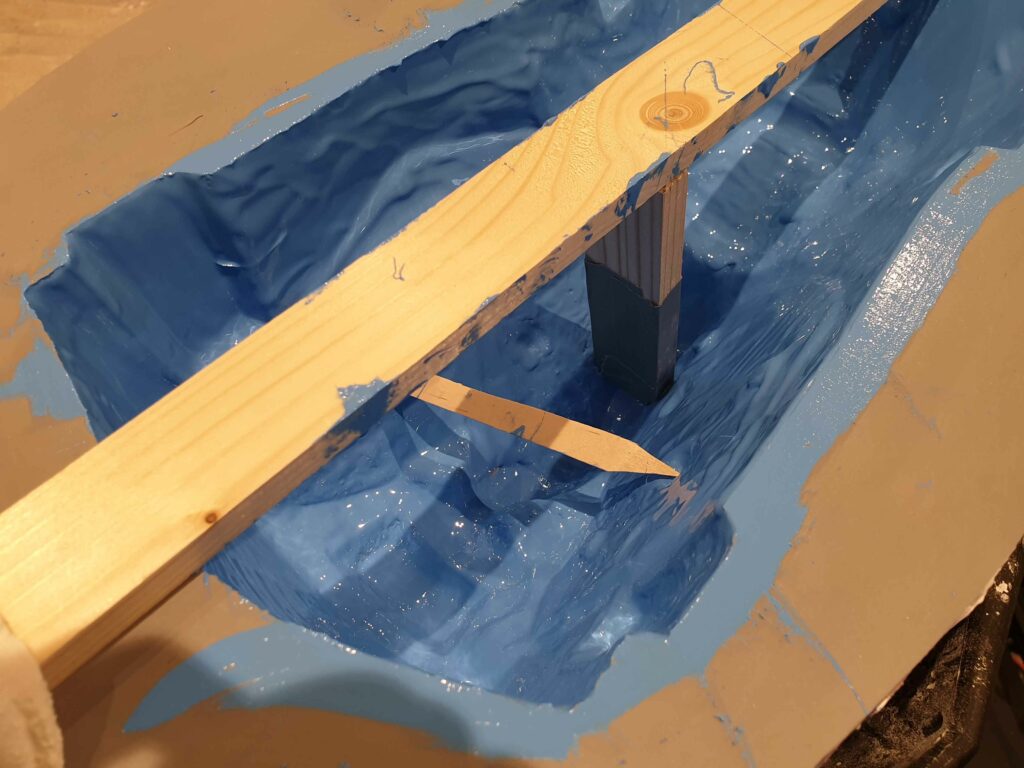
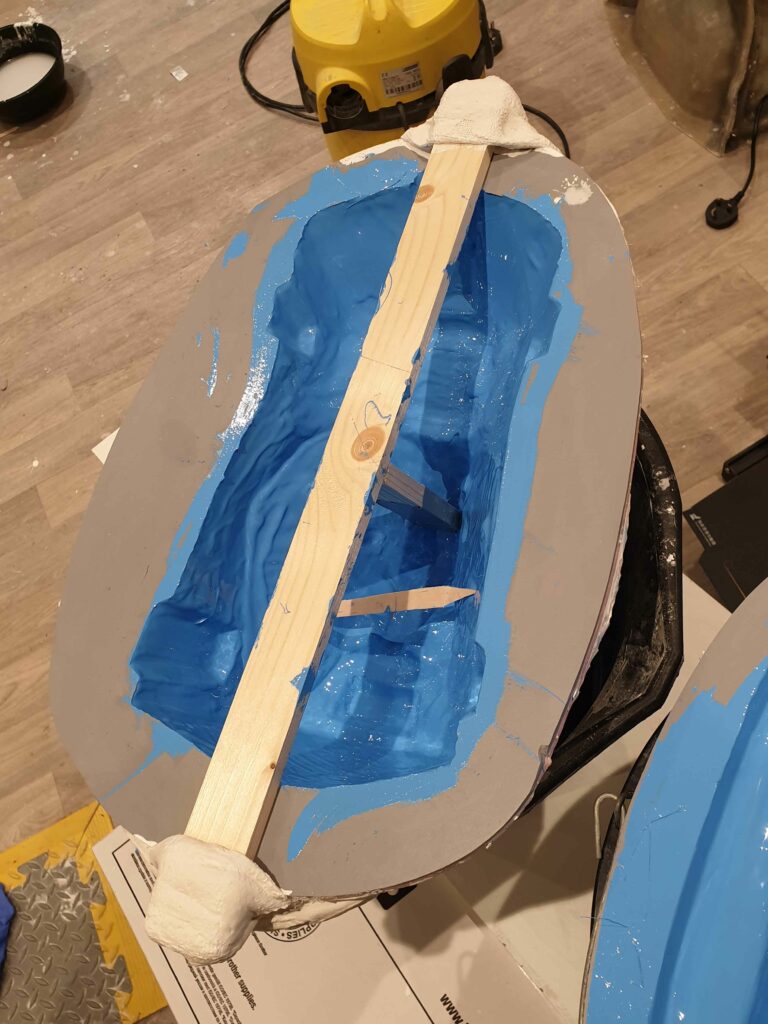
Because of both pieces were cast at angles, it follows that when the face is upright, both these resin pieces will not obligingly stay in place. I brace them in place with some thin wooden sticks and construct a wooden brace across the top to push them firmly in place while an epoxy gelcoat is applied to the back of the pieces and the remainerof the silicone face which is not covered by the resin inserts.
It seems a bit of a hassle, but I absolutely need these resin pieces to remain pressed into their correct location throughout this process, to remain accurate and correct to the face.
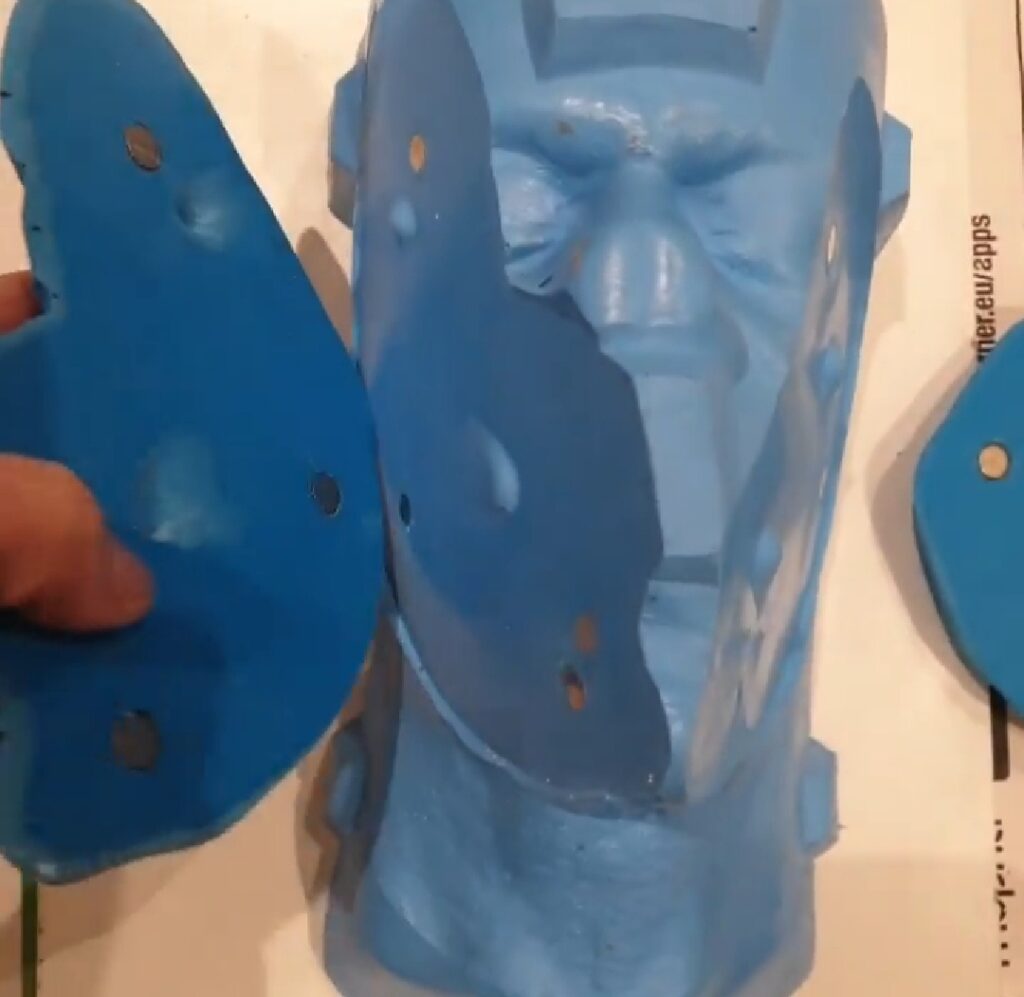
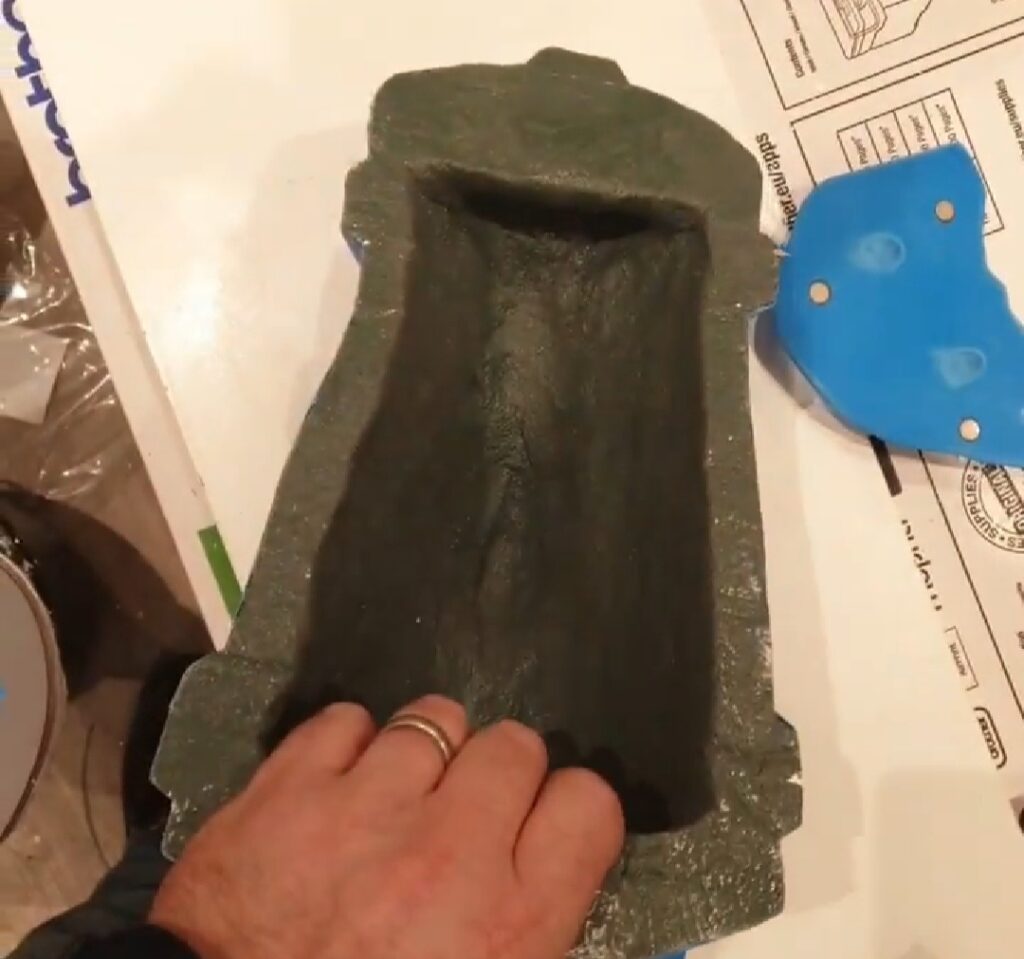
Once the gelcoat has set up overnight, the wooden braces can be removed. I then apply Epopaste 400 Epoxy paste all over the inside, about 12mm/half-inch thick. This is then left for 24 hours to fully harden. Once opened the following day, this is what we have:
Step 13. Once all made, the plastiline sculpts are finally placed on their respective cores and finished. Textures are added and any inevitable damage caused when being removed from their initial plaster core back in Toronto is repaired.
I did manage to drop the facepiece which was rather infuriating – it was a mere twenty minutes to repair but still….it was a bit upsetting at the time. To have travelled so far without incident and then once in my hands it gets smacked about. Oops.
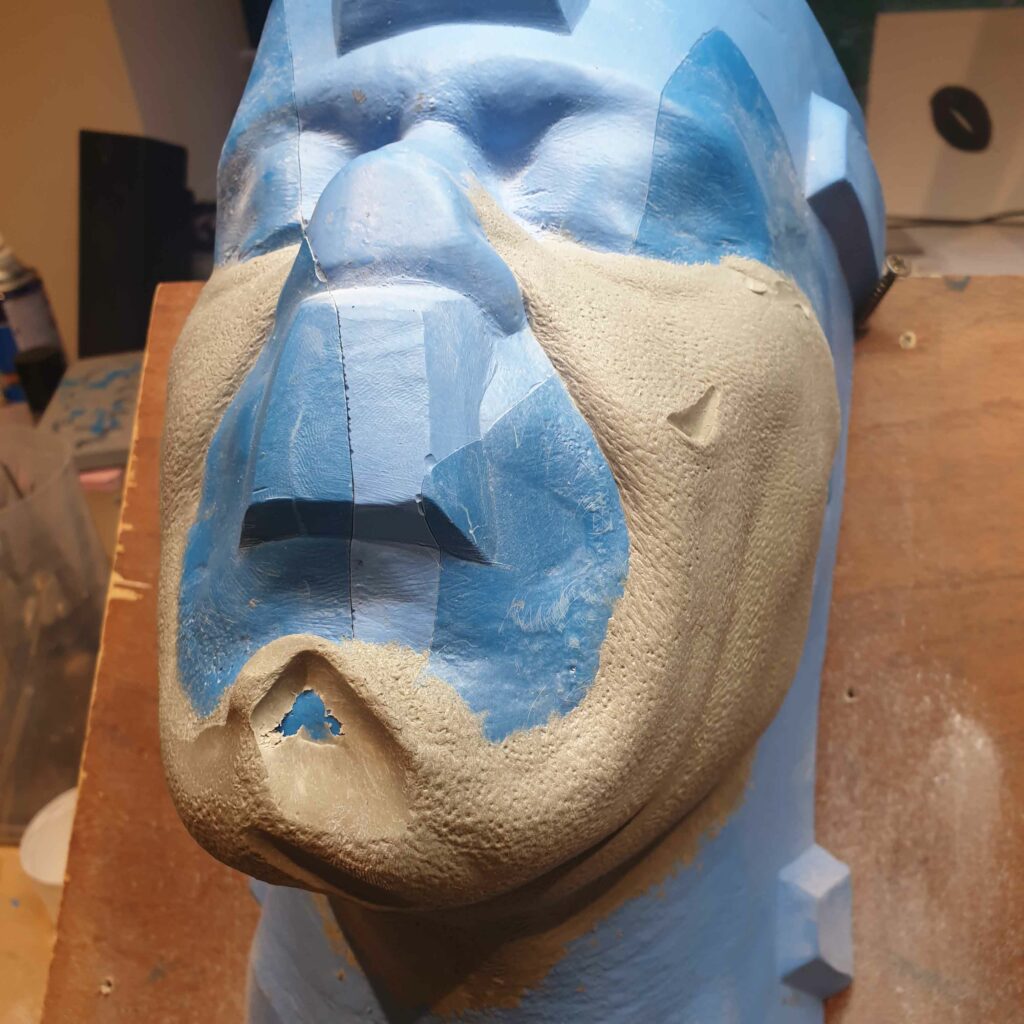
Step 14. Clay walls built up to contain the poured F40 resin on the nose and bottom lip pieces. The forehead and facepiece were moulded using Epopaste 400 just like their cores. The epoxy gelcoat goes on first and was left overnight to harden.
The Gelcoat I had was white, and I prefer a darker surface on a mould as typically, it shows where the cap plastic lands when applying encapsulant, and it’s easier to see the surface details. To that end, I used Smooth-On So Strong pigments (black and dark blue).
The Epopaste looks kind of like animal dung, but it mixes with the catalyst easily and is easily smoothed onto the surface. I LOVED using it, and as I say, slower than the usual mould materials I liked to use but made a very stable and strong mould.
It’s a good idea to make the edge, the area against which we pry when opening the mould, really strong so I started on this area with my limited remaining Epopaste.
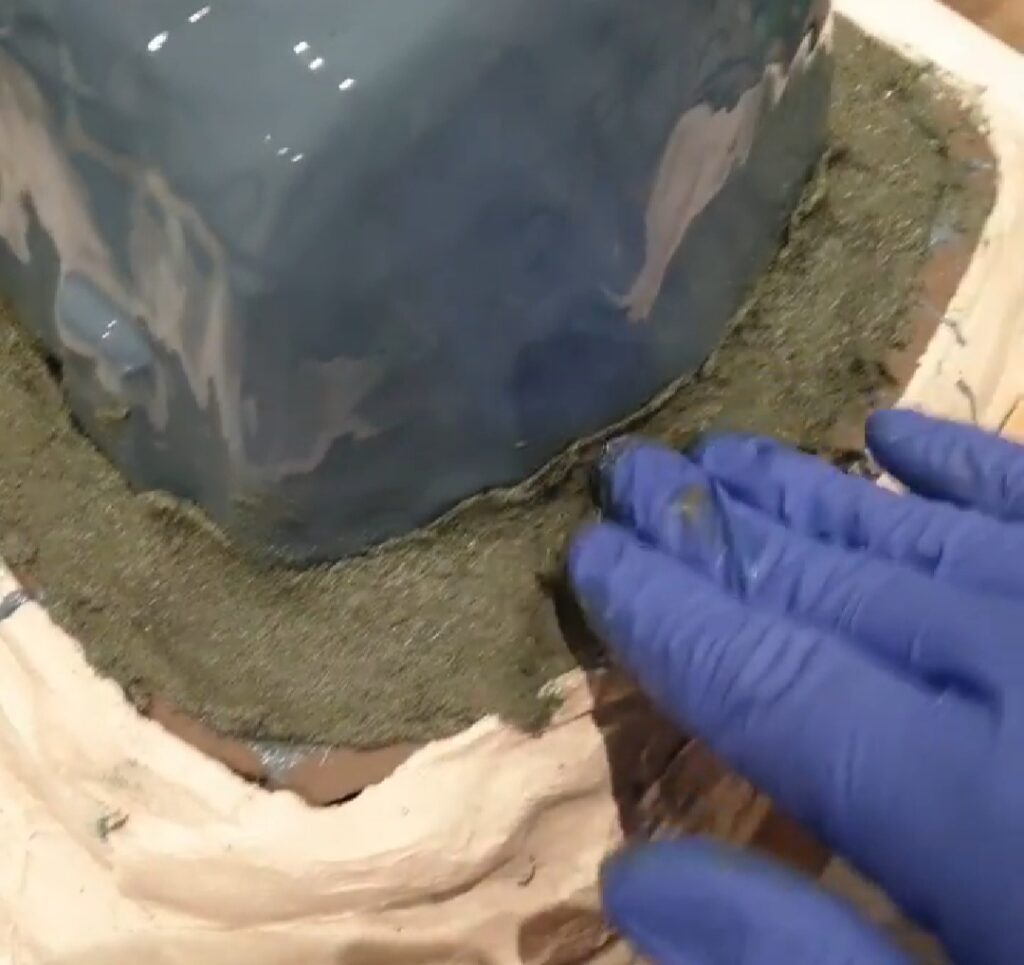
Then the outside was packed with the remaining Epopaste. I didn’t have much left so after the thin layer I applied (about 6mm thick) set up, I applied a few layers of plaster and scrim to reinforce the mould. This was all left until the following day when everything had hardened fully. Epoxy moulds are good but slower than polyester and glass moulds.
Below are the finished moulds, opened and cleaned out.
Whilst all this was going on, Chris Lyons of Fangs FX was busy getting our dentures ready – more on this later.
I will cover the running of pieces in the next post – this one is pretty hefty and I think I have waffled on enough for one post.
One of the amazing products we used which I was unfamiliar with but Neil recommended was the 4k Longwear Creme makeup which was great for the final look. This makeup is a waterproof, silicone-based buttery cream consistency which can be applied with a brush or sponge, bt also thinned and airbrushed which we showed on the stage. Neil even tinted our anti-shine with it so we kept colour consistent throughout the process. We will cover this in a later post when we look at the application.
Thanks so much for taking a look – we will be back soon with more!
In this episode, Todd and Stu talk about our week making moulds with epoxy, dropping sculpts and moulage effects for first responder training.
Earlier in 2019, Stu got to sit and chat with some fine folks at IMATS London and a chat with makeup designer Kate Benton kicks off the first of these finally edited up after a crazy industry year.
This is the sculpt I was detailing and then dropped. Doh!
As you may know, this podcast is a side hustle for us which has been on the backburner for a while as the industry rocked the makeup case hard. Now as things ease up, the Prosthetics Event is almost upon us and a season of podcast editing is happening and winding down for the end of the year. Deep joy!
Stream or download below, we are also on Spotify, iTunes, Soundcloud…wherever you get podcasts! Subscribe in your podcatcher to make sure you don’t miss the latest episodes!
Check out the amazing artistry of Mike Marino and Prosthetic Rennaisance (Proren) here: https://www.prorenfx.com/ and on Insta @prorenfx
This is the BBC Makeup Department Leaflet I mentioned in this episode.
We sure appreciate your ears and attention. If you would like to help support us, then please share this episode with someone who you think would get something out of it.
Get in touch at stuartandtodd@gmail.com to ask fx related questions and to suggest your ideas for a future episode.
OK, back to the workshop for us. Speak soon. -Stuart & Todd
Starting Education In Makeup Effects & Prosthetics
This episode is prompted by seeing a few questions on forums about how best to learn about makeup FX and prosthetics. Where to go and what to learn?
Depending on what you want to be able to do, let’s also draw a distinction between a makeup artist who sometimes will apply a prosthetic v someone who specialises in creating and applying more complex pieces.
Some people want to exist in the workshop only and have no interest in being on set all day. It takes all types but understands there is a profession which specialises in making and one in makeup, they don’t always cross over, and you don’t need to be able to do everything.
Stream or download below, we are also on Spotify, iTunes, Soundcloud…wherever you get podcasts! Subscribe in your podcatcher to make sure you don’t miss the latest episodes!
There are some great colleges out there with tutors doing sterling work. There are also some not so great. We think that is worth mentioning and discussing.
In this episode, I mention some institutions off the top of my head which I reckon do a great job, and I have had the privilege of visiting many more and speaking with the students there.
In the podcast recording, I didn’t supply an exhaustive list, and to those which I neglected to mention I apologise. The result of memory oversight. I have been overwhelmed recently by the kindness and generosity of the tutors who make huge efforts to deliver good education.
Thank you for what you do.
There are a few different paths to go down if looking to get schooling. Nowadays it essentially boils down to three main categories of training. Education systems vary across the world, but the essence of these categories remain the same.
1. Academic or ‘certified’ qualification level (usually longer term)
2. Private courses & tuition (usually short term)
3. Self-taught through books, DVD’s and online sources (usually long term & ongoing)
Jordu Schell has been pushing clay around for a while and knows a thing or two about sculpting.
Creating concepts for characters and creatures, masks, makeups and beautifully crafted designs, he also teaches his craft all over the world and has recently released the first of a series of downloadable books, The Professional Creature Design Handbook.
In this podcast we chat about:
The headspace of sculpting
The frustration of failing and why it matters
Using nature as inspiration and reference
The pitfalls of copying styles (Aping the style without understanding the deeper truth behind it)
Stream or download below, we are also on Spotify, iTunes, Soundcloud…wherever you get podcasts! Subscribe in your podcatcher to make sure you don’t miss the latest episodes!
It’s been a while since Todd & I have podcasted, so apologies for the slow return to form.
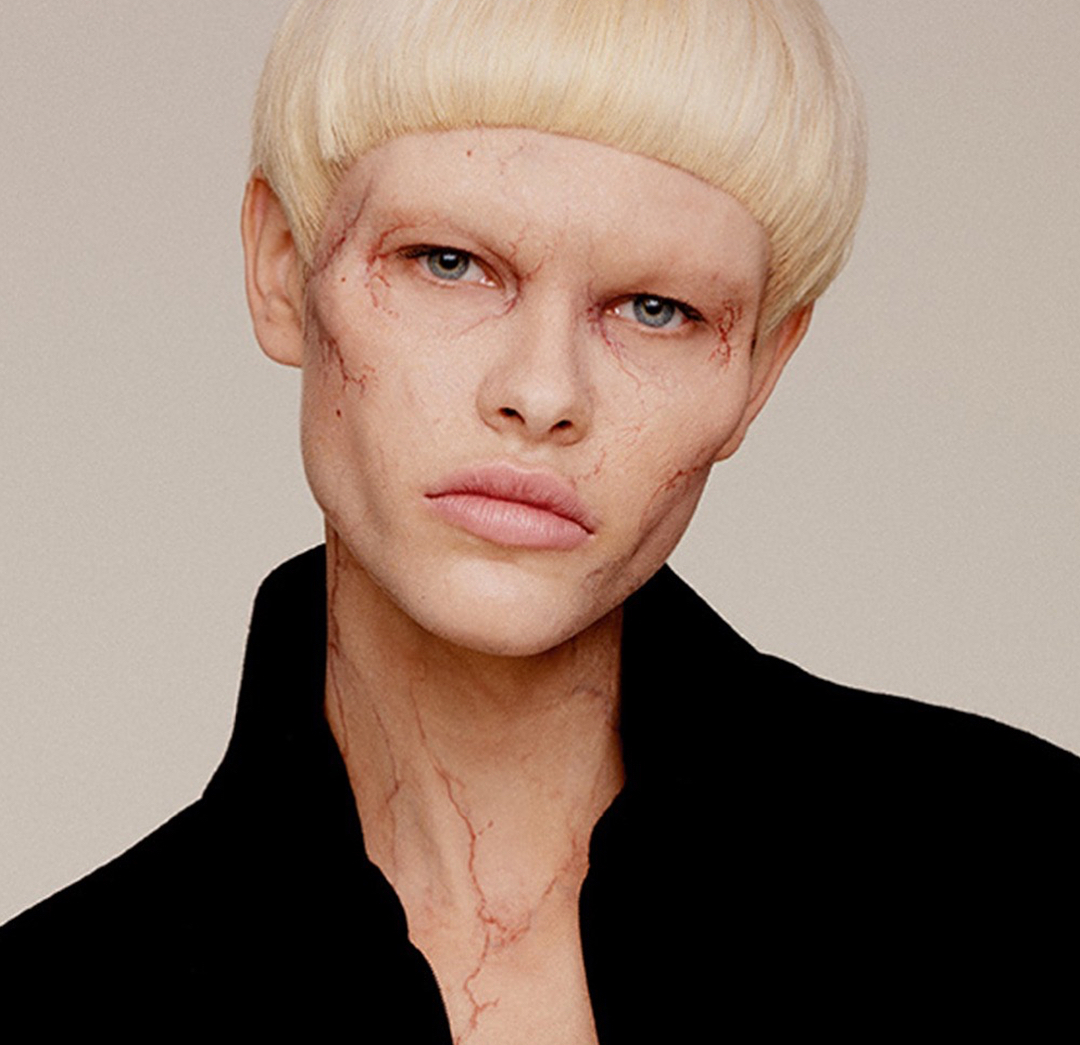
It’s been a brutal few months, mainly as I have been on the new Netflix/BBC version of Dracula which has kept my hands red and my days long and busy.
Claes Bang as Dracula.
Naturally, NDA’s prevent me from divulging what’s what but rest assured, fans of the Hammer style will enjoy the perfect casting of Danish actor Claes Bang in the lead role.
Dave and Lou Elsey ran the Prosthetics department, and the small crew we had was kept busy. Makeup dept head Marcus Whitney and his crew did some amazing work and as it has been penned by the Sherlock team of Steven Moffat and Mark Gatiss, you can be sure of some exciting storylines.
Totally stoked to have been involved!
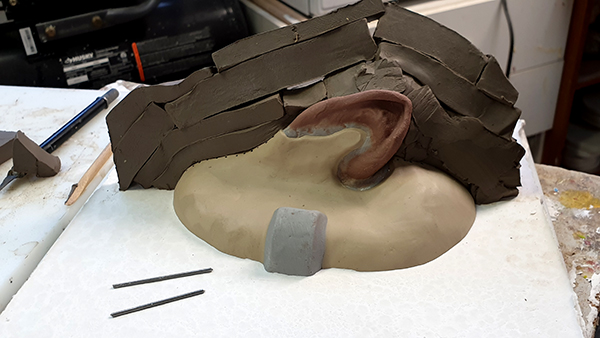
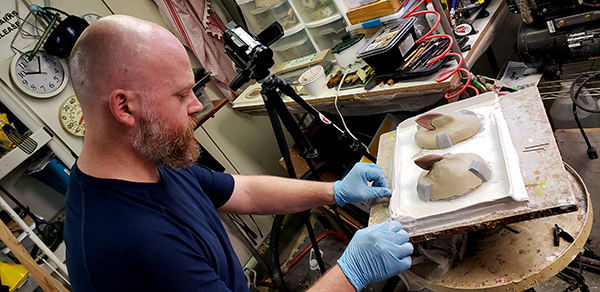
In this podcast, we chatted outside in Todd’s back yard about our endeavours over the previous couple of days, making ears. We had used epoxy and as I have used so much polyester resin with fibreglass over the years, talk fell mainly to comparing the two materials and the pros and cons of each.
Stream or download below, we are also on Spotify, iTunes, Soundcloud…wherever you get podcasts! Subscribe in your podcatcher to make sure you don’t miss the latest episodes!
We covered:
Polyester resin v Epoxy.
Block moulds v Shell moulds.
Mould closure – Bolted v strap/weight. Discussing the position of a clamp (centre for small mould) or multiple if larger moulds. Designing moulds to have flat, parallel clamping faces or indentations to retain straps so they don’t slide off. Blocks also to keep strap pulling taught.
Size of moulds, what determines the best mould material and type?
Moulds built to withstand the forces of repeated opening, closing, clamping etc.
Why ‘Derry Girls’ may be the best thing on TV.
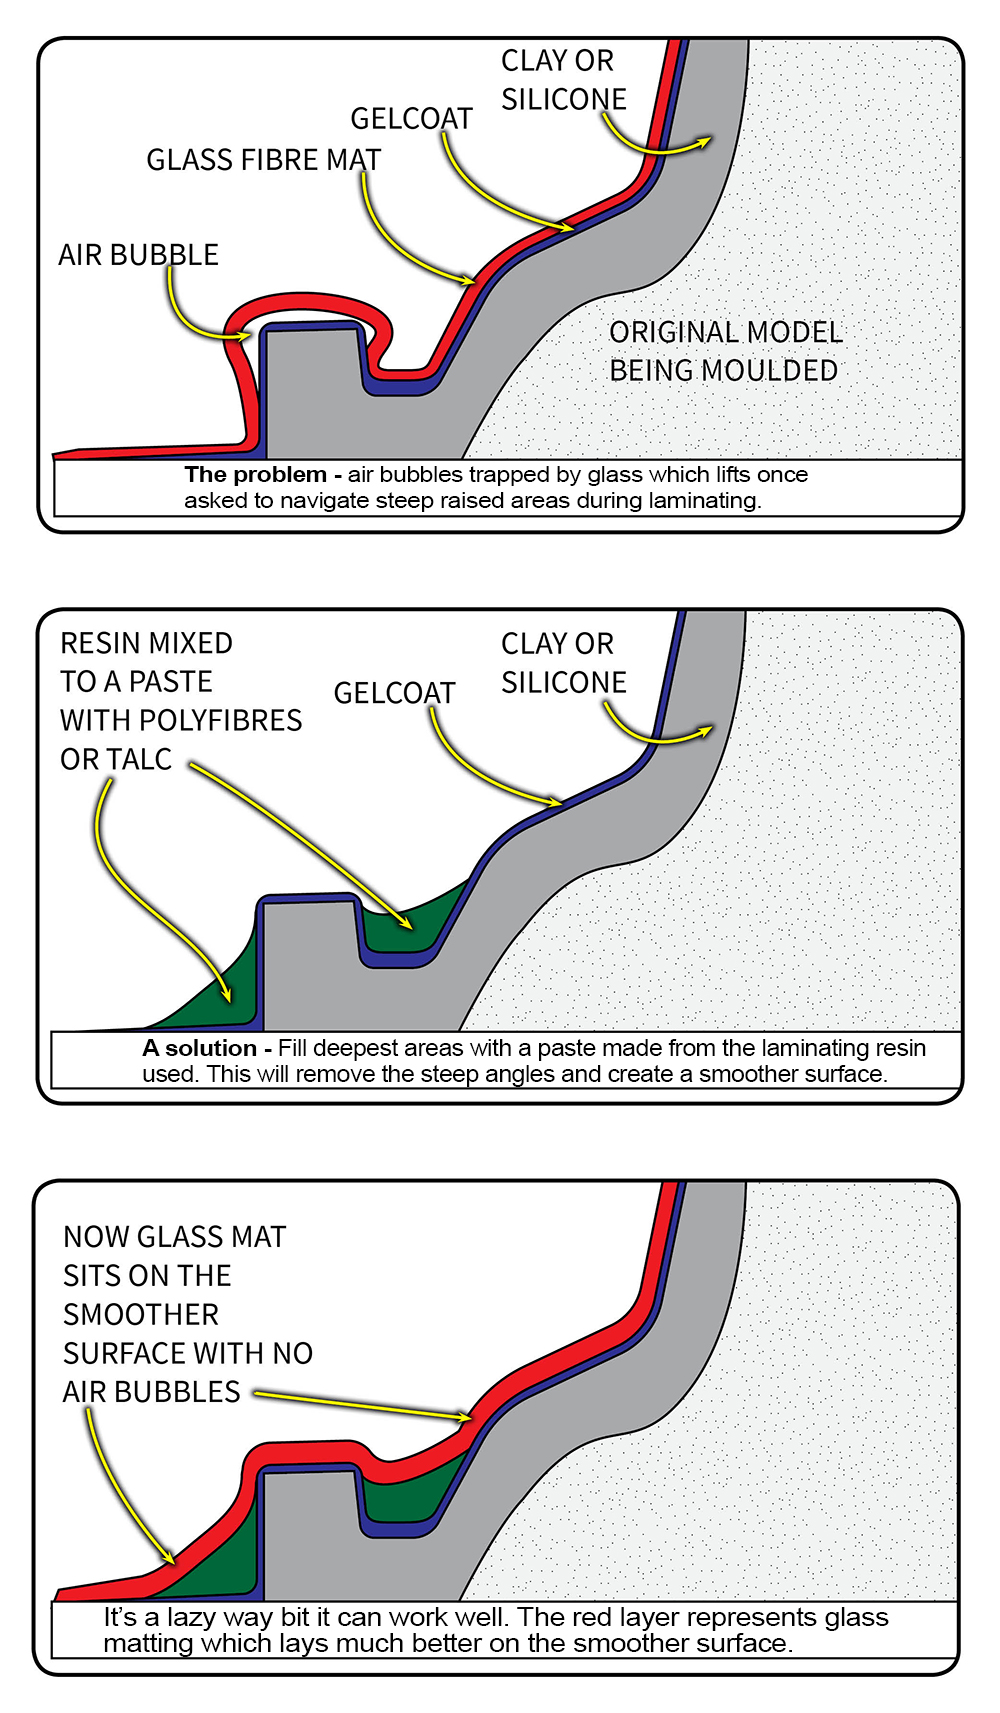
Laying fibreglass over harsh angles and air bubbles.
Heat issues on mould halves getting hot, can damage plastiline sculpt as well as warp.
Keeping a logbook/record of size of item moulded, amounts of resin/cat used, temp and humidity, how much was left over/waste.
Polyester resin used in construction so old school plasterers would use the fibreglass and so would know the material and make moulds with it, but not necessarily from prosthetic sympathy.
Collapsible cores v flared out cores and why you’d go there.
Plaster Gypsum in US v UK resin/marine industry.
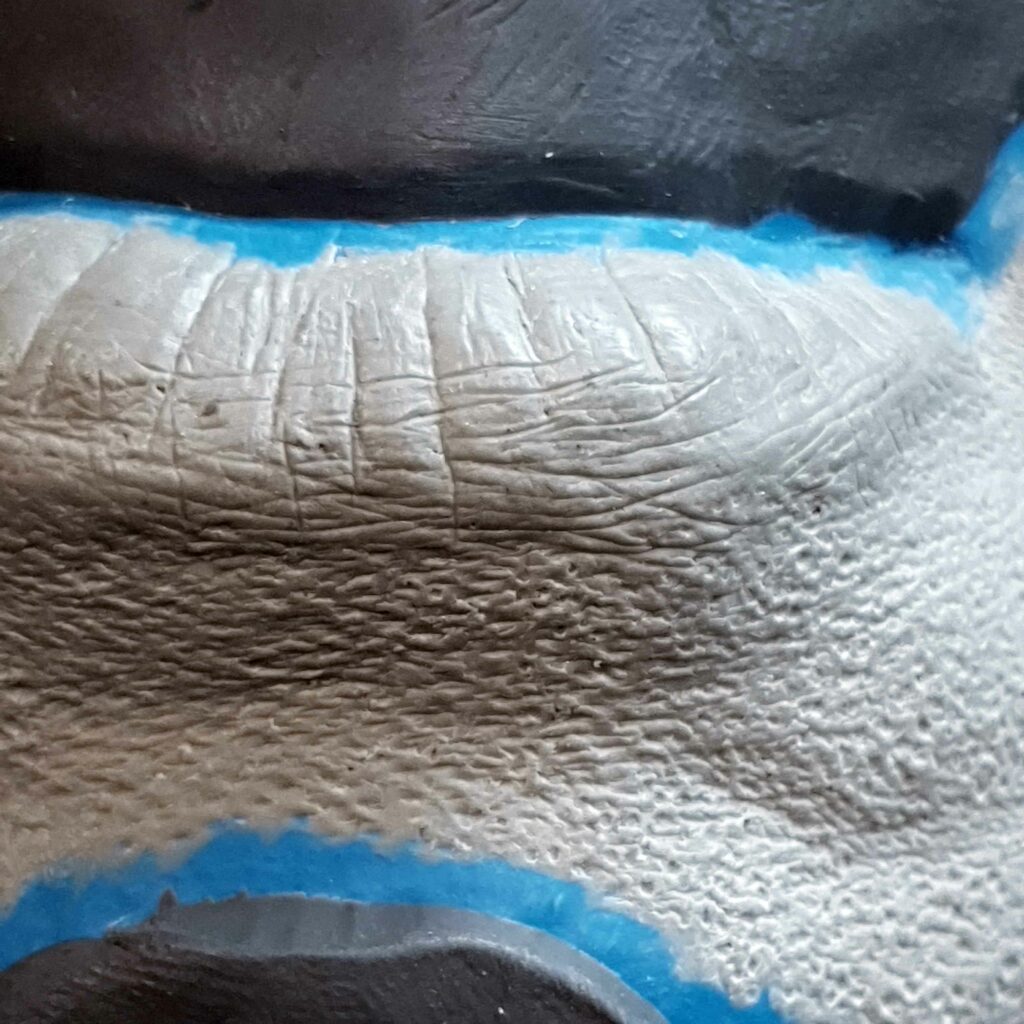
Below is a picture demonstrating one of the main issues I have with fibreglassing over keys. The raised bumps create a sharp angle which can cause air bubbles in certain moulding materials, such as epoxy an the glass matting that is often used.
One lazy way I have started using nowadays is to fill the deepest recesses with a paste made up of a little of the laminating resin with either industrial talc or, Polyfibres/Urefil, a lightweight particulate which is used for just such a purpose.
Rest assured the next podcast is coming up soon. We have a few in the can and I am editing again this week! As soon as I can, I’ll upload the finished item.
Keep at it!
Stuart
Stream or download below, we are also on Spotify, iTunes, Soundcloud…wherever you get podcasts! Subscribe in your podcatcher to make sure you don’t miss the latest episodes!
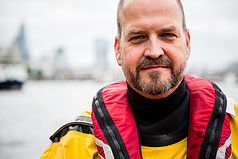
“Paul walked into a Lifeboat station on his 17th birthday and never left, initially volunteering at Poole and now at Tower Lifeboat in London. So far he has been a Search and Rescue Volunteer with the RNLI (Royal National Lifeboat Institution) and HM Coastguard for 31 years.”
So reads the write-up for the honours listing of Pauls OBE from 2013, a high honour of recognition for sterling work which he continues to do within maritime medicine and emergency response.
Training those who deal with emergency and pre-hospital medicine is no mean feat, and making sure casualty makeup used in training medical personnel is both accurate and hardwearing is a key part of that. It was because of this shared interest that Paul and Stuart crossed paths, and led to this episode of the podcast.
Casualty simulation is often an avenue makeup artists will get involved in as they can obviously add a great deal of realism to training scenarios with good makeup. Anyone who has done a first-aid at work course will no doubt be familiar with a biro mark or lip pencil line as a substitute wound.
Pauls experience teaching casualty simulation revealed to him how a lack of correct reference, appropriate anatomical awareness and poor technique meant sometimes makeup being done was not helping the simulation!
This can be both from an aesthetic point of view (it doesn’t actually look very good or realistic) and from a medical diagnostic point of view if a ‘bruise’ looks more like a burn and then is treated as such.
He set about to change that with the training he does with his company Saviour Medical.
We are used to seeing wounds portrayed on TV and they are often overdone for theatrical effect and not realistic, with big blood sprays etc. There is a difference between the drama of a compelling story requiring larger than life effects and correct representation of real trauma.
Realistic Medical Moulage for simulation purposes
This podcast episode hopes to deal directly with that, focussing on what is important with some real insight into how best to approach. Paul made a brief list of key elements which we cover in depth in the podcast, such as:
Correct Wound: – Looks accurate – often less is more – Bleeds the right amount – Skin tones accurate – Right location, need for some surface anatomy knowledge – Right materials used – must survive contact with the responder – no wax or tissue paper
Actor Compliance: – Pre-brief the simulation – care of any sensitive issues – Pre-brief wound location and ascertain actor is ok with that – we all have bits of us we don’t like! – Pre-brief if trauma ‘cut downs’ to nearly nude / underwear – Need to gain consent for the treatment interventions – Explain symptoms that should be displayed and progression of symptoms based upon correct or incorrect interventions – Supply safe word to actor and treatment team – Freshly shaved where appropriate – Bring old clothes and a spare set to go home!
Scene: – Supply appropriate props (inhalers etc) – Dress scene to make the mechanism of injury realistic – Ascertain real impact on actor (hot / cold / wet etc)
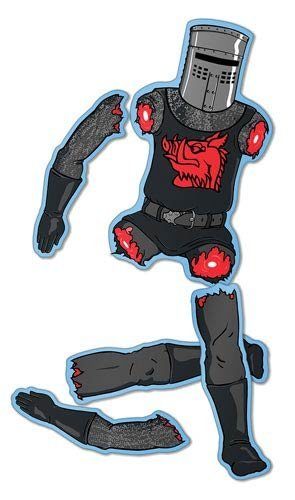
The Black Knight Always Triumphs. Even though his wounds may bleed a little too much.
We also mention a previous episode of our podcast where real carcasses of pigs (supplied by a butcher) were shot with different guns, allowing Todd to make casts of the resulting damage – many of which he then used to make appliances with accurate trauma effect!
As ever, we are so grateful to you for listening and giving us your time. If you enjoy this podcast then please mention and link it in your favourite social media platform. It really helps us grow the podcast, secure guests and bring you bigger and better shows.
IMATS LONDON 2019 PROMO CODE
Looks like there will be some podcast action at London IMATS 2019, so come and say hi! I’ll bring some audio gear and record some bits there, and those fine folks at Makeup Artist Magazine have given us a PROMO CODE to get a DISCOUNT on show tickets. When prompted at paytime, simply use the coupon code Bray to get £20 off a ticket!
In this podcast we talk about art, what it means to be an artist, why we do it, and the challenges we face in trying to make a living doing this.
This was mostly brought about because of the fantastic conversation I had with my first ever boss when I started working in effects in 1994.
Pauline and business partner, Nik Williams run Animated Extras, an effects company specialising in prosthetics, animatronics, puppets, creature suits, fake bodies and many animals from elephants, bats, sharks…you name it.
Stream or download below, we are also on Spotify,iTunes, Soundcloud…wherever you get podcasts! Subscribe in your podcatcher to make sure you don’t miss the latest episodes!
In their own words…
“From singing sloths to the putrefying corpses of Hollywood A-listers, Animated Extras have been creating all kinds of weird and wonderful things for the Film, TV, and advertising industry since 1986.”
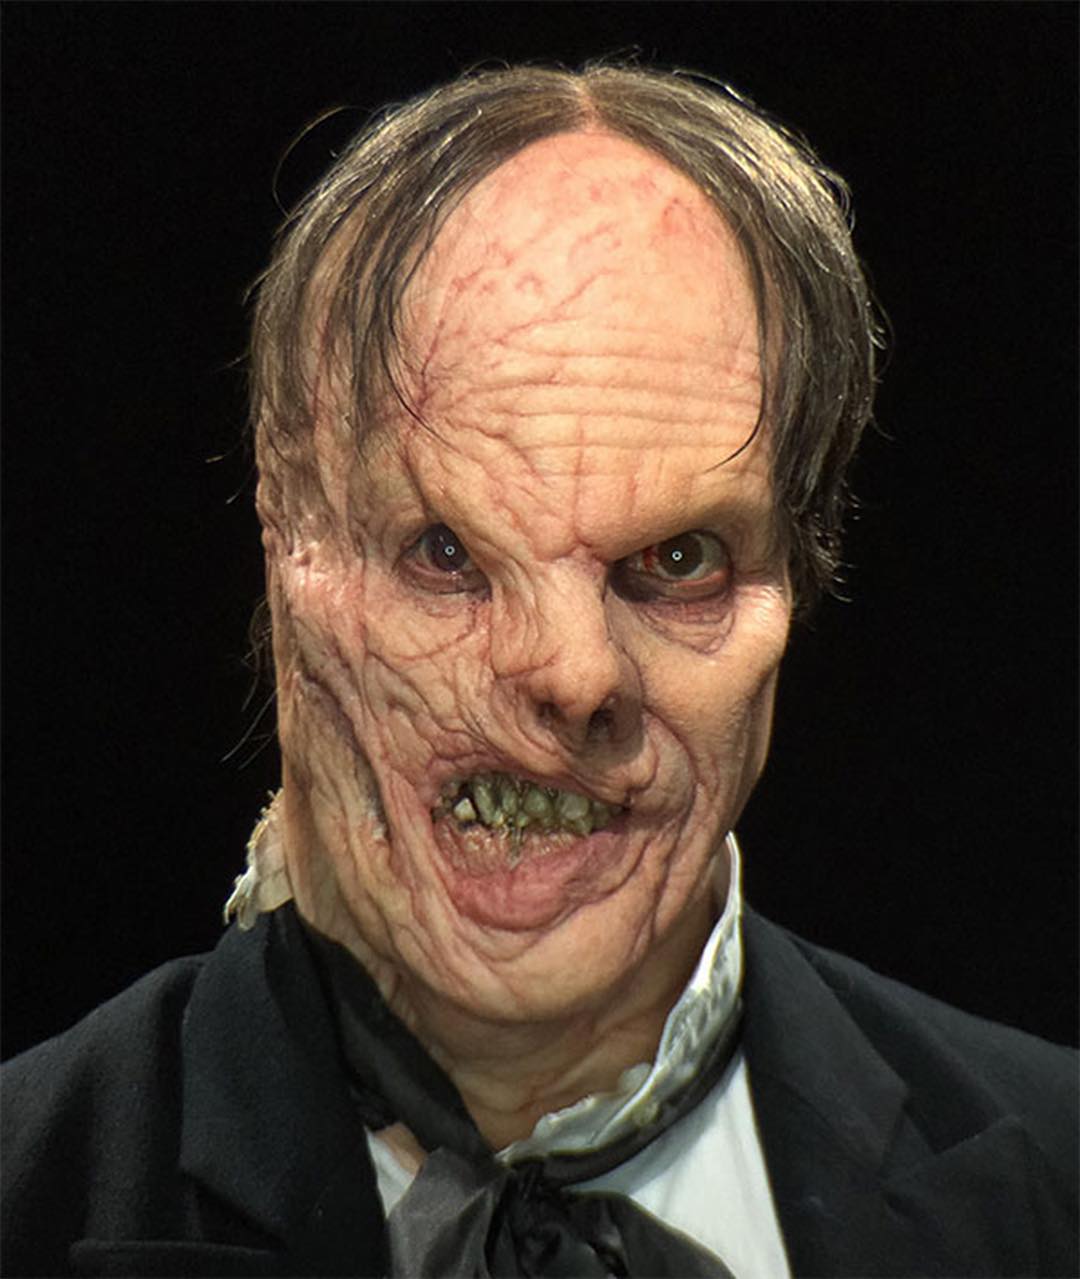
Pauline was the first person I ever saw take a lump of clay and make it look like a real person when she made a fake head of Michael Gambon for the film ‘Mary Reilly‘. It was to me complete and total magic, and it was an absolute delight and honour to sit with her and talk frankly about the task of sculpting. We recorded this interview at Animated Extras workshop in Shepperton Studios.
Things we cover in the chat include: Finite existence Having a brief set by industry v personal jobs Working in bronze Scans v sculpt and the life looks fake but feels real etc. Types of sculpting and sculptors Get the feel early rather than struggle on with wrong and try and make it right. Watching different sculptors work when you run a company. Photography
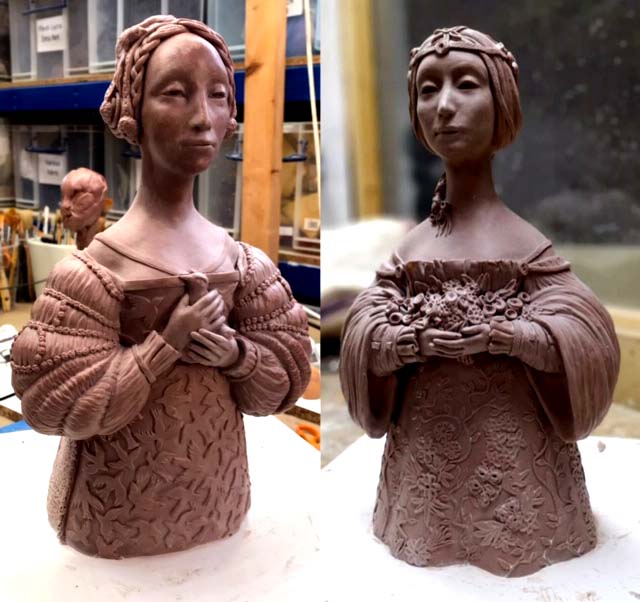
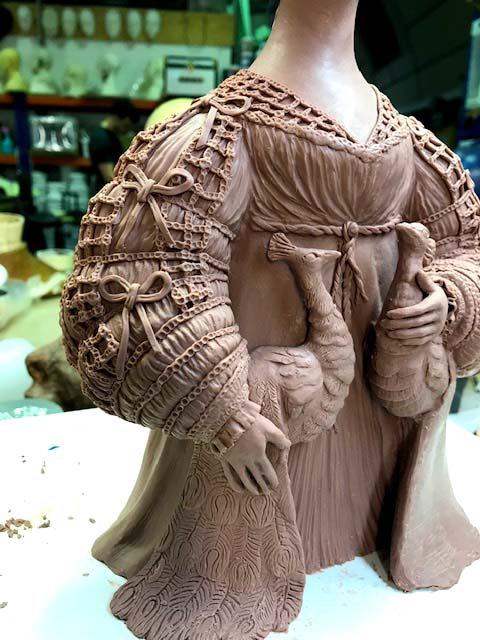
The Three Sisters Pauline sculpted in Monster Clay before being cast in bronze. (Pauline hated plastilines before, so this was a significant development)
Todd and I get stuck into some deep dives about art, and how it’s a joy to have a craft but also a largely unappreciated career path. It doesn’t savelives or risk that of the artist by putting them in harm’s way.
It often serves the artist more than the community around it, and may be seen as a selfish, luxury position and an unnecessary way to spend a life. See what you think and maybe drop us a line at stuartandtodd@gmail.com with your thoughts and experiences about that.
I mention a great podcast I listened to by Seth Godin, (the podcast is called ‘Akimbo and this was from series 2, episode 9 called ‘Distribution and cultural destiny’) and in it he talks about how the distribution of media changed the media it distributed. From cinemas, to TV, to Home Vidoe, DVD and now streaming, each new development has reduced costs and democratised the medium. Such access means more making and consumption, but often this can also mean a watering down of quality. Is that a fair trade off or an inevitable side effect?
See what you think, I’d reccommend it. Seth is a very influential thinker and I listen to almost everything he puts out. Listen here
Lastly, here is the letter to Agnes De Mille Todd mentioned.
There is a vitality, a life force, a quickening that is translated through you into action, and because there is only one of you in all time, this expression is unique.
If you block it, it will never exist through any other medium and be lost. The world will not have it. It is not your business to determine how good it is, nor how valuable it is, nor how it compares with other expressions.
It is your business to keep it yours clearly and directly to keep the channel open. You do not even have to believe in yourself or your work. You have to keep open and aware directly to the urges that motivate you.
Keep the channel open. No artist is ever pleased. There is no satisfaction whatever at any time. There is only a queer, divine dissatisfaction, a blessed unrest that keeps us marching and makes us more alive than the others.
-Martha Graham
We’d appreciate it if you’d share this podcast with friends or colleagues who you think would get a kick out of it. Thank you for sticking with us!
-Stuart & Todd
Stream or download below, we are also on Spotify,iTunes, Soundcloud…wherever you get podcasts! Subscribe in your podcatcher to make sure you don’t miss the latest episodes!
Richard Redlefsen is someone I saw for the first time a few years back at the UMAE where he was applying his demo makeup on the PPI stand.
What was of note for me was how particular and precise everything was. Care was taken at every turn, and it struck me that the amount of effort that takes must come from a deep well.
So it was a great pleasure to sit and chat with the man himself, and I could ask if he thought of this about himself and if we could pick apart where that comes from. As you’ll hear, Richard had a career as a dancer before he embarked on makeup, and his training was thorough. I think that experience and also working for a makeup brand such as Lancôme meant his work doesn’t start and stop with bits of rubber!
Stream or download below, we are also on Spotify, iTunes, Soundcloud…wherever you get podcasts! Subscribe in your podcatcher to make sure you don’t miss the latest episodes!
Check out a brief selection of the range Richard covers.
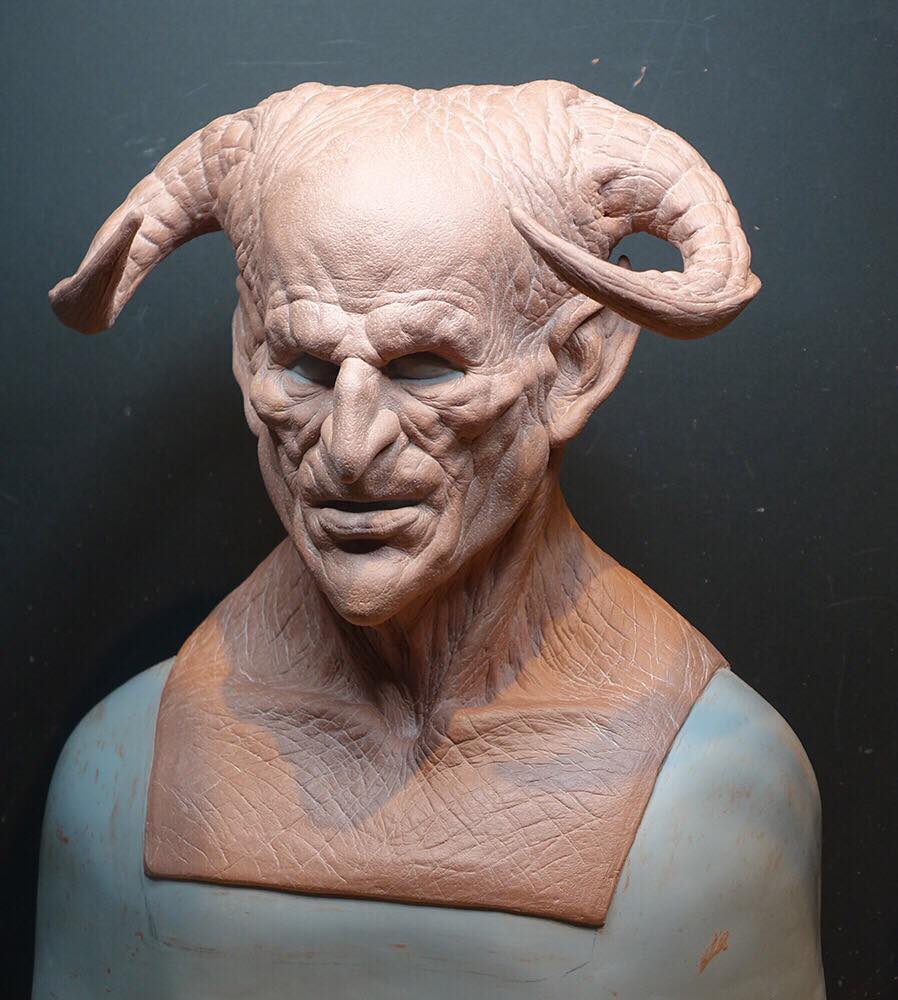
A Devil mask sculpt completed recently for Immortal Masks.
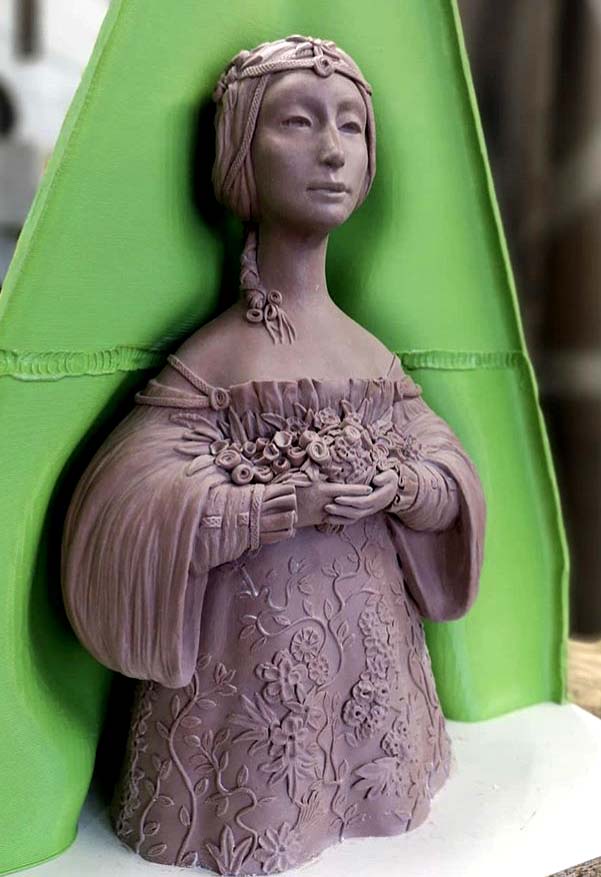
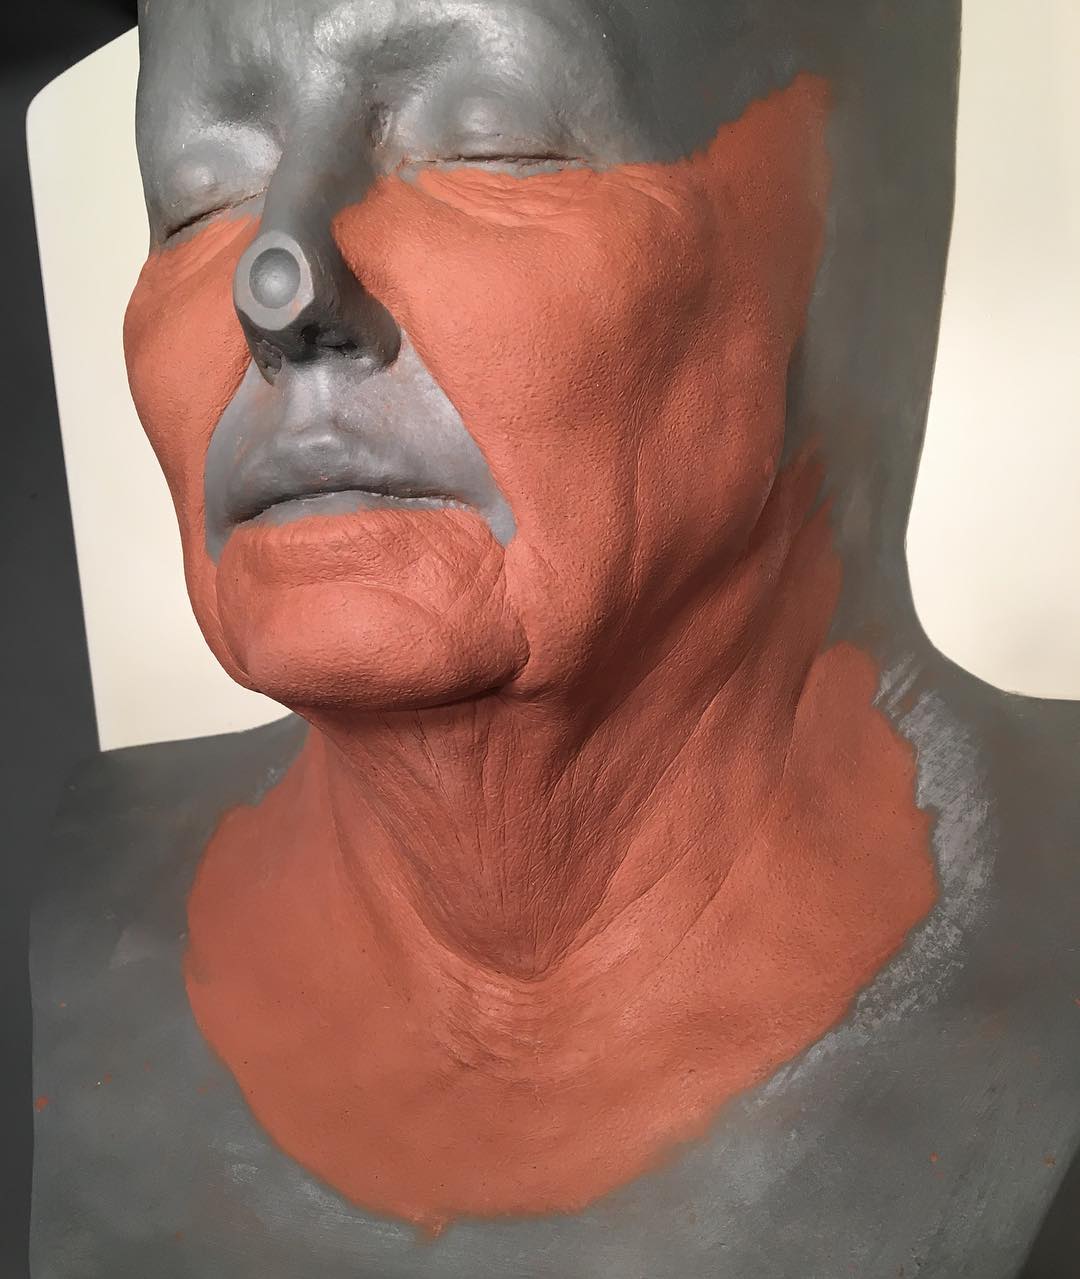
Claudia Alta (Lady ‘Bird’ Johnson) wrap-around prosthetic sculpt ready to mould.
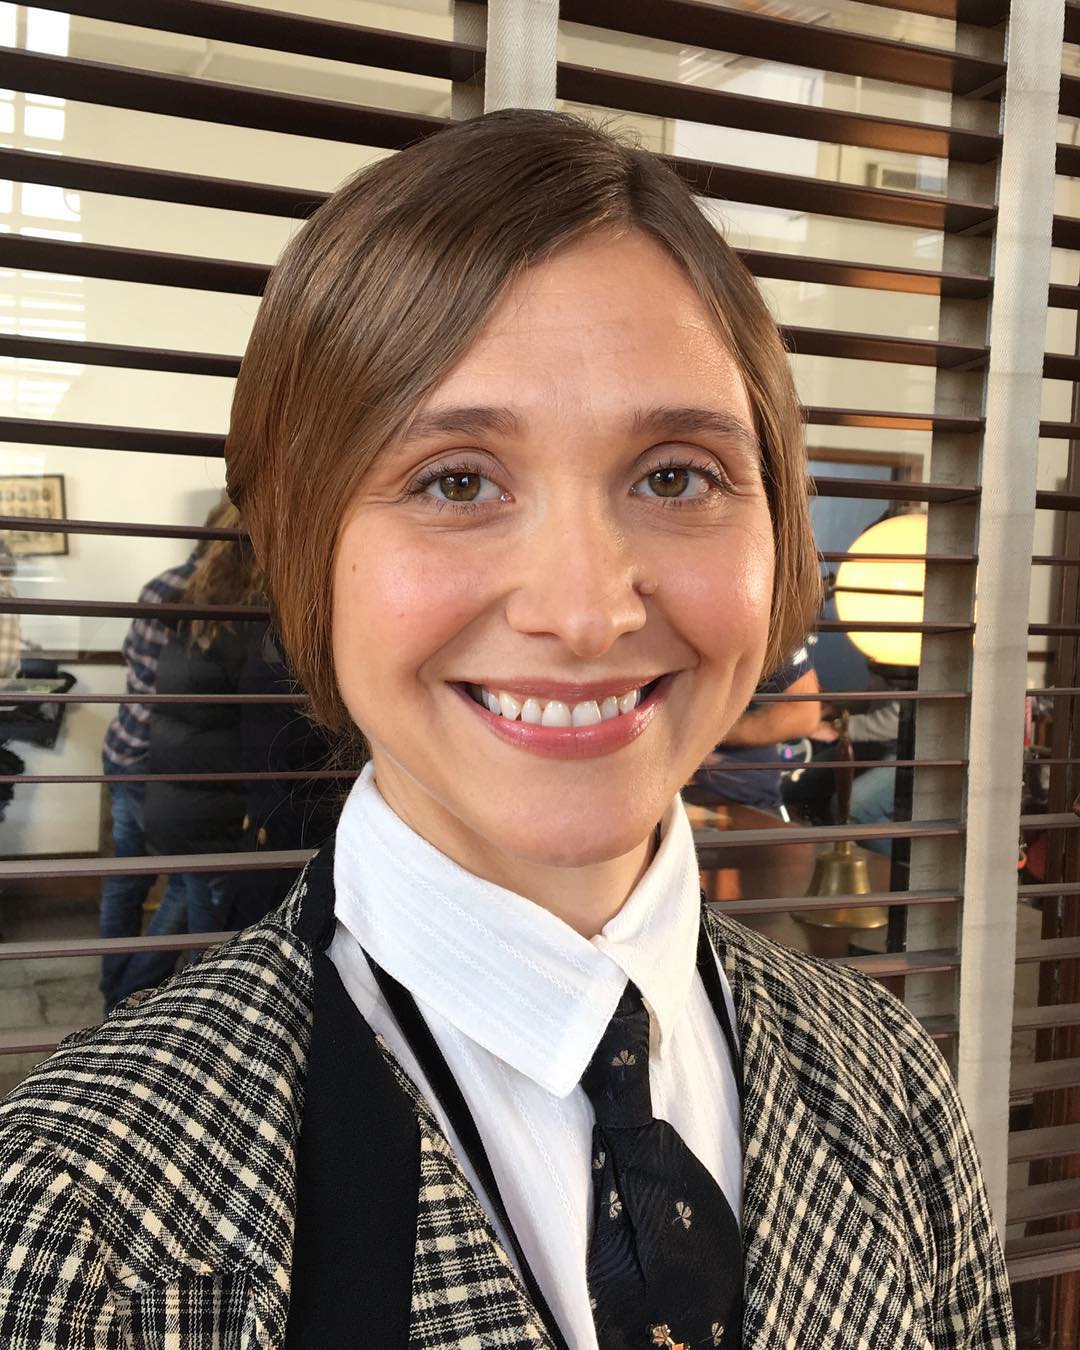
A 1920s beauty makeup on Sarah Sokolovic from the NBC show Timeless. Sarah plays Grace Humiston (the first female Special Assistant United States Attorney). Makeup was usually done by Peter DeOliveira and Richard filled in on this day. It’s quite a responsibility to fill in seamlessly on a show with established looks.
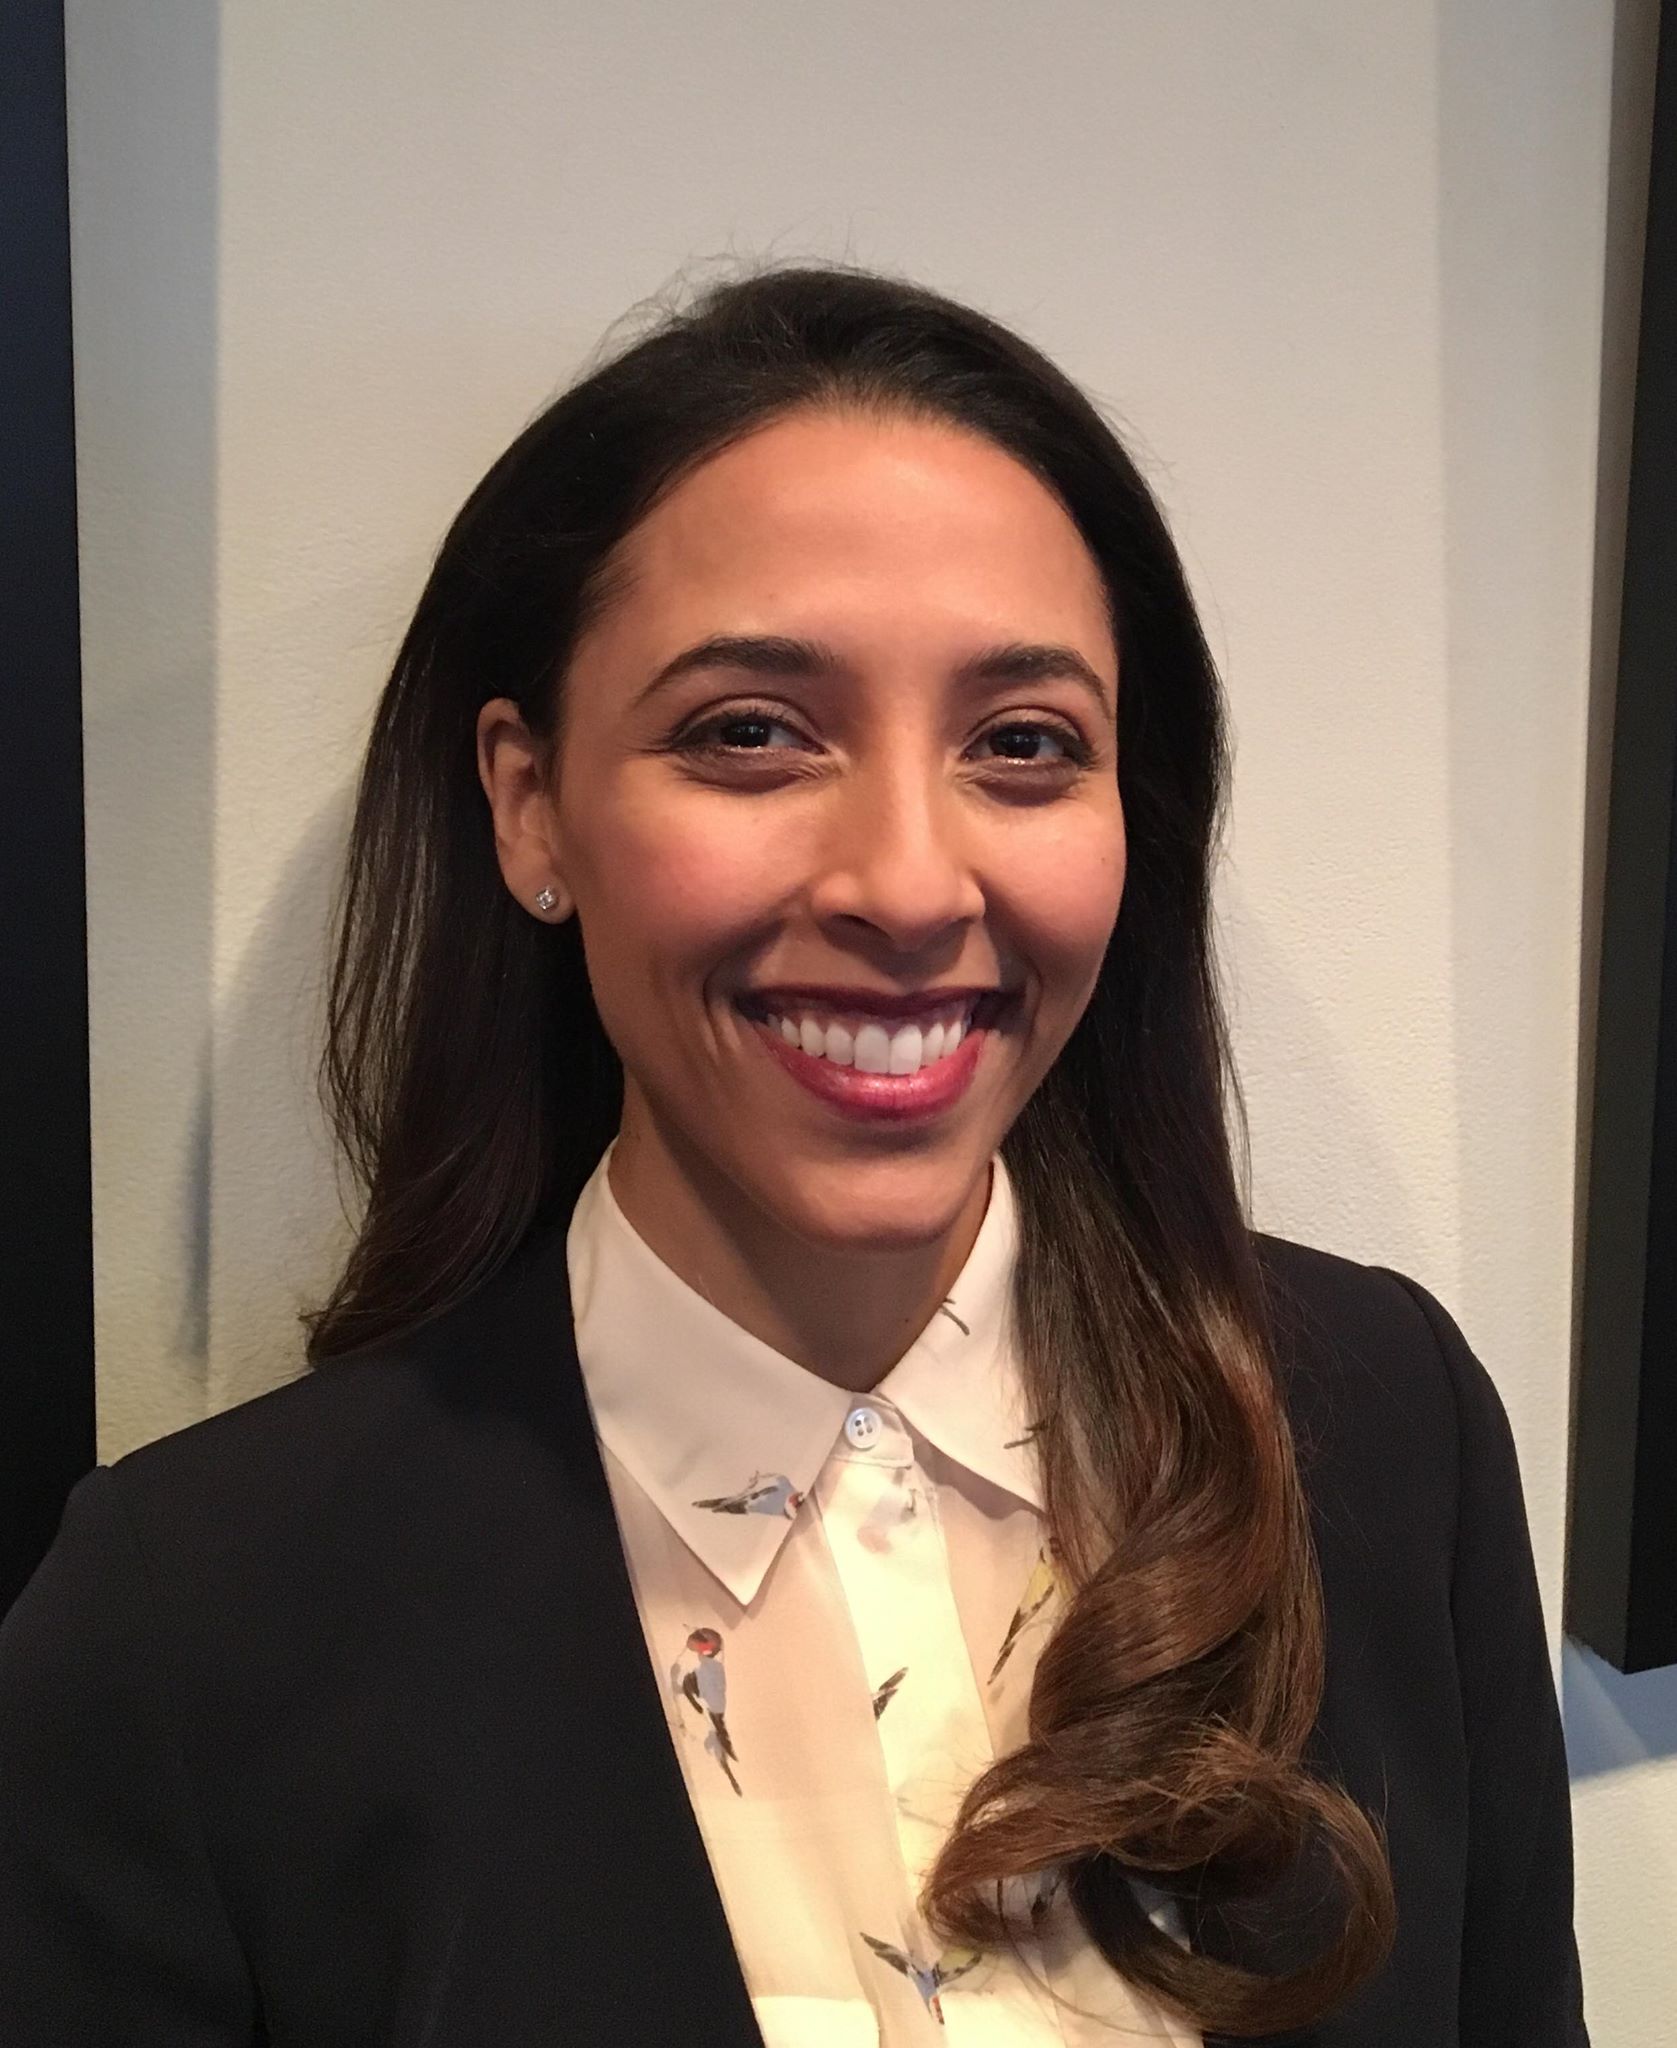
Another beauty makeup on Bianca Lopez from NBC show Timeless. Makeup by Richard Redlefsen. Debbie Zoller makeup dept head.
We are on the lookout for your stories of people wanted way too much of something for a whole lot of nothing.
We chat about a Facebook post which got a lot of people’s back up, as a freelancer or anyone with a creative spark, you may have been approached to do something which gradually expands into a lot of somethings, and payment is strangely far from the table.
Email us with your stories, screenshots or anything regarding that. We’d love to do a post focussing on that and read some of the best ones out, and formulate an appropriate response to arm you if you find yourself in that position of feeling bad for wanting fair compensation.
If you enjoy this, PLEASE help us grow by telling someone about us and posting on social media! We had a lovely message from Charlotte Annice Spruch who mentioned the formula for finding your worth from a few episodes back on a Facebook group. Cheers Charlotte!
That kind of sharing is what helps us grow, and we get heard by the people who would be glad to find us!


 In this episode, Todd and Stu talk about our week making moulds with epoxy, dropping sculpts and moulage effects for first responder training.
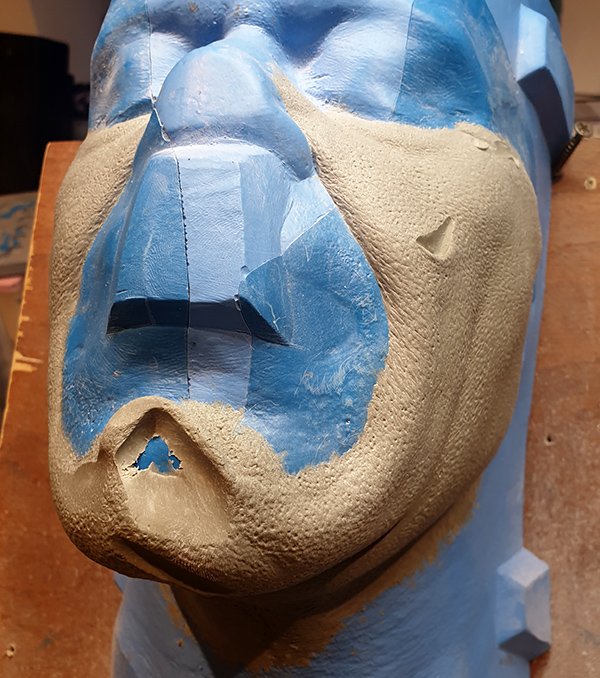


 It’s been a while since Todd & I have podcasted, so apologies for the slow return to form.
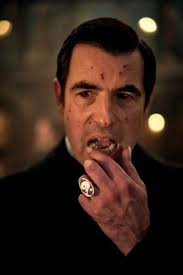

 Pauls experience teaching casualty simulation revealed to him how a lack of correct reference, appropriate anatomical awareness and poor technique meant sometimes makeup being done was not helping the simulation!